
Data verification extension envelope test
This procedure explains how to set up and execute a functional test that invokes a data verification extension from an eSignature envelope. Although the example screens are for a bank account verification extension, this procedure can be used with any data verification extension.
This test checks the functioning of connected fields, which are envelope fields that can be verified by data verification or connected field extensions defined in your account. To set up the test, you add connected fields to an eSignature template, generate an envelope from the template, and access the envelope via an emailed link. While viewing the envelope, you supply values in the connected fields to confirm that your extension is successfully invoked.
Instead of creating a template, you can add connected fields directly to an envelope. This test procedure specifies adding them to a template so that you can save and reuse it instead of adding connected fields to an envelope every time you want to test. Docusign also supports programmatically creating envelopes that include connected fields. See Connected fields concepts for details.
The high-level steps to create and run this test are:
- Step 1. Add connected fields to a template
- Step 2. Generate and send an envelope
- Step 3. Access the envelope and supply data to verify
Make sure that you’ve completed all the requirements listed for functional tests in Test prerequisites.
Walkthrough playlist You can also see video overviews of the data verification extension envelope test using the Data Verification Reference Implementation below:
Step 1. Add connected fields to a template
To add connected fields to a template:
-
Log in to the eSignature web application and select Templates from the top navigation.
-
Do one of the following:
- Follow the procedure in To edit a template if you want to add connected fields to an existing template.
- Follow the procedure in To create a template to create a new template for the test.
-
While creating or editing the template, select Next to display the Add Fields view.
-
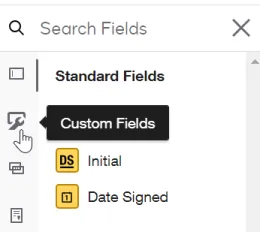
In the left navigation, select the Custom Fields icon.
-
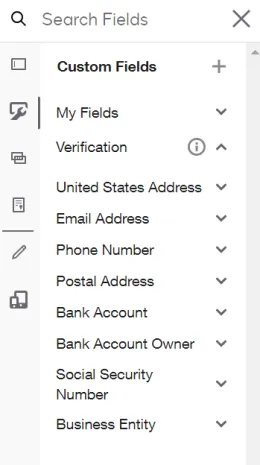
Expand the Verification list to display a list of data verification extensions. See Supported extensions for a complete list.
-
Expand the extension you want to test. You’ll see a list of connected fields that will appear in the envelope. For example, bank account verification requires an account number, account type, and routing number. These fields correspond to the required request properties for the extension’s action contract.
You can access the action and capability contracts for each extension from the Extension contracts page.
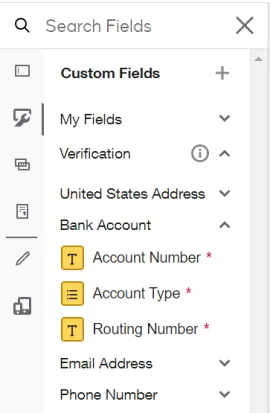
If the fields are not enabled, then no extension app with this extension is installed to your account. See Run a connection test for instructions to install an extension app to your account.
-
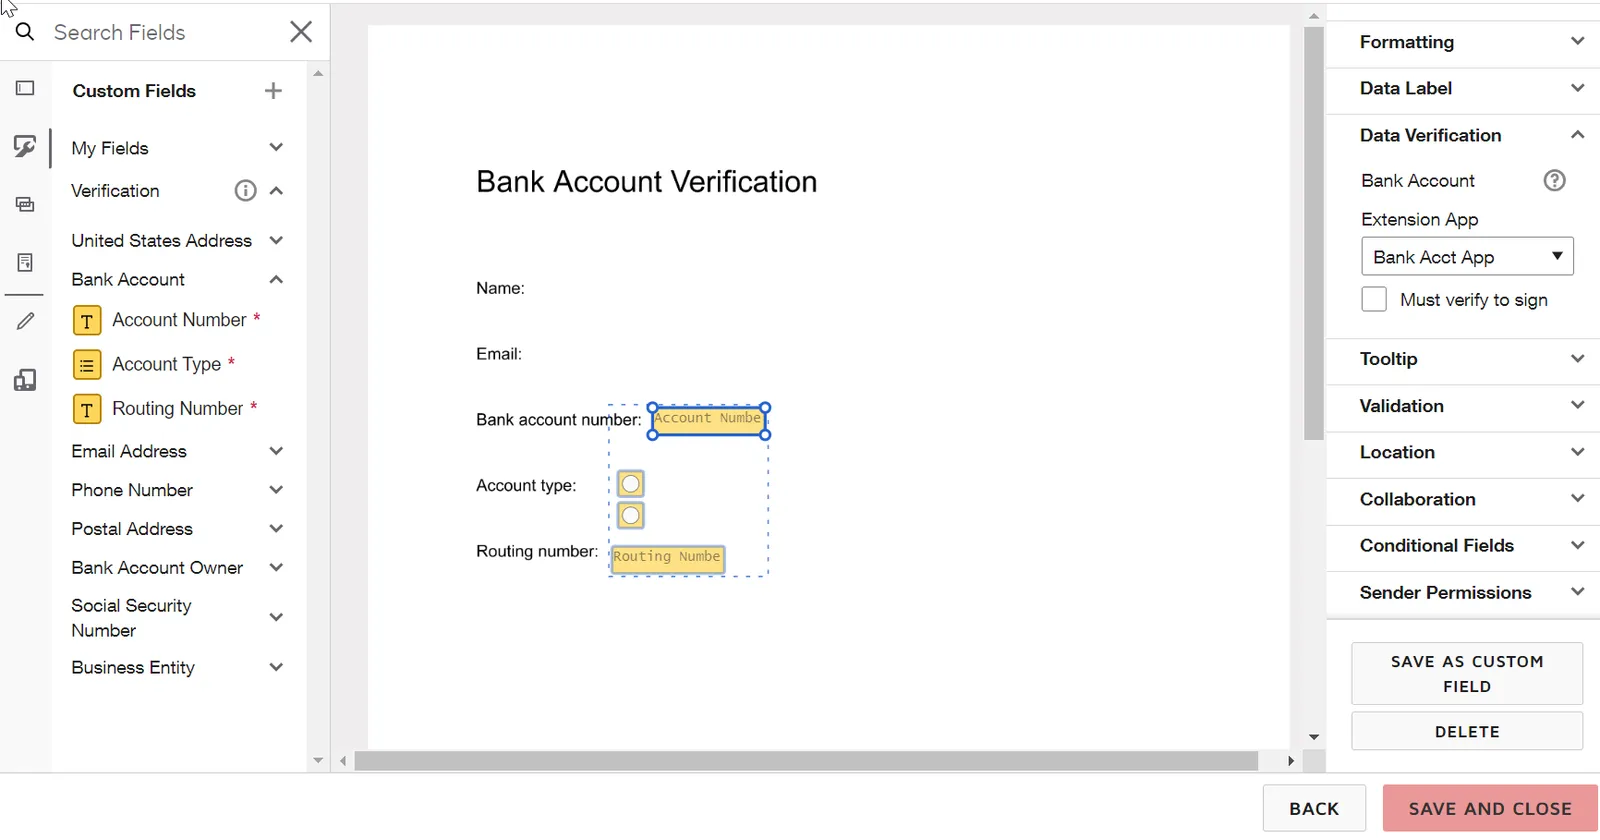
Drag the connected field group to the document. You can then move the fields individually to position them as appropriate.
-
In the properties list on the right, expand Data Verification.
-
Confirm that the correct value appears in the Extension App field. This is the App name you selected when you registered the extension app via the form-based process, or the value from the name property in the app manifest if you registered the extension app by uploading an app manifest file.
-
Select Must verify to sign if you want to require successful verification of the data supplied in the envelope in order to complete the signing process. If you leave this option unchecked, data verification will still occur.
You are not required to add a Signature field or any other fields to the template in order to test a data verification extension.
-
Select Save and Close to save the template.
Once you’ve saved the template, you can generate an envelope from it whenever you want to test your extension. For example, if you update your back-end API service code to fix an issue, you can test the fix by generating a new envelope. In the current release, if you update the extension app registration, you’ll need to create a new template or envelope to test with. In a future release, registration changes will automatically be propagated to existing templates.
Step 2. Generate and send an envelope
Follow the procedure in Use a Template to Create an Envelope to generate an envelope and email a link to view the envelope. When completing this procedure, supply an address where you can receive email.
Step 3. Access the envelope and supply data to verify
When you receive the email:
-
Open it and select Review Document.
-
Select Continue to display the envelope.
-
Enter values in all the connected fields. Each field has a tooltip that lists the type of value expected in the field.
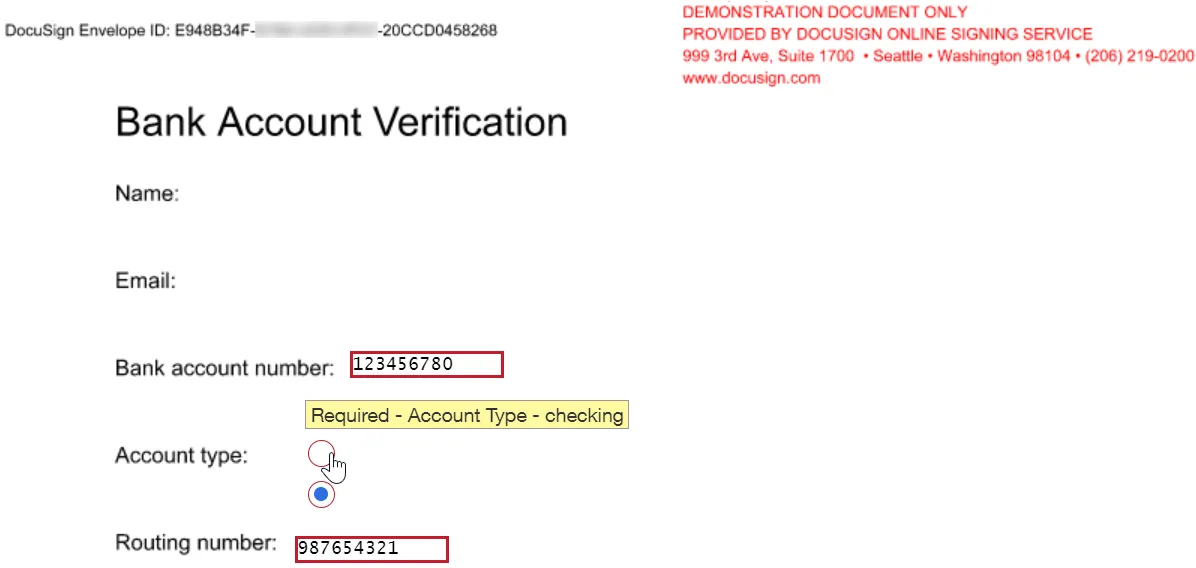
-
When all connected field values have been supplied, Docusign invokes your extension to verify them. A Verifying data message is displayed, followed by a message to indicate whether verification succeeded or failed. You should confirm that:
- Supplying valid values results in successful verification.
- Supplying invalid values results in failed verification.
- For a postal address verification extension, supplying an address that results in a partial match returns a list of suggested addresses.
-
Changing any of the values causes the data verification operation to be triggered again.
If your extension is not invoked successfully, run the Developer Console connection and extension tests for the extension app to get detailed error messages and troubleshoot.
Next steps
- Find out more about functional tests.
- Learn how to run integration tests.
- See how to use the App Center preview.