
Data IO extension workflow test
These procedures explain how to set up and execute a functional test that invokes a data IO extension from a Workflow Builder workflow. For this test, you run a workflow that reads data from your external system, populates web form fields with the retrieved values, and writes values from the web form to the external system.
Note: You can configure a data IO extension so that it reads from an external system, but does not write to it. See Data IO extension contract reference for details. When setting up a workflow, you can omit the data read step or data write step if you only want to test one of these operations.
The high-level steps to create and run this test are:
- Step 1. Identify or create a web form
- Step 2. Create and publish the workflow
- Step 3. Execute a workflow instance
This is one of many possible approaches to setting up a workflow. For additional options, see the workflow user documentation.
Make sure that you’ve completed all the requirements listed for functional tests in Test prerequisites.
Walkthrough playlist: You can also see a video overview of the data IO extension workflow test using the Data IO Reference Implementation below:
Step 1. Identify or create a web form
Before you create the workflow, make sure that your developer account has a web form that you can use in a data collection step in the workflow. You can use an existing web form in your account, or create a new web form.
When selecting or creating a web form:
- The web form must be standalone. Web forms that are derived from eSignature templates cannot be used in workflows. Web Form Requirements and Data-Mapping Information explains how to create a standalone web form.
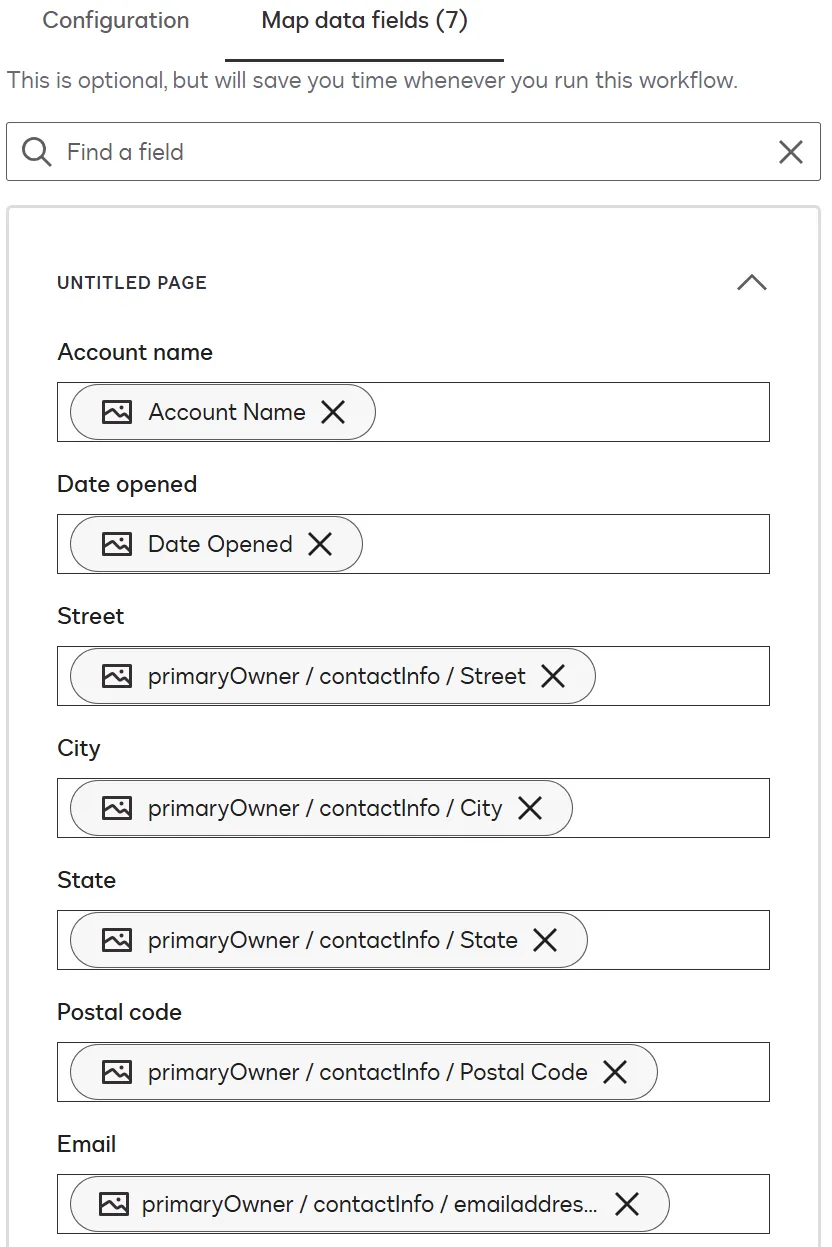
- The web form should contain fields that correspond to fields in your external system. This enables you to test your extension by populating web form fields with values retrieved from the external system and/or writing web form field values to the external system.
- Each web form field has a Field name property, which appears on the Properties panel in the Web Forms builder. Field names are also listed on Workflow Builder screens that map web form fields to external system fields. Make note of the field names in the Web Forms builder so that you can easily identify web form fields when configuring workflow steps in Workflow Builder.
Step 2. Create and publish the workflow
To create a workflow that tests a data IO extension:
-
Log in to the Workflow Designer.
-
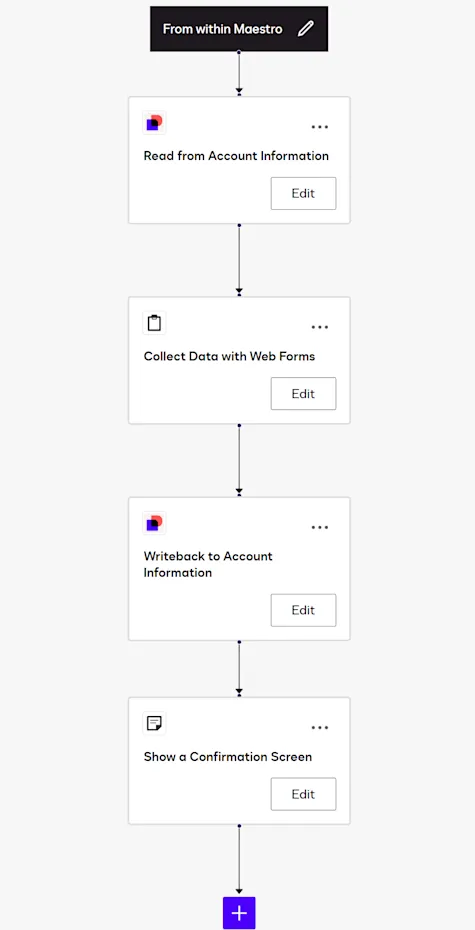
Follow the steps in Create a Basic Workflow to create and save a workflow. When creating a workflow, select Blank Workflow. Your workflow should include:
-
The workflow start method From within Maestro.
-
A participant who fills out the web form. See Workflow participant for configuration guidelines.
-
Optional: A step that invokes your extension to read external system data so that the values can be populated in the web form. See Data read step for configuration guidelines. If you want to test writing data but not reading data, omit this step.
-
A step that displays a web form. See Collect Data with Web Forms step for configuration guidelines.
-
Optional: A step that invokes your extension to write data collected in the web form to the external system. See Data write step for configuration guidelines. If you want to test reading data but not writing data, omit this step.
-
A step that displays a message confirming that all workflow steps are complete. See Show a Confirmation Screen step for configuration guidelines.
When you’ve finished configuring the start method, the workflow participant, and the steps for a test of both reading and writing data, the workflow should appear as shown. If you want to test reading data only or writing data only, do not include the unneeded step in the workflow.
-
-
Complete the steps in Review and Publish a Workflow. Then you can execute instances of the workflow to test your extension app.
Workflow participant
Although a workflow can have multiple participants, you only need one for a workflow that invokes a data IO extension. Create a Basic Workflow has information about configuring a participant. The participant role name that you enter will be displayed on configuration screens for workflow steps that require selection of a participant.
Data read step
Note: If you do not want to test reading data from an external data source, omit this step from the workflow.
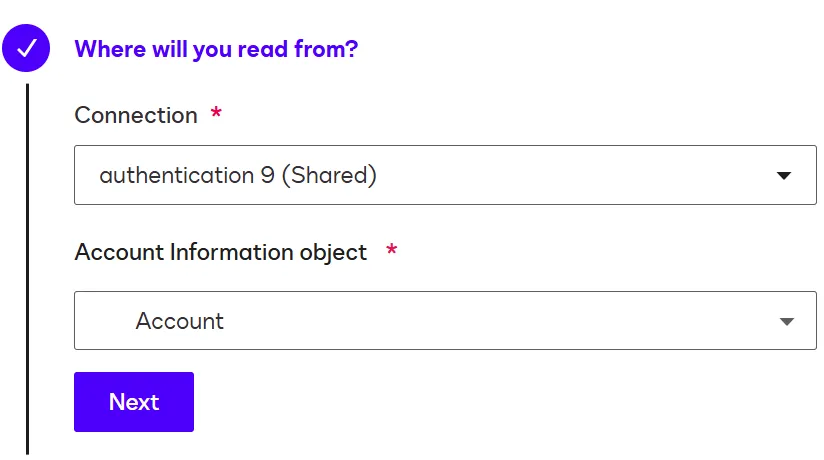
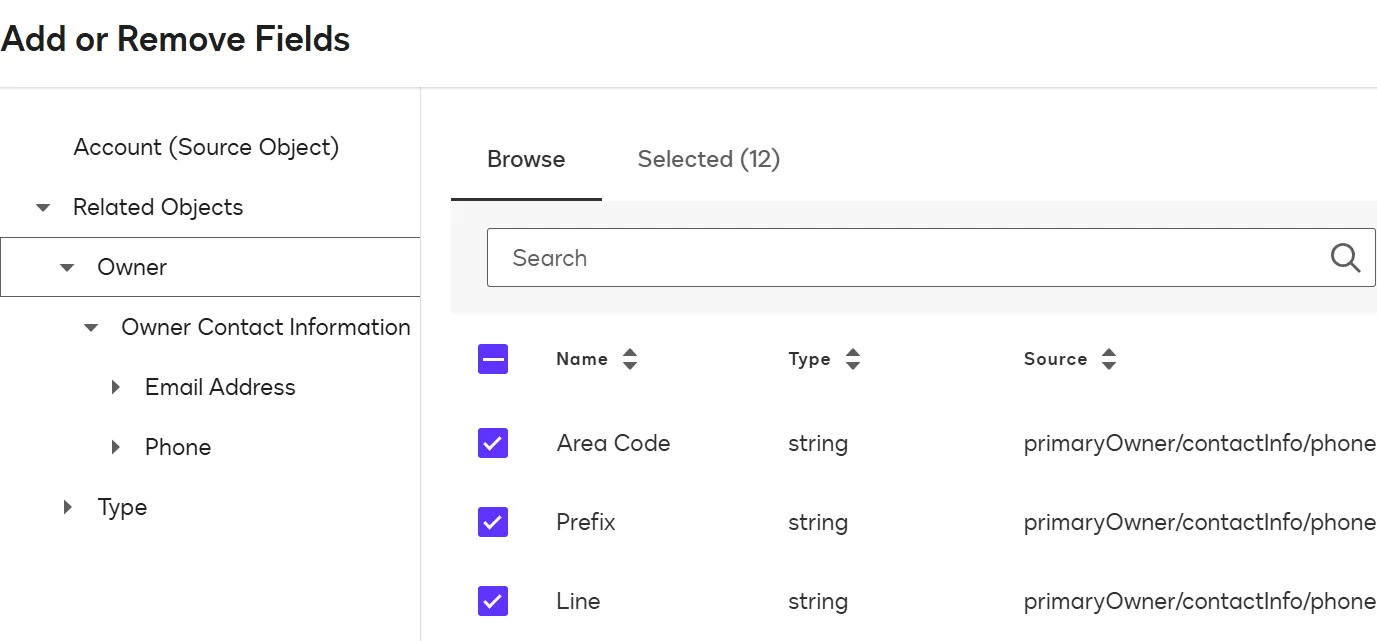
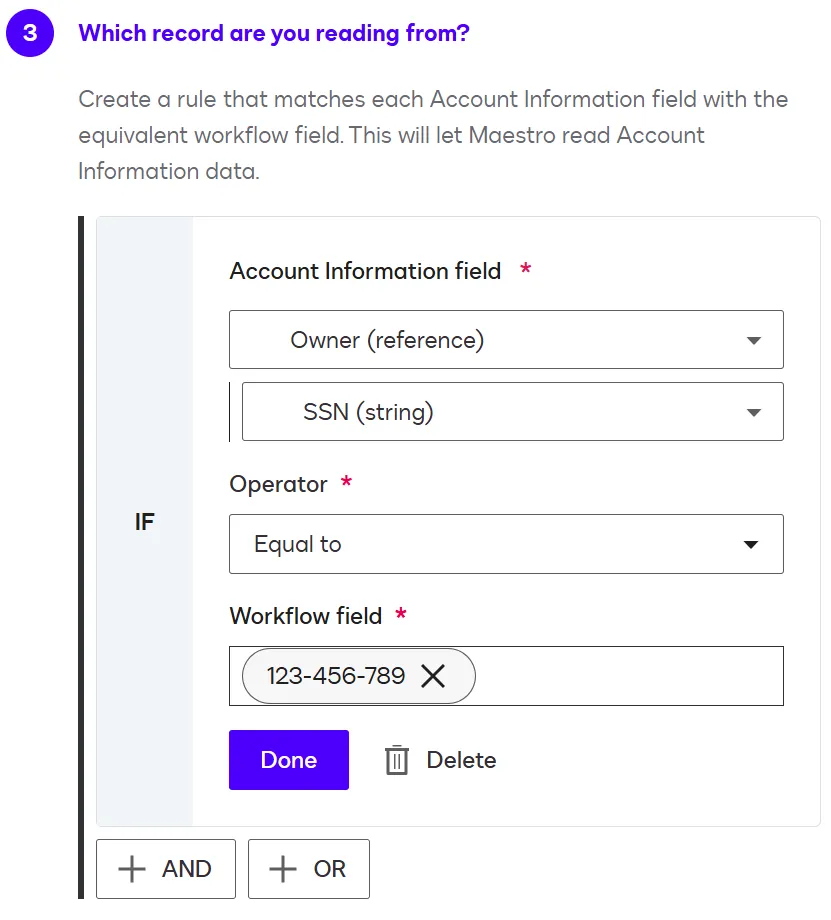
This step will invoke your data IO extension to search for records in the external system and read values from them. This step tests the Search Records action.
When you add this step, you select the data read function for your extension. The workflow step dropdown displays Read from followed by the App name you selected when you registered the extension app via the form-based process, or the value from the name property in the app manifest if you registered the extension app by uploading an app manifest file.
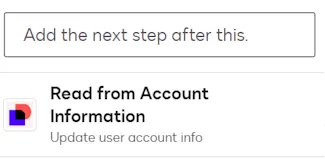
The Read from step for your extension will not appear in the dropdown if:
- The extension app is not installed and connected to your account.
- The Get Type Names and Get Type Definitions actions, which are executed when the connection is established, did not succeed. If you suspect that this is the case, run the Developer Console connection and extension tests to troubleshoot.
Configure the settings for this step as follows:
Collect Data with Web Forms step
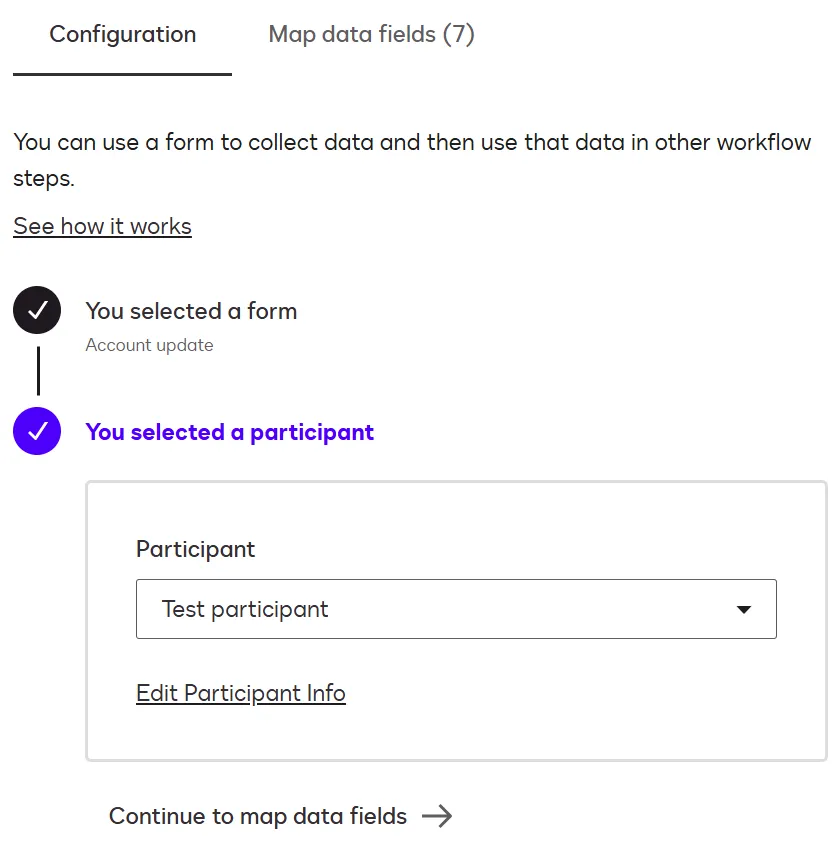
A Collect Data with Web Forms step displays a web form consisting of fields in which a participant can supply values. A procedure for adding this type of step appears in Configure a Collect Data with Web Forms Step.
Configure the settings for this step as follows:
Data write step
Note: If you do not want to test writing data to an external data source, omit this step from the workflow.
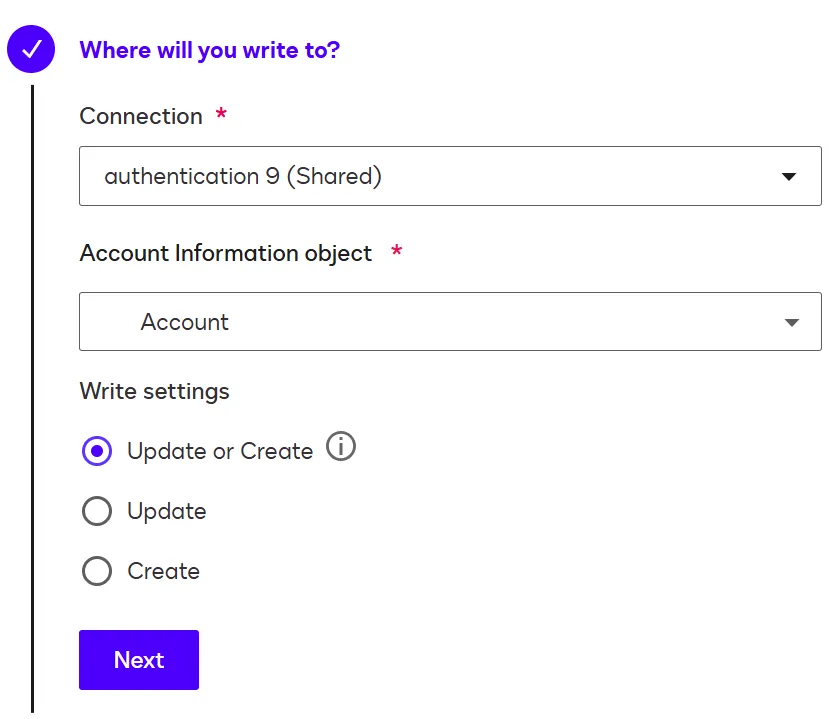
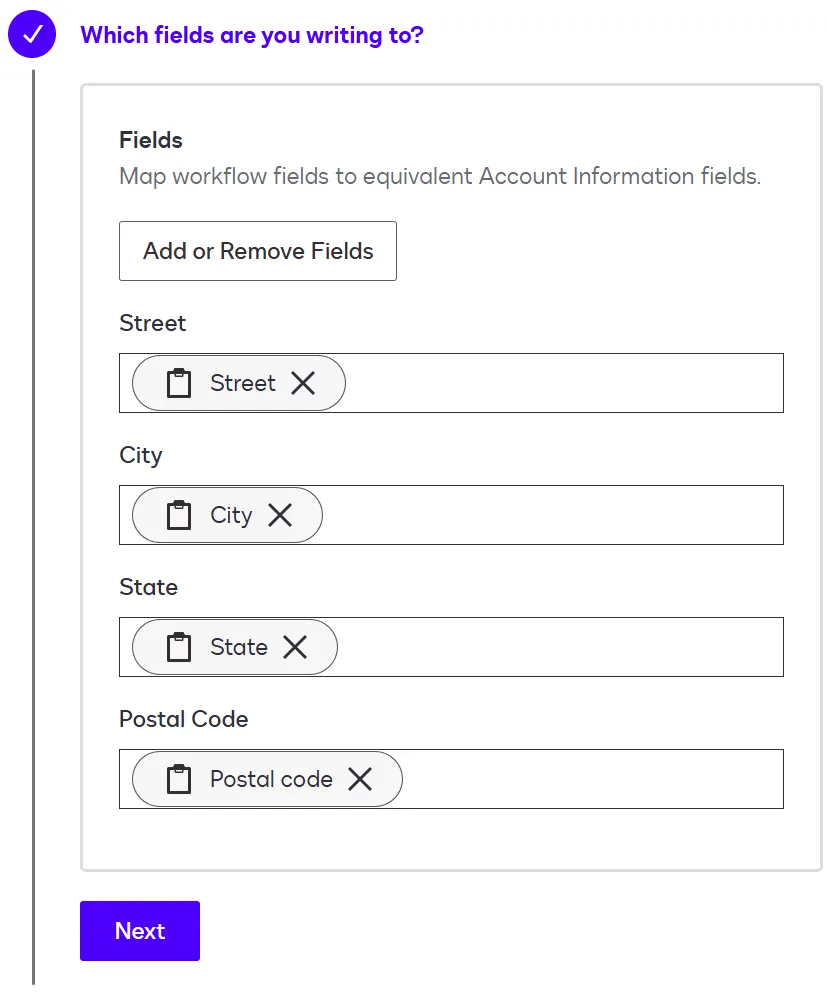
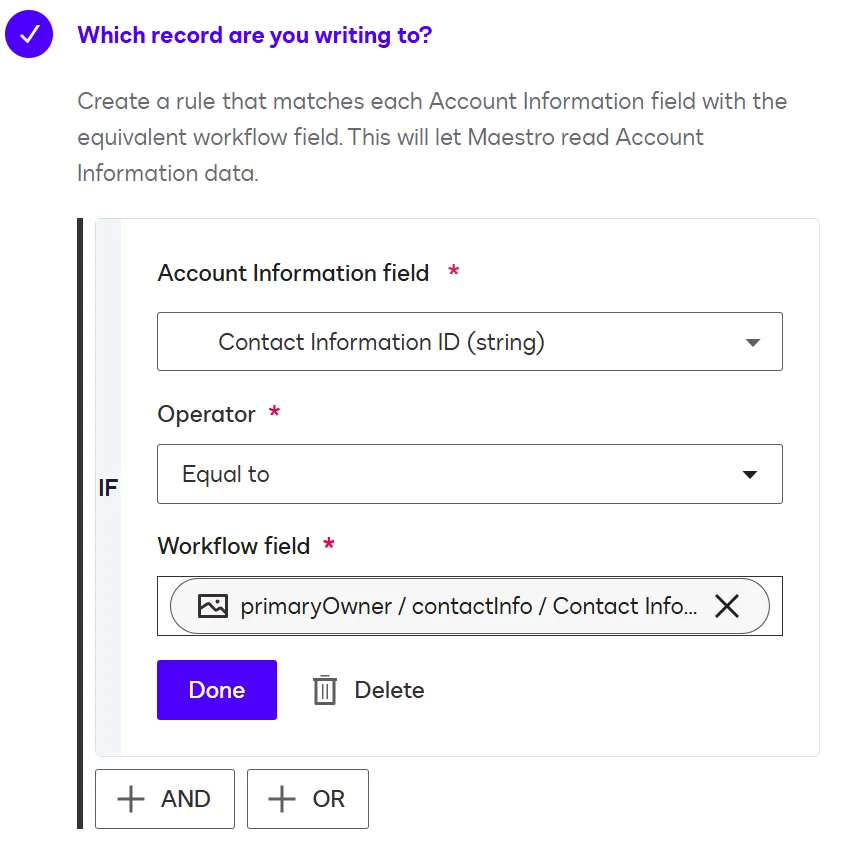
This step invokes your data IO extension to write values from the web form to the external system. This step tests the Search Records, Patch Record, and Create Record actions.
When you add this step, you select the data write function for your extension. The workflow step dropdown displays Writeback to followed by the App name you selected when you registered the extension app via the form-based process, or the value from the name property in the app manifest if you registered the extension app by uploading an app manifest file.
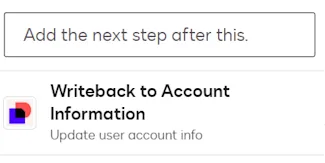
The Writeback to step for your extension will not appear in the dropdown if:
-
The extension app is not installed and connected to your account.
-
The Get Type Names and Get Type Definitions actions, which are executed when the connection is established, did not succeed. If you suspect that this is the case, run the Developer Console connection and extension tests to troubleshoot.
-
The extension app implements data read but not data write.
Configure the settings for this step as follows:
Show a Confirmation Screen step
The last step in your workflow should be a Show a Confirmation Screen step, which displays a message to indicate that the workflow is complete. A procedure for adding this type of step appears in Configure a Show a Confirmation Screen Step.
When you add this step, configure the settings as follows:
Web form field value types
When working with web form fields in Workflow Builder, you can select different value types for some fields. For fields that support multiple value types, the step configuration screen’s web form field list includes a row for each value type. In the sample screen shown here, the Last Review web form field has these value types available to select: Normalized, User Value, and Format.
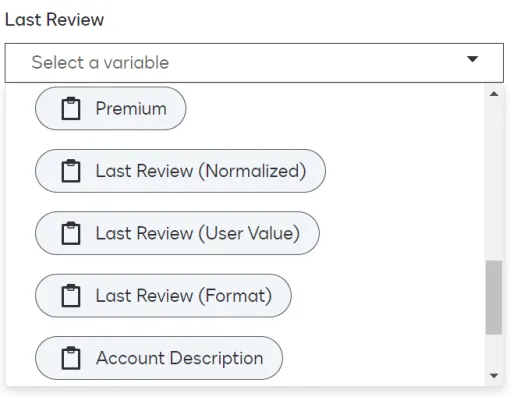
Below is a list of value types available for each web form field type.
Step 3. Execute a workflow instance
Once you’ve published your workflow, you can execute an instance of it to run through the steps as an end user would and make sure that the data read and write operations succeed.
- Follow the steps in the From Within Workflow Builder section of How to Start a Workflow to execute a workflow instance.
- If the workflow includes a data read step, confirm that the web form loads with values retrieved from the external system.
- Fill out and submit the web form.
- Confirm the submitted form values.
- The confirmation page is displayed.
- If the workflow includes a data write step, check the external system to confirm that web form values were successfully written to it.
If your extension is not invoked successfully, run the Developer Console connection and extension tests for the extension app to get detailed error messages and troubleshoot.
Next steps
- Find out more about functional tests.
- See reference information for the data IO extension.
- Learn how to run integration tests.