
File output system of record test: Workflow step creates envelopes (beta)
This procedure explains how to set up and execute a functional test that invokes a file output system of record extension from a workflow. For this test, you configure and run a workflow that displays a document for signature and writes the signed document to a system of record.
The files to be exported are generated by the workflow’s Send Documents for Signature step. To test a scenario in which any envelope sent from the account can be stored to the system of record if it meets certain conditions, follow the procedure in File output system of record test: An event triggers the workflow. See Identify the file source for information about the two options.
The high-level steps to create and run this test are:
- Step 1. Identify or create an eSignature template
- Step 2. Create and publish the workflow
- Step 3. Execute a workflow instance
This is one of many possible approaches to setting up a workflow. For additional options, see the workflow user documentation.
Make sure that you’ve completed all the requirements listed for functional tests in Test prerequisites.
Step 1. Identify or create an eSignature template
Before you create the workflow, make sure that you have an eSignature template in your account that you can use in a signing step in the workflow. The document to be signed in that step will be derived from the template. You can use an existing eSignature template in your account, or create a new template.
When selecting or creating a template:
- For a simpler workflow setup, the template should have a single recipient instead of multiple recipients.
- The recipient type must be Needs to Sign.
- Do not hard-code a recipient name or email in the template.
- Make sure that the template document includes, at minimum, a Signature tab.
See Template Requirements for additional information about templates to be used with a workflow signing step.
Step 2. Create and publish the workflow
To create a workflow that tests a file output system of record extension:
-
Log in to the Workflow Designer.
-
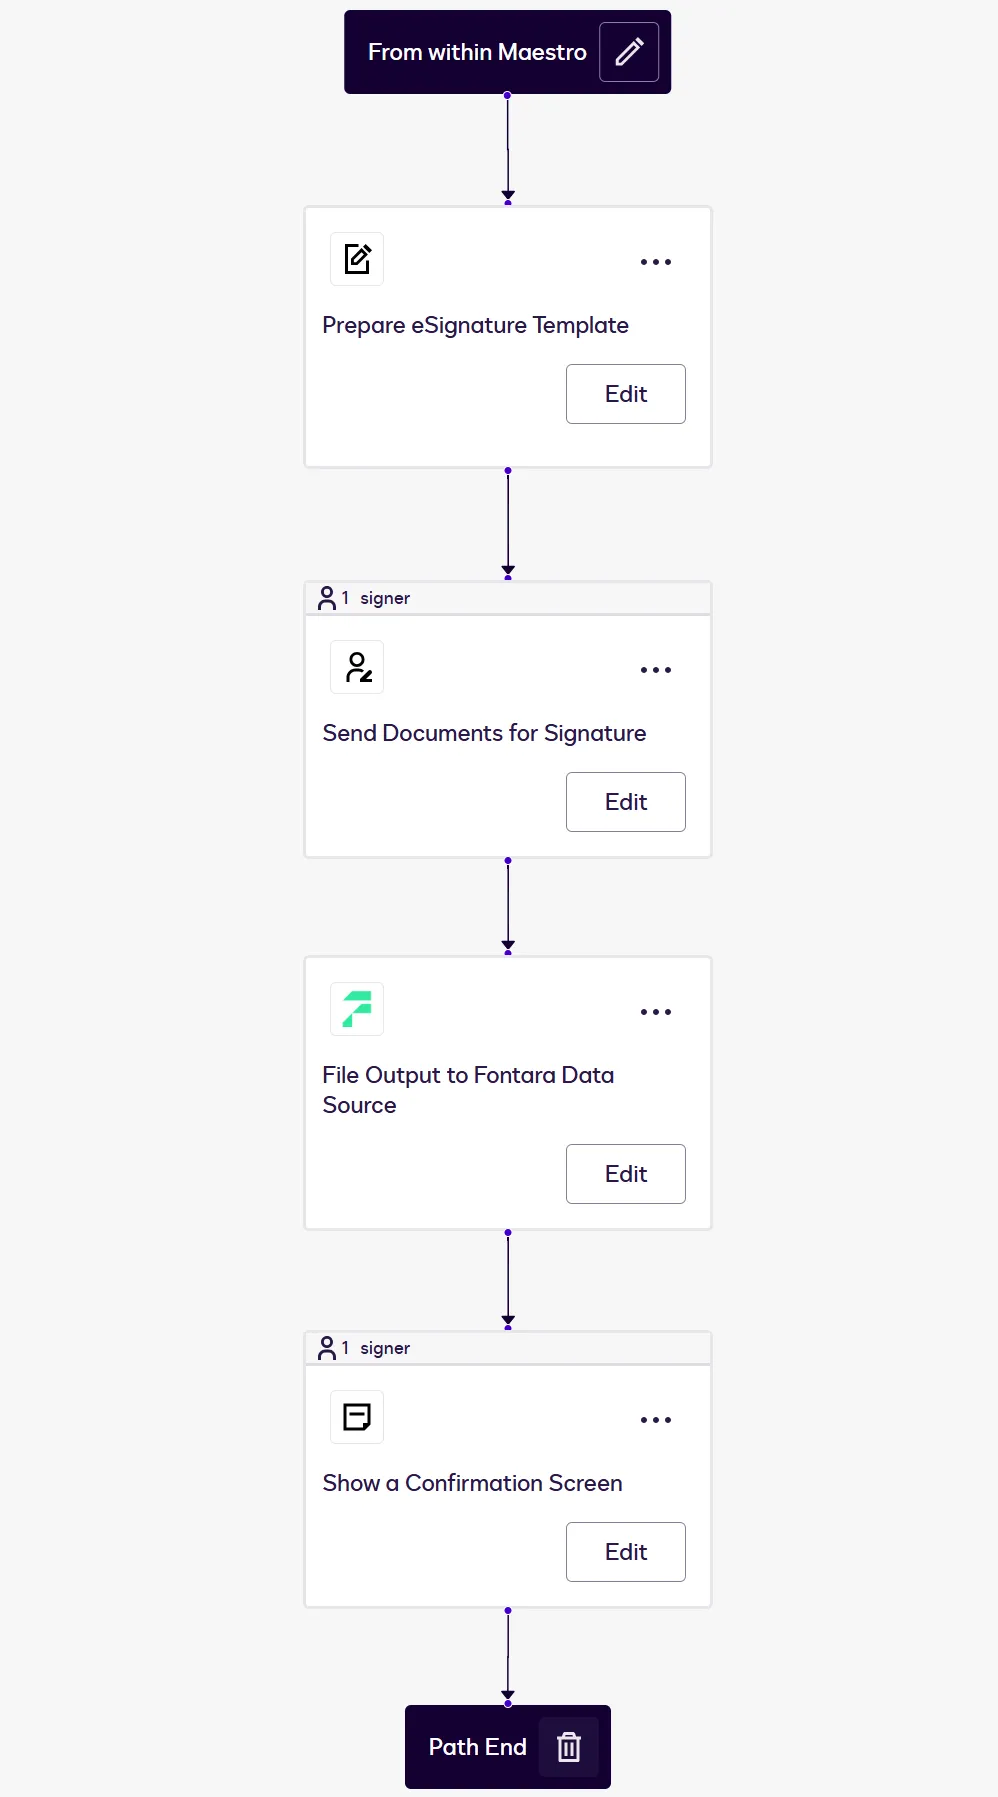
Follow the steps in Create a Basic Workflow to create and save a workflow. When creating a workflow, select Blank Workflow. Your workflow should include:
-
The workflow start method From within Maestro.
-
A step that defines an eSignature template containing a document to be signed. See Prepare eSignature Template step for configuration guidelines.
-
A step that displays a document for signature. See Send Documents for Signature step for configuration guidelines.
-
A step that invokes your extension app to write the signed document to the system of record. See File output system of record extension step for configuration guidelines.
-
A step that displays a message confirming that all workflow steps are complete. See Show a Confirmation Screen step for configuration guidelines.
When youʼve finished configuring the start method and the steps, the workflow should appear as shown.
-
-
Complete the steps in Review and Publish a Workflow. Then you can execute instances of the workflow to test your extension app.
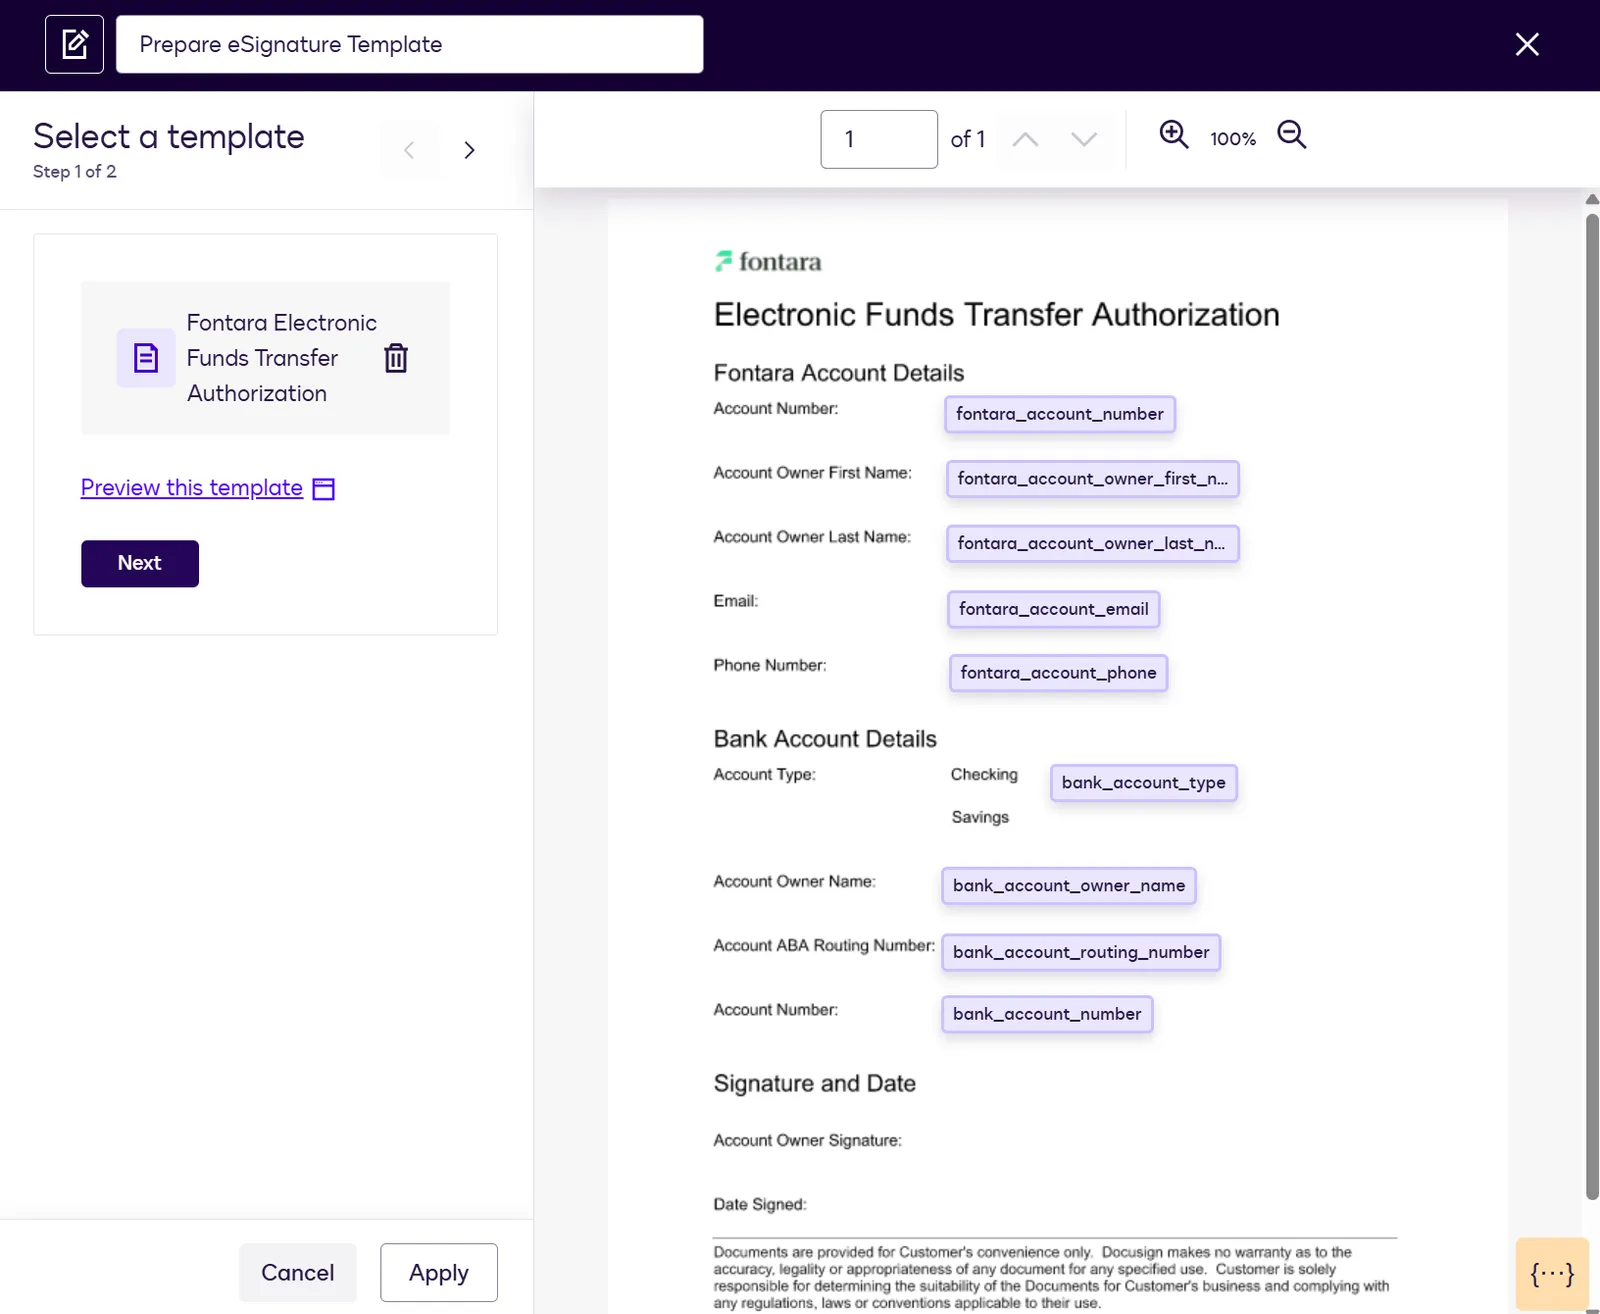
Prepare eSignature Template step
The first step in your workflow should be a Prepare eSignature Template step. A procedure for adding this type of step appears in Configure a Prepare eSignature Template step.
When you add this step, configure the settings as follows:
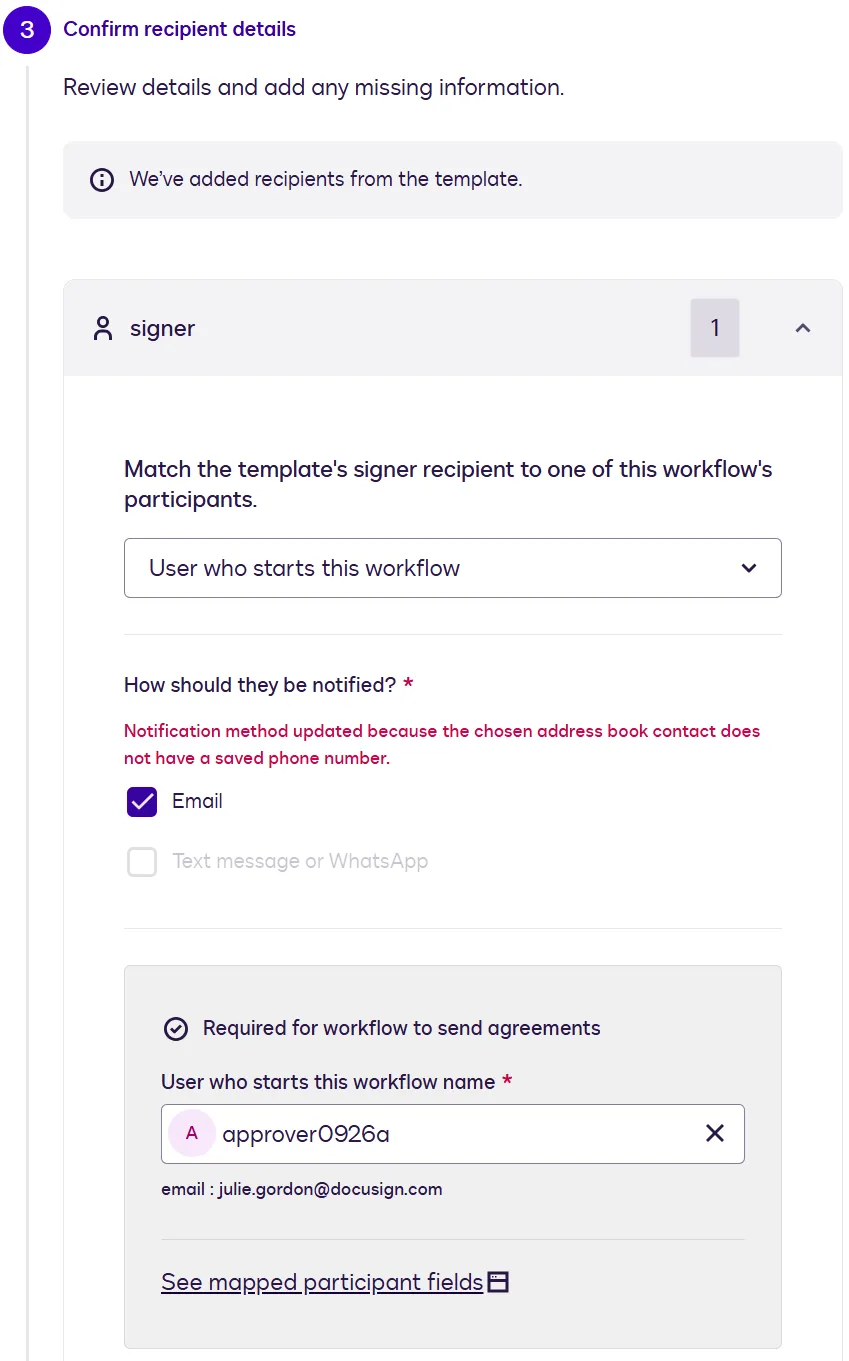
Send Documents for Signature step
The next step in your workflow should be a Send Documents for Signature step, which generates an eSignature envelope for the user to sign. A procedure for adding this type of step appears in Configure a Send Documents for Signature Step.
When you add this step, configure the settings as follows:
File output system of record extension step
This step will invoke your extension app.
To add this step, display the Apps tab on the Add New Step panel and select the extension thatʼs defined in your extension app registration. The Add New Step panel displays the values from the extensions.name and extensions.description properties in the app manifest.
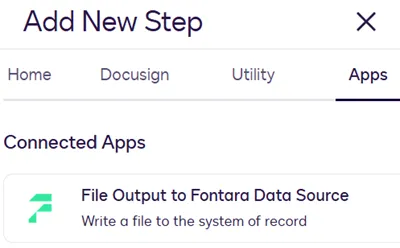
Note: The step for your extension will not appear in the Connected Apps list if the extension app is not installed and connected to your account.
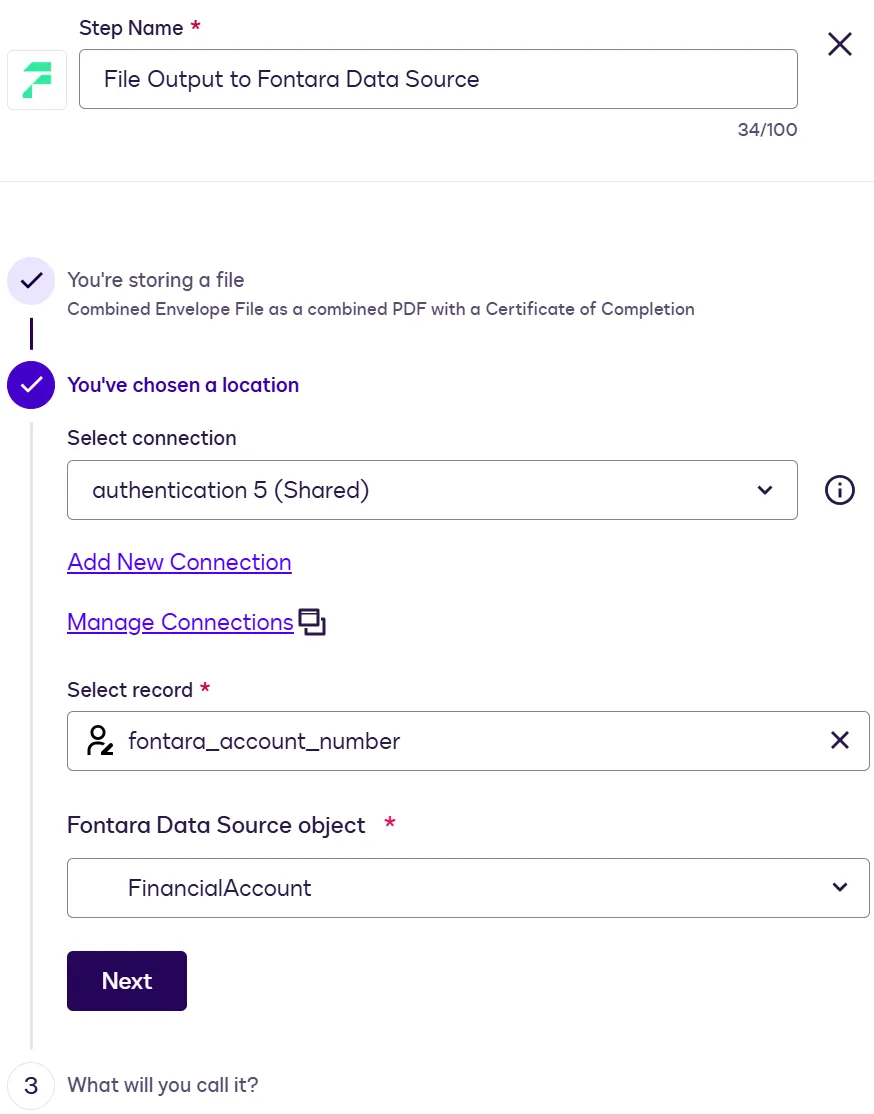
When you configure this step, the Get Type Names capability will be invoked to retrieve a list of objects in the system of record. When you execute an instance of the workflow, this step invokes the Write File action.
When you add this step, configure the settings as follows:
Workflow variables
When defining the File Output step, you can include workflow variables for the record identifier and file naming convention. Variables will be populated with values at workflow instance run time.
The types of variables available for selection include:
- Workflow step variables. For example, variables associated with the Send Documents for Signature step include the unique ID of the eSignature envelope and values from the envelope fields.
- Workflow participant variables. These are values associated with the customer who completes the steps in a workflow instance. They include the name and email address.
- Workflow instance variables. These are values associated with the workflow instance, such as the instance ID and the start date and time.
Show a Confirmation Screen step
The last step in your workflow should be a Show a Confirmation Screen step, which displays a message to indicate that the workflow is complete. A procedure for adding this type of step appears in Configure a Show a Confirmation Screen Step.
When you add this step, configure the settings as follows:
Step 3. Execute a workflow instance
After you’ve published your test workflow, you can execute an instance of it, run through the steps as a customer would, and make sure that the file is written to the system of record successfully. You can monitor the progress of the workflow instance as it executes.
To execute a workflow instance:
- Follow the steps in the From Within Workflow Builder section of How to Start a Workflow to execute a workflow instance. The document to be signed is displayed in your browser.
- Complete the signing process. The File Output step is executed and the confirmation page is displayed.
- Check the object and record to which the external service stores files, and confirm that the File Output step succeeded.
If your extension is not invoked successfully, run the Developer Console connection and extension tests for the extension app to get detailed error messages and troubleshoot.
Next steps
- Find out more about functional tests.
- Review the File output system of record extension contract reference.
- Learn how to run integration tests.