
Use a manifest file to register an extension app
This guide describes the steps for registering an extension app by building a JSON app manifest file. You also have the option of registering an extension app using a form. See Form-based and app manifest method comparison for guidance about which method might be more useful.
The example code in this procedure implements a file output to cloud storage use case.
Before starting this procedure, make sure that you have completed or obtained the items listed in Prerequisites for registering an extension app.
Step 1. Register a new app in the Developer Console
Open the Developer Console and select Create App, and then By editing the manifest in the upper right corner of the screen.
Step 2. Create an extension app manifest
The app manifest editor opens, containing an extension app manifest template. This is where you will create or upload the extension app manifest. The app manifest is a JSON file that defines these parameters for an extension app:
-
See What’s inside an extension app for details about how these components function.
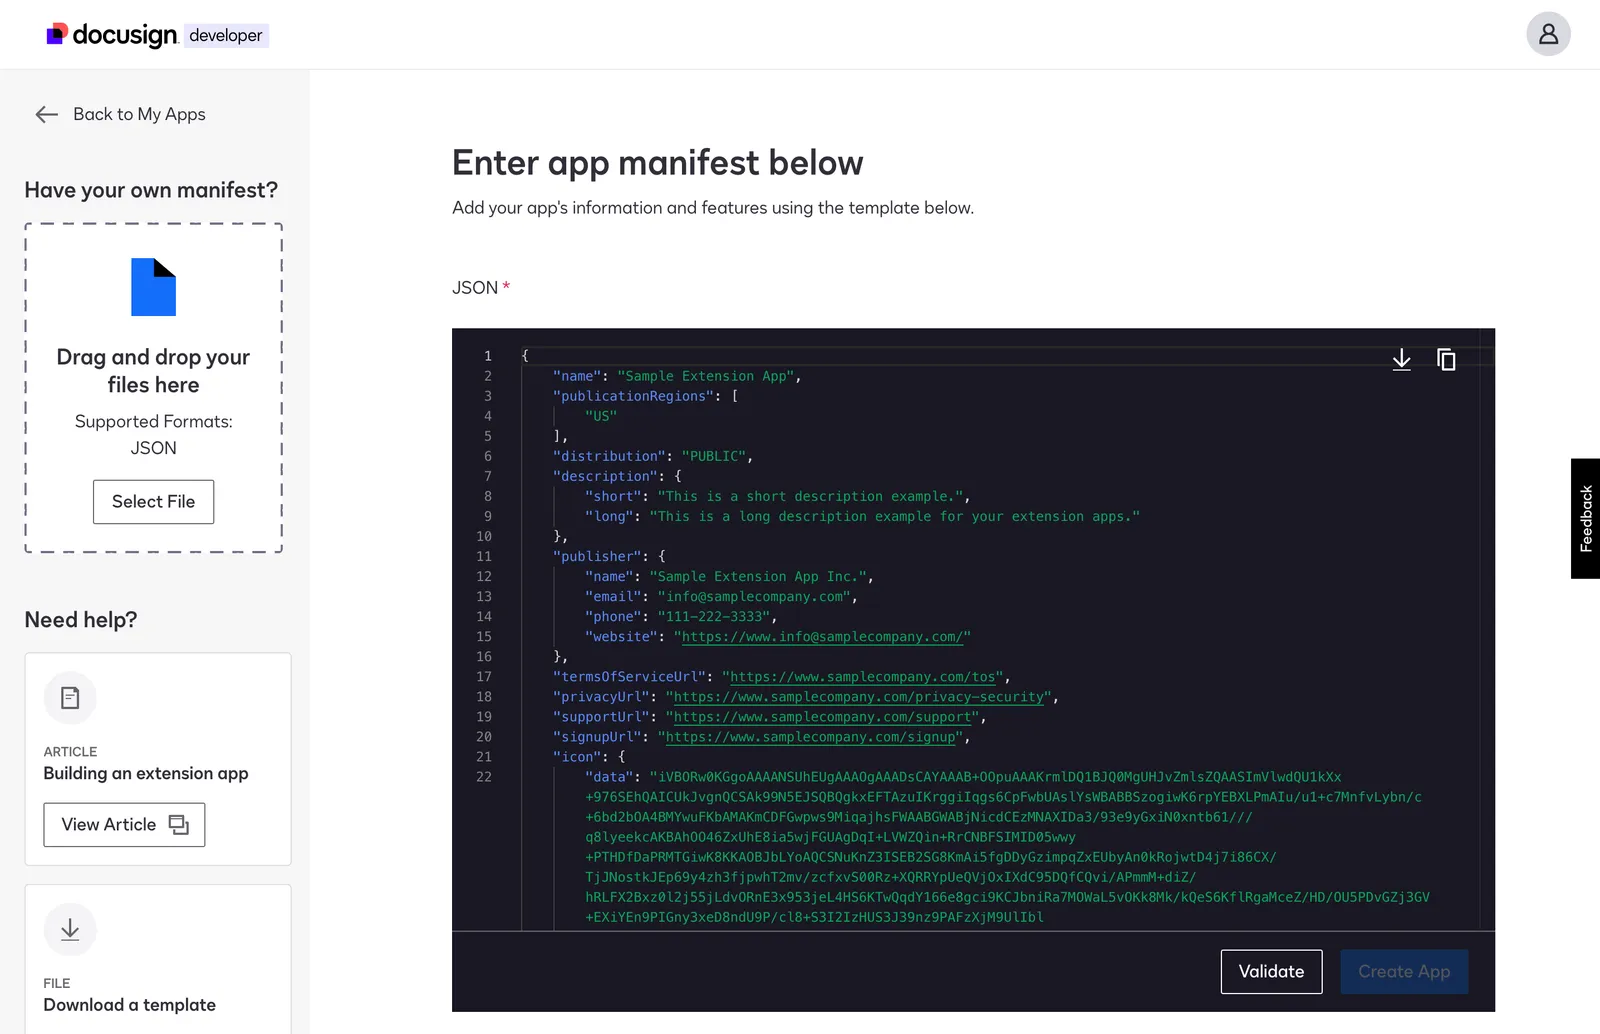
You can create and edit your manifest directly in the manifest editor, or you can use the buttons in the top right corner of the manifest editor to download or copy the manifest template to edit it in the IDE of your choice. You can also download the manifest template by choosing Download under Download a template in the left column on the screen shown above. If you edited your manifest in your IDE, save it as a JSON file and upload it, either by dragging and dropping the file in the box on the left of the screen shown above, or by choosing Select File. After your manifest has been uploaded, it will replace the manifest template in the app manifest editor. You can continue to make any necessary edits in the manifest editor.
Extension app information
The properties defined at the beginning of the extension app manifest—the name, short and long descriptions, images, publisher details, and relevant URLs—will appear in the Docusign App Center when the extension app is published. Each extension app that you create needs to have a unique name. The distribution property determines whether your app will be public or private. The value of distribution cannot be changed once the app is live. You can change the distribution value when the app is in Draft, Approved, or Rejected status.
The publicationRegions property determines the regions in which the app will be available for production use. Once an app is live, you can add regions, but you cannot remove them. See Globalization for more information.
To add an icon to your extension app, set the value of icon.data to the Base64 representation of your image. Set the value of icon.mediaType to the media type of the icon.
To convert an image file to Base64, you can use commands like these:
- Windows (PowerShell):
[Convert]::ToBase64String((Get-Content TestImage.png -Encoding Byte)) >> output.txt - UNIX/Linux:
cat TestImage.png | base64 | pbcopy
A number of Base64 image converter utilities are also available on the internet. Guidelines for icons and screenshots appear in Extension app best practices.
Connections
The next section of the extension app manifest defines the extension app’s connections. The connection object contains all of the data needed to connect with an external API, API proxy, or identity provider. The connection name must be a unique value that will be used again later when defining the extension app’s actions. Within the connections object, set these values within the params property:
-
clientIdandclientSecret: These values should come from the external platform or identity provider. -
provider: This value should be set toCUSTOM. -
scopes: List any scopes that need to be requested during authorization. -
grantType: Indicates whether the extension app uses Authorization Code Grant (authorization_code) or Client Credentials Grant (client_credentials). -
customConfig: ThecustomConfigobject that will store the following properties related to your extension app’s custom configuration:tokenUrlandauthorizationUrl: Set these values to the endpoints for getting the token and authorization.authorizationParams: Use this property to store any query parameters needed for the authorization endpoint.authorizationMethod: Set this value to eitherheaderorbody.scopeSeparator: Set this value to the delimiter that will be used to separate your needed scopes.
Note: Docusign automatically generates a redirect_uri value based on your provided authorizationUrl and passes this value back to you as a query parameter. Do not hard-code the redirect_uri. It may contain one of several values, depending on your region and environment. See Authorization for details.
Extensions
After defining your extension app’s connections, you can create an extensions object to define the group of tasks that your extension app executes and an actions object to define each one of those tasks. In the extensions object, define the following properties:
-
template: This value should be set to the unique string identifier that references the predefined extension contract for your extension provided by Docusign. -
actionReferences: List the actions that make up your extension.The names in the
actionReferencesobject must match the names of actions defined in theactionsobject of your extension app manifest. -
capabilities: List the optional capabilities that make up your extension. The names listed here should match the names of actions defined in the actions object of your extension app manifest. Not all extension types currently support capabilities.
Actions
To define the extension’s actions, add them to your extension app manifest in the list of actions. Optional capabilities can also be added to this list for extensions where capabilities are supported.
nameanddescription: These values describe your action and give it a name. The value ofnamewill be referenced in theactionReferencesfield in theextensionsobject. For file IO extensions, Docusign predefines the name values. See the extension contract reference for details. For other extensions, any value can be used.template: This value defines the contract of the action and should be set to the unique string identifier of the template for the contract. You can access the action contracts for each extension from the Extension contracts page.connectionsReference: This value should match the value of thenameparameter in theconnectionsobject in your extension app manifest.params: Use this parameter to specify the external API endpoint or API proxy endpoint that will be called by the action.
Screenshots
Finally, to add screenshots to your extension app, set the value of screenshots[].data to the Base64 representation of your images. Set the value of screenshots[].mediaType to the media type of the screenshot. You can add up to four screenshots.
This JSON snippet shows how the parameters appear in the extension app manifest.
Once you have set all of those values, your extension app manifest is ready to be uploaded and validated. See the App manifest reference for a full list of supported elements.
Step 3. Validate your app manifest
When your app manifest is ready, select Validate to determine if your manifest has any errors. See Troubleshooting manifest errors for a list of possible errors with details on how to troubleshoot them. Once your manifest has passed all validation checks, you can choose Create App to finish registering your application.
Next steps
- Learn how to Test an extension app.
- Review Example extension app use cases.
- Publish an extension app on the Docusign App Center.