
File output tabular format extension workflow test
This procedure explains how to set up and execute a functional test that invokes a File output tabular format extension from a workflow. For this test, you configure and run a workflow that collects user data from a web form and writes the form values to an existing spreadsheet stored in a cloud storage system.
The high-level steps to create and run this test are:
- Step 1. Identify or create a web form configuration
- Step 2. Create and publish the workflow
- Step 3. Execute a workflow instance
This is just one of many possible approaches to setting up a workflow. For additional options, see the workflow user documentation.
Make sure that you’ve completed all the requirements listed for functional tests in Test prerequisites.
Step 1. Identify or create a web form configuration
Before you create a workflow, make sure that you have a stand-alone web form in your account that can be used in a web form step in the workflow. This form collects data in the workflow, which is then exported to a spreadsheet.
Step 2. Create and publish the workflow
To create a workflow that tests a file output tabular format extension:
-
Log in to the Workflow Designer.
-
Follow the steps in Create a Basic Workflow to create and save a workflow. When prompted, select the option to start from a blank canvas instead of a template. Your workflow should include:
- The workflow start method: From within Workflow Builder.
- A participant: The participant fills out the web form with values that will be written to a spreadsheet. See Workflow participant for configuration guidelines.
- A web form step: This step displays a web form to collect the participant’s data. See Web form step for configuration guidelines.
- A step that invokes your extension app: This step writes the values entered in the web form to a spreadsheet. See File output tabular format extension step for configuration guidelines.
- A confirmation step: This step displays a message confirming that all workflow steps are complete. See Show a Confirmation Screen step for configuration guidelines.
-
Complete the steps in Review and Publish a Workflow. Then you can execute instances of the workflow to test your extension app.
Workflow participant
Although a workflow can have multiple participants, you only need a single participant for a workflow that invokes a file output tabular format extension. See Define Workflow Participants for details on configuring a participant. The participant role name you enter will be displayed on configuration screens for workflow steps that require selection of a participant.
Web form step
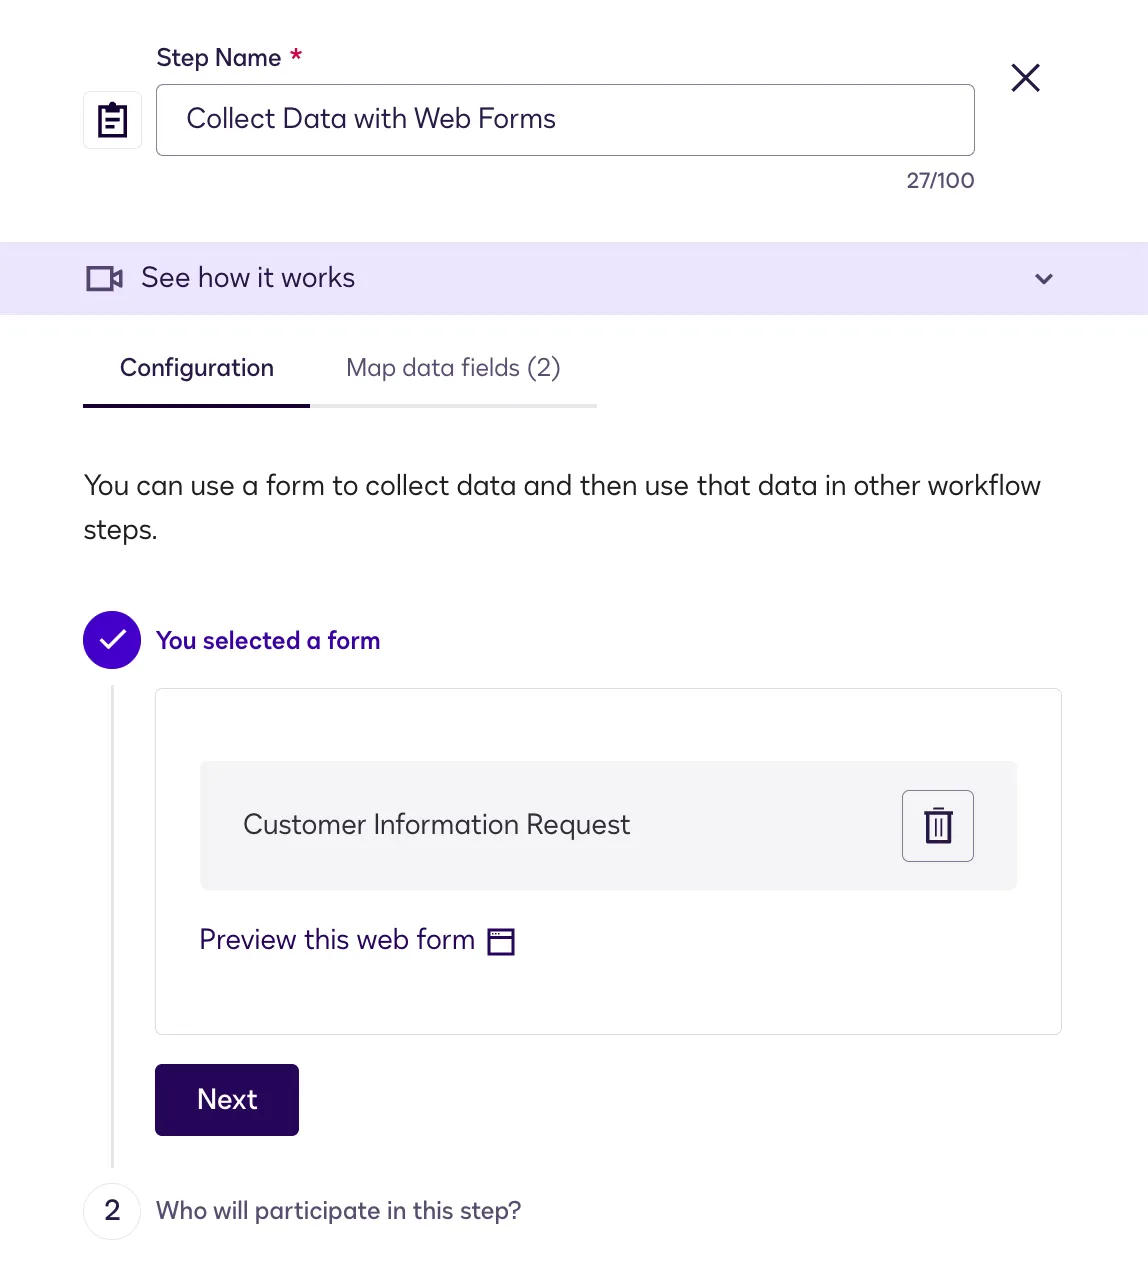
The first step in your workflow should be a Collect Data with Web Forms step. This step collects participant information in a form. See Configure a Collect Data with Web Forms Step for more information on how to add this type of step.
When you add this step, configure the settings as follows:
File output tabular format extension step
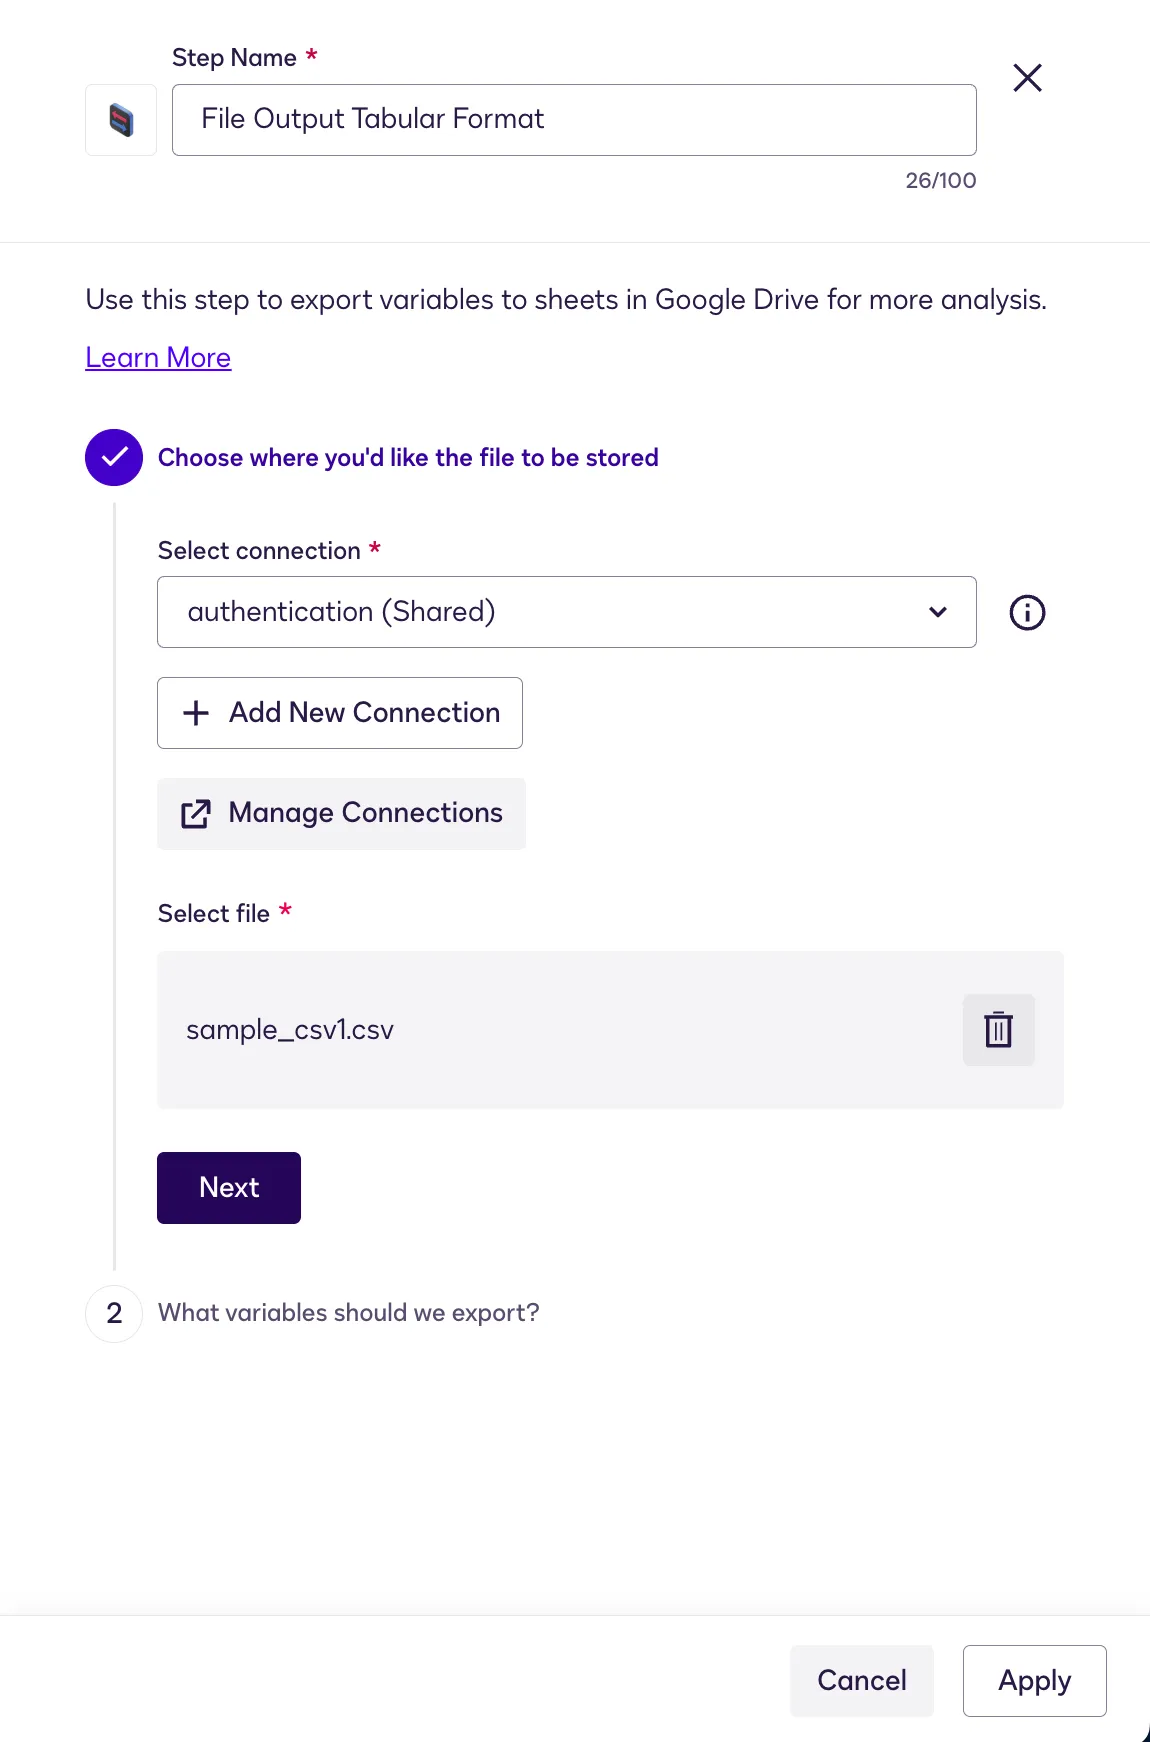
This step will invoke your extension app.
To add this step, select the extension thatʼs defined in your extension app registration. The Add New Step panel’s Apps tab displays the values from the extensions.name and extensions.description properties in the app manifest.
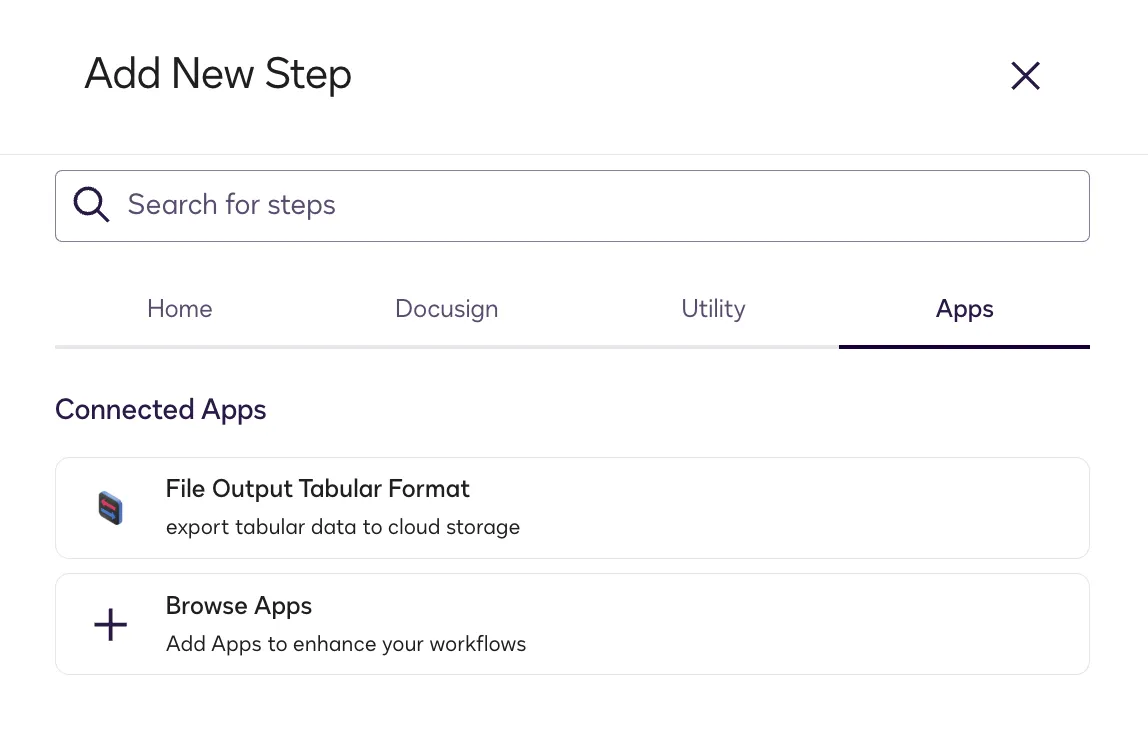
Note: The step for your extension will not appear on the Apps tab if the extension app is not installed and connected to your account.
When you configure this step, the following capabilities will be invoked if they are implemented in the extension app registration:
- List Drives: Enables the step configuration page to retrieve a list of drives (or similar structures that contain files) on the cloud storage system. If the app registration does not include this capability, the UI will not display the drive selection control.
- List Directory Contents: Enables the step configuration page to retrieve a list of folders and tabular files from the selected drive (or similar container type) or directory. If the app registration does not include this capability, the UI will not display file selection controls.
- List Headers: Enables the step configuration page to check the column headers in the destination sheet against the selected variables and ensure that there will be no data corruption.
When you execute an instance of the workflow, this step invokes the Export to Destination action defined in the extension app registration.
When you add this step, configure the settings as follows:
Show a confirmation screen step
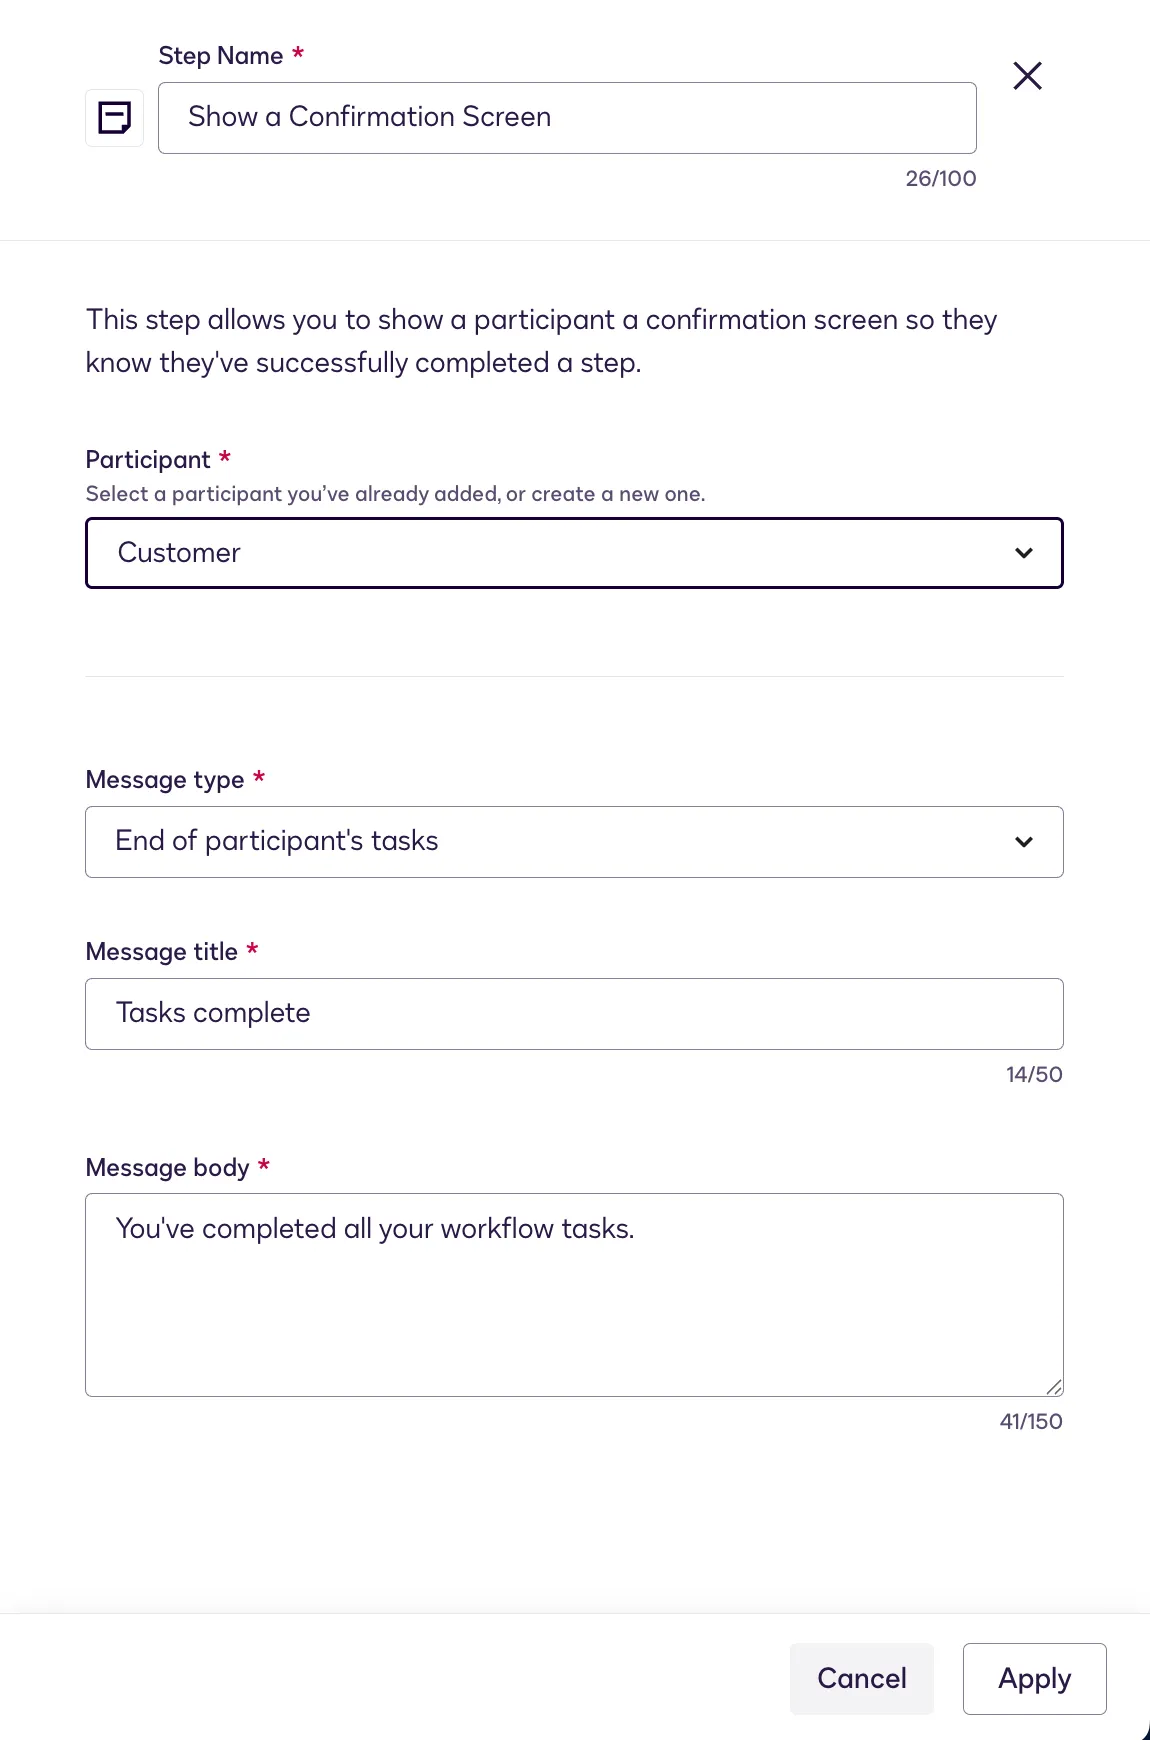
The last step in your workflow should be a Show a Confirmation Screen step, which displays a message to indicate that the workflow is complete. A procedure for adding this type of step appears in Configure a Show a Confirmation Screen Step.
When you add this step, configure the settings as follows:
Step 3. Execute a workflow instance
After you publish your test workflow, you can execute a workflow instance, follow the steps as a customer would, and verify that the correct spreadsheet is successfully updated with the values of the expected variables. You can monitor the progress of the workflow instance as it executes.
To execute a workflow instance:
-
Follow the steps in the From Within Workflow Builder section of How to Start a Workflow to execute a workflow instance.
The web form is displayed in your browser.
-
Fill out and submit the web form.
The file output step is executed and the confirmation page is displayed.
-
Check the cloud storage file to which the external service writes data and confirm that the file output step succeeded.
If your extension is not invoked successfully, run the Developer Console connection and extension tests for the extension app to get detailed error messages and troubleshoot.
Next steps
- Find out more about functional tests.
- Review the File output tabular format extension contract reference.
- Learn how to run integration tests.