
Skip to navigation

How to use conditional recipients

View as Markdown
eSignature REST API 2.1 only

This topic demonstrates how to create an envelope whose workflow routes it to different recipients based on the value of a transaction.

Run this code example from our Quickstart or launcher projects: Bash, C#, Java, Node.js, PHP, PowerShell, Python, or Ruby.

Required data

Running the code in this how-to requires this data:

Data elementDescription
{API_ACCOUNT_ID}A GUID value that identifies your account. This value is automatically generated by Docusign for any account you create. Copy the value from the API Account ID field on the Apps and Keys page.
{BASE_PATH}A string value that forms the root of the URL required to make API calls. The base path value in the example code is set to target the developer environment at
https://<domain>/restapi
Where <domain> is demo.docusign.net for the developer environment and is the result of the GetUserInfo call in production.
{SIGNER1_EMAIL}A string value for the email address of the first recipient.
{SIGNER1_NAME}A string value for the name of the first recipient.
{SIGNER_NOT_CHECKED_EMAIL}A string value for the email address of the first conditional recipient.
{SIGNER_NOT_CHECKED_NAME}A string value for the name of the first conditional recipient.
{SIGNER_WHEN_CHECKED_EMAIL}A string value for the email address of the second conditional recipient.
{SIGNER_WHEN_CHECKED_NAME}A string value for the name of the second conditional recipient.

Step 1. Obtain your OAuth token

To make the API call shown in this how-to, you need a valid OAuth access token. Docusign supports access tokens for three different recommended OAuth grant types: Public Authorization Code Grant, Confidential Authorization Code Grant, and JSON Web Token (JWT) Grant. Choose the OAuth grant type appropriate for your scenario.

See Confidential Authorization Code Grant for guidance on your options to get an Confidential Authorization Code Grant OAuth token.
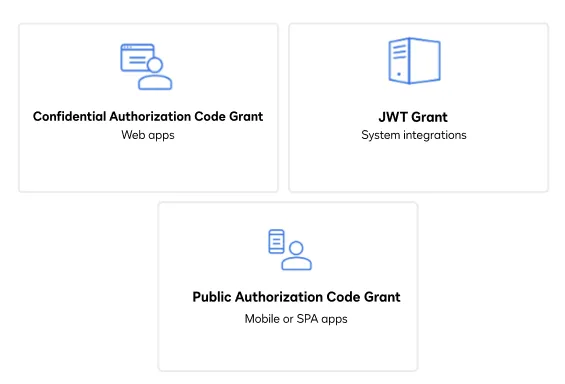
Three icons that represent the three methods a user can use to obtain an OAuth token: JSON Web Token (JWT), Public Authorization Code Grant (ACG), and Confidential Authorization Code grant

Step 2. Construct your API headers

After you have a valid OAuth access token, you are ready to construct the API headers that you will pass to the API call. Construct your headers like this, but make sure to substitute your valid OAuth access token for {ACCESS_TOKEN}.

declare -a Headers=('--header' "Authorization: Bearer $ACCESS_TOKEN"
'--header' "Accept: application/json"
'--header' "Content-Type: application/json")

Step 3. Construct the request body

Next, create the request body. To create an envelope using the eSignature REST API, construct an envelope body in JSON format. Replace {SIGNER1_EMAIL}, {SIGNER1_NAME}, {SIGNER_NOT_CHECKED_EMAIL}, {SIGNER_NOT_CHECKED_NAME}, {SIGNER_WHEN_CHECKED_EMAIL} and {SIGNER_WHEN_CHECKED_NAME} with your recipients’ data in the JSON request body.

The workflow section contains the information necessary to determine the action; in this case, pause_before, and the trigger routing_order, will cause the workflow to pause before the envelope is sent to the second recipient, whose information is in conditionalRecipients.

printf \
'{
"documents":
[
{
"documentBase64": "VGhhbmtzIGZvciByZXZpZXdpbmcgdGhpcyEKCldlJ2xsIG1vdmUgZm9yd2FyZCBhcyBzb29uIGFzIHdlIGhlYXIgYmFjay4=",
"documentId": "1",
"fileExtension": "txt",
"name": "Welcome"
}
],
"emailSubject": "ApproveIfChecked",
"workflow":
{
"workflowSteps":
[
{
"action": "pause_before",
"triggerOnItem": "routing_order",
"itemId": 2,
"status": "pending",
"recipientRouting":
{
"rules":
{
"conditionalRecipients":
[
{
"recipientId": 2,
"order": "0",
"recipientGroup":
{
"groupName": "Approver",
"groupMessage": "Members of this group approve a workflow",
"recipients":
[
{
"recipientLabel": "signer2a",
"name": "'"${SIGNER_NOT_CHECKED_NAME}"'",
"roleName": "Signer when not checked",
"email": "'"${SIGNER_NOT_CHECKED_EMAIL}"'"
},
{
"recipientLabel": "signer2b",
"name": "'"${SIGNER_WHEN_CHECKED_NAME}"'",
"roleName": "Signer when checked",
"email": "'"${SIGNER_WHEN_CHECKED_EMAIL}"'"
}
]
},
"conditions":
[
{
"recipientLabel": "signer2a",
"order": 1,
"filters":
[
{
"scope": "tabs",
"recipientId": "1",
"tabId": "ApprovalTab",
"operator": "equals",
"value": "false",
"tabType": "checkbox",
"tabLabel": "ApproveWhenChecked"
}
]
},
{
"recipientLabel": "signer2b",
"order": 2,
"filters":
[
{
"scope": "tabs",
"recipientId": "1",
"tabId": "ApprovalTab",
"operator": "equals",
"value": "true",
"tabType" : "checkbox",
"tabLabel": "ApproveWhenChecked"
}
]
}
]
}
]
}
}
}
]
},
"recipients":
{
"signers":
[
{
"email": "'"${SIGNER1_EMAIL}"'",
"name": "'"${SIGNER1_NAME}"'",
"recipientId": "1",
"routingOrder": "1",
"roleName": "Purchaser",
"tabs":
{
"signHereTabs":
[
{
"name": "SignHere",
"documentId": "1",
"pageNumber": "1",
"tabLabel": "PurchaserSignature",
"xPosition": "200",
"yPosition": "200"
}
]
,
"checkboxTabs":
[
{
"name": "ClickToApprove",
"selected": "false",
"documentId": "1",
"pageNumber": "1",
"tabLabel": "ApproveWhenChecked",
"xPosition": "50",
"yPosition": "50"
}
]
}
},
{
"email": "placeholder@example.com",
"name": "Approver",
"recipientId": "2",
"routingOrder": "2",
"roleName" : "Approver",
"tabs":
{
"signHereTabs":
[
{
"name": "SignHere",
"documentId": "1",
"pageNumber": "1",
"recipientId": "2",
"tabLabel": "ApproverSignature",
"xPosition": "300",
"yPosition": "200"
}
]
}
}
]
},
"status": "Sent"
}
' >>$request_data

Step 4. Call the eSignature REST API

Now that you have constructed your API headers and envelope body, make a request to the Envelopes:create endpoint and include the JSON body to create a new envelope with the conditional routing criteria you have selected.

Here’s how you make the call, but make sure to substitute your API account ID for {ACCOUNT_ID}.

View the source code for this how-to on GitHub: Bash, C#, Java, Node.js, PHP, PowerShell, Python, Ruby.

Status=$(curl --request POST "${base_path}/v2.1/accounts/${account_id}/envelopes" \
"${Headers[@]}" \
--data-binary @${request_data} \
--output ${response})

Expected response

If you run this code example from our Quickstart or launcher projects, you should see a JSON response similar to the code shown.

Sample response
{
"envelopeId": "74baaa91-xxxx-xxxx-xxxx-929b02f47fd1",
"uri": "/envelopes/74baaa91-xxxx-xxxx-xxxx-929b02f47fd1",
"statusDateTime": "2020-08-08T05:24:13.5370000Z",
"status": "sent"
}

Next steps