
How to bulk send envelopes
This topic demonstrates how to send envelopes in bulk to multiple recipients with the eSignature API. To accomplish the task, you will first create a bulk send recipients list, then create an envelope. From there, you will combine the envelope and bulk list to initiate bulk send.
Run this code example from our Quickstart or launcher projects: Bash, C#, Java, Node.js, PHP, PowerShell, Python, or Ruby.
Required data
Running the code in this how-to requires this data:
Step 1. Obtain your OAuth token
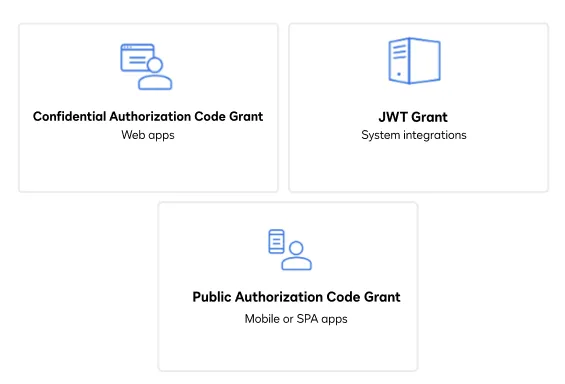
To make the API calls shown in this how-to, you need a valid OAuth access token. Docusign supports access tokens for three different recommended OAuth grant types: Public Authorization Code Grant, Confidential Authorization Code Grant, and JSON Web Token (JWT) Grant. Choose the OAuth grant type appropriate for your scenario.
See Confidential Authorization Code Grant for guidance on your options to get an Confidential Authorization Code Grant OAuth token.
Step 2. Construct your API headers
After you have a valid OAuth access token, you are ready to construct the API headers that you will pass to the API calls. Construct your headers like this, and then save them into a file or variable, but make sure to substitute your valid OAuth access token for {ACCESS_TOKEN}.
Step 3. Submit a bulk list
Your bulk send recipients list begins as a file you create in comma-separated values (CSV) format, holding information for each recipient. To prepare the list for bulk sending, you need to create a JSON representation of your CSV data and add it to your request body before sending it to the API as follows:
- Create a request body specifying your emails, names, and role names (
roleName) for each recipient. - With your constructed API headers, send the current request body to the eSignature REST API, but make sure to substitute your API account ID for {API_ACCOUNT_ID}.
- Extract the
listIdfrom the response as the {BULK_LIST_ID}. You will use it again in future steps.
Step 4. Create an envelope
With your generated API headers, create a request body for an envelope and set the envelope status to created. Send a request to the eSignature REST API and extract the envelope ID from the response as the {ENVELOPE_ID}. You will use it again in steps 5 and 6.
Step 5. Attach your bulk list ID to the envelope
Attach the listID obtained in step 3 to your envelope as a custom field named mailingListId. Make a request to the eSignature REST API using the generated envelope ID from step 4.
Step 6. Initiate bulk send
Now that you have constructed an envelope and bulk list, make a request to the eSignature REST API and include the bulk list ID and envelope ID to initiate the bulk sending of envelopes to multiple recipients. Here’s how you make the call, but be sure to substitute your bulk list ID for {BULK_LIST_ID} and envelope ID for {ENVELOPE_ID}. Extract the batchId from the response into a variable for use in the next step:
Step 7. Confirm successful batch send
Now that your bulk send operation has been initiated, check the progress of the operation by sending a request to the eSignature REST API, furnishing the batchId that was generated during the previous step. The sample code as configured here will wait for 10 seconds to give the API enough time to process the bulk envelopes from step 6.
Expected response
If you run this code example from our Quickstart or launcher projects, you should see a JSON response similar to the code shown.
Next steps
- Run this code example from our Quickstart or launcher projects: Bash, C#, Java, Node.js, PHP, PowerShell, Python, or Ruby.
- Learn more about Bulk sending envelopes.
- See how to Go-Live with a completed app and find the base path for API calls in the production environment.