
How to request a signature by email with document generation
This topic demonstrates how to request a signature for an envelope created from a template that uses the Document generation feature. This feature enables you to create agreements that can be populated with customized data. The template includes a document that contains placeholders, known as sender fields. For each envelope created from the template, the sender fields in the document are dynamically populated with data specified by the sender. The document in this example also includes a dynamic table—a feature that enables senders to supply values for a table that can have a different number of rows for each envelope. The signature request in this how-to is sent to the recipient via email, a process known as remote signing.
If you have created a template using the recommended Agreement Template Builder or the Docusign Template Assistant for Word add-in, you can skip steps 2 through 4 in this how-to.
Important: You must have document generation enabled for your account. See Document generation for more information.
Run this code example from our Quickstart or launcher projects: Bash, C#, Java, Node.js, PHP, PowerShell, Python, or Ruby.
Required data
Running the code in this how-to requires this data:
Step 1. Obtain your OAuth token
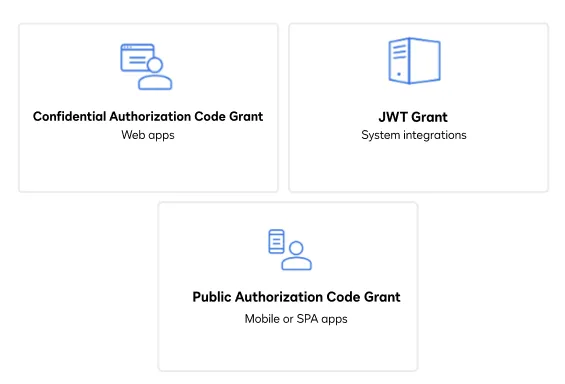
To make the API calls shown in this how-to, you need a valid OAuth access token. Docusign supports access tokens for three different recommended OAuth grant types: Public Authorization Code Grant, Confidential Authorization Code Grant, and JSON Web Token (JWT) Grant. Choose the OAuth grant type appropriate for your scenario.
See Confidential Authorization Code Grant for guidance on your options to get an Confidential Authorization Code Grant OAuth token.
Step 2. Create a template
This template definition includes a signer role that serves as a placeholder for the envelope recipients. This placeholder role contains an ID, a role name, and a routing order that determines the order of delivery. The template definition also includes a description, name, email subject, recipients, and status. The template document and signer tabs will be defined in subsequent steps. Create the template using the Templates:create API call, substituting your API account ID for ACCOUNT_ID, your base path for BASE_PATH, and the access token from step 1 for ACCESS_TOKEN.
Step 3. Add a document with sender fields to your template
The document provided in this call should have sender fields, which will be automatically detected. See Methods for creating documents for more information on how to create a document with a dynamic table and sender fields. For your sender fields to be automatically detected, you must add your document to the template separately from the Templates:create call in Step 2. After adding a Base64-encoded document to the request body, call TemplateDocuments:update, substituting the template ID obtained from the Templates:create API call for TEMPLATE_ID.
Step 4. Add tabs to the template
Now that the template contains a document, add tabs for the placeholder recipient. In the request body, define a signHere tab and a dateSigned tab using Auto-place (anchor tagging). Then make a call to TemplateRecipientTabs:create.
Step 5. Create an envelope draft from a template
When creating an envelope definition from a template, you must specify the template ID that was returned from the Templates:create call in Step 2. If you created the template using the Agreement Template Builder or the Docusign Template Assistant for Word, you can obtain the template ID by logging in to the eSignature web app, selecting Templates from the top navigation menu, opening the template, and selecting the Template ID link. You also must provide the name and email of the party acting in the signer role that the template specifies. Set the status field to created since you will be updating this draft in the following steps. Then create the envelope draft with a call to Envelopes:create, substituting your signer’s email for SIGNER_EMAIL and their name for SIGNER_NAME.
Step 6. Get DocGenFormFields
Make a call to DocumentGeneration:getEnvelopeDocGenFormFields to receive a list of the docGenFormFields on the document. You will also need the documentId value returned in the response of this API call to complete the next step.
Step 7. Merge sender fields with the eSignature REST API
Update the value of the docGenFormFields specified in the response of the previous step with the appropriate sender data. Then, use the DocumentGeneration:updateEnvelopeDocGenFormFields method to dynamically generate a document with the data included in the request.
Step 8. Send the envelope with the eSignature REST API
Send the envelope by setting the status to sent using the Envelopes:update method.
Expected response
If you run this code example from our Quickstart or launcher projects, you should see a JSON response similar to the code shown.
In addition, the signer receives an email containing a signing link that they can use to open and electronically sign a document using the Docusign mobile app or the Docusign website. After signing is complete, the recipient receives a carbon copy (CC) of the email that includes all of the completed and signed documents.
Next steps
- Run this code example from our Quickstart or launcher projects: Bash, C#, Java, Node.js, PHP, PowerShell, Python, or Ruby.
- Learn more about Document generation.
- Find out more about Document Generation Syntax.
- See Document Generation for Docusign eSignature in the eSignature User Guide for general information about the feature, including use cases.
- See how to Go-Live with a completed app and find the base path for API calls in the production environment.