
Skip to navigation

How to request a signature using a composite template

View as Markdown

This topic demonstrates how to request a signature through your app using a template and an additional, dynamically-constructed HTML document by using the composite template feature.

Run this code example from our Quickstart or launcher projects: Bash, C#, Java, Node.js, PHP, PowerShell, Python, or Ruby.

Required data

Running the code in this how-to requires this data:

Data elementDescription
{API_ACCOUNT_ID}A GUID value that identifies your account. This value is automatically generated by Docusign for any account you create. Copy the value from the API Account ID field on the Apps and Keys page.
{BASE_PATH}A string value that forms the root of the URL required to make API calls. The base path value in the example code is set to target the developer environment at
https://<domain>/restapi
Where <domain> is demo.docusign.net for the developer environment and is the result of the GetUserInfo call in production.
{CC_RECIPIENT_EMAIL}A string value for the email address of the carbon copy recipient.
{CC_RECIPIENT_NAME}A string value for the name of the carbon copy recipient.
{CLIENT_USER_ID}A string value that serves as an identifier of an individual signer throughout the signing process. The combination of this value, the signer’s name, and the signer’s email is used to uniquely identify them.
{ITEM}An arbitrary string used to specify an item being ordered in the document.
{QUANTITY}An arbitrary string used to specify a quantity of items being ordered in the document.
Redirect URIA URL to which the user will be forwarded after authentication. The value for this URL must exactly match one of those pre-registered for the integration key in your Docusign account. See redirect URI for details.
{SIGNER_EMAIL}A string value for the email address where the signer will receive a notification of the signing request.
{SIGNER_NAME}A string value for the full name of the signer.
{TEMPLATE_ID}A GUID value that identifies a Docusign template that is used to create a Docusign envelope. This value is automatically generated by Docusign when the template is created.

Step 1. Obtain your OAuth token

To make the API calls shown in this how-to, you need a valid OAuth access token. Docusign supports access tokens for three different recommended OAuth grant types: Public Authorization Code Grant, Confidential Authorization Code Grant, and JSON Web Token (JWT) Grant. Choose the OAuth grant type appropriate for your scenario.

See Confidential Authorization Code Grant for guidance on your options to get an Confidential Authorization Code Grant OAuth token.
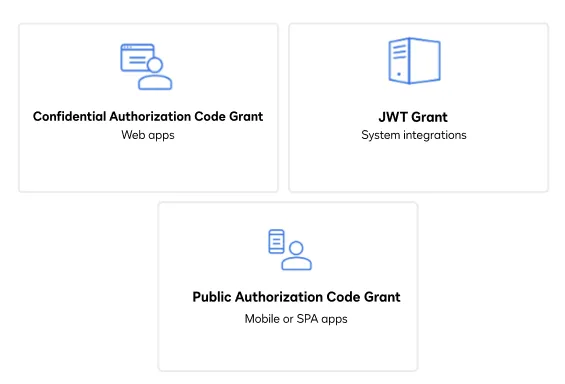
Three icons that represent the three methods a user can use to obtain an OAuth token: JSON Web Token (JWT), Public Authorization Code Grant (ACG), and Confidential Authorization Code grant

Step 2. Create the envelope definition as a part of the composite template

First, create a new envelope definition that declares a pair of compositeTemplate objects. Each of these objects will represent one template that you will use to derive the created envelope. The first of these composite templates will be derived from one of your existing templates, specified by its template ID. It is divided into a serverTemplate (which holds server-side template data, such as ordering) and an inlineTemplate (which holds inline template data, such as tabs/fields). The second composite template will contain the HTML document, as well as its tabs and recipients.

Note: When you create an envelope by using a composite template, you should specify the envelope custom fields in the inline template. Any custom fields that you specify at the root level are ignored.

The code for this step demonstrates how to define a method, makeEnvelope, that creates an envelope definition using composite templates:

printf \
'{
"compositeTemplates": [
{
"compositeTemplateId": "1",
"inlineTemplates": [
{
"recipients": {
"carbonCopies": [
{
"email": "'"${CC_EMAIL}"'",
"name": "'"${CC_NAME}"'",
"recipientId": "2",
"roleName": "cc"
}
],
"signers": [
{
"clientUserId": "1000",
"email": "'"${SIGNER_EMAIL}"'",
"name": "'"${SIGNER_NAME}"'",
"recipientId": "1",
"roleName": "signer"
}
]
},
"sequence": "2"
}
],
"serverTemplates": [
{
"sequence": "1",
"templateId": "' > $request_data
printf "${template_id}" >> $request_data
printf '"
}
]
},
{
"compositeTemplateId": "2",
"document": {
"documentBase64": "' >> $request_data
cat $doc1_base64 >> $request_data
printf '",
"documentId": "1",
"fileExtension": "html",
"name": "Appendix 1--Sales order"
},
"inlineTemplates": [
{
"recipients": {
"carbonCopies": [
{
"email": "'${CC_EMAIL}'",
"name": "'"${CC_NAME}"'",
"recipientId": "2",
"roleName": "cc"
}
],
"signers": [
{
"email": "'"${SIGNER_EMAIL}"'",
"name": "'"${SIGNER_NAME}"'",
"recipientId": "1",
"roleName": "signer",
"tabs": {
"signHereTabs": [
{
"anchorString": "**signature_1**",
"anchorUnits": "pixels",
"anchorXOffset": "20",
"anchorYOffset": "10"
}
]
}
}
]
},
"sequence": "1"
}
]
}
],
"status": "sent"
}' >> $request_data

Step 3. Call Docusign to create the envelope

Next, create the envelope from the definition that you created in the previous step, then create the recipient view for embedded signing.

  1. Instantiate the Docusign API client.
  2. Set the following default request header to add your access token.

"Authorization" : "Bearer {ACCESS_TOKEN}" 3. Initialize the Envelopes API. 4. Create an envelope by passing in the generated envelope definition and your API account ID.

curl --header "Authorization: Bearer ${ACCESS_TOKEN}" \
--header "Content-Type: application/json" \
--data-binary @${request_data} \
--request POST ${base_path}/v2.1/accounts/${account_id}/envelopes \
--output $response

Step 4. Create the recipient view definition

The recipient view is the screen that Docusign generates and displays in your app to enable your signers to sign documents. The recipient view request returns a link that enables your recipients to sign documents from your app. To create the definition, you must add the signer’s information and the redirect URI.

  1. Set the redirect URI to which the user will be forwarded after signing is complete. This URI must exactly match one that is preregistered for the integration key in your Docusign account.

    Note: You can include a state parameter in the URI string to record your application’s state and provide recovery information, potentially enabling it to resume interrupted operations using only callback data.

  2. Add the recipient information to the view, including the signer’s email, name, and client user ID.

View the source code for this how-to on GitHub: Bash, C#, Java, Node.js, PHP, PowerShell, Python, or Ruby.

curl --header "Authorization: Bearer ${ACCESS_TOKEN}" \
--header "Content-Type: application/json" \
--data-binary '
{
"returnUrl": "http://httpbin.org/get",
"authenticationMethod": "none",
"email": "'"${SIGNER_EMAIL}"'",
"userName": "'"${SIGNER_NAME}"'",
"clientUserId": 1000,
}' \
--request POST ${base_path}/v2.1/accounts/${account_id}/envelopes/${envelope_id}/views/recipient \
--output ${response}

Expected response

If you run this code example from our Quickstart or launcher projects, you should see a JSON response similar to the code shown.

Sample response
{
"url": "https://demo.docusign.net/Signing/MTRedeem/v1/09f2e35e-xxxx-xxxx-xxxx-1fbc6fcf77ed?slt=eyJ0eX...i3x-4g"
}

Next steps