
How to request a signature through your app (embedded signing) with a CFR Part 11 account
This topic demonstrates how to request a signature through your app with CFR Part 11 accounts. To use Embedded signing with a CFR Part 11 account, you need to require recipient authentication for your signers using the workflow with the defaultName of “SMS for access & signatures.” This topic also demonstrates how to use Auto-place (anchor tagging) to automatically position tabs in a document with a specified string.
Prerequisites
- Running this example requires that you have a CFR Part 11 account with the “SMS for access & signatures” authentication method enabled.
- To run this example from our launchers, you will need to log in with your CFR Part 11 account before you can view the example. After logging in the example will appear in place of the general embedded signing example.
Run this code example from our Quickstart or launcher projects: Bash, C#, Java, Node.js, PHP, PowerShell, Python, or Ruby.
Required data
Running the code in this how-to requires this data:
Step 1. Obtain your OAuth token
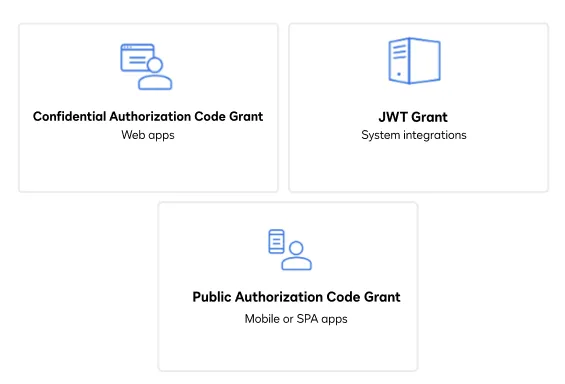
To make the API calls shown in this how-to, you need a valid OAuth access token. Docusign supports access tokens for three different recommended OAuth grant types: Public Authorization Code Grant, Confidential Authorization Code Grant, and JSON Web Token (JWT) Grant. Choose the OAuth grant type appropriate for your scenario.
See Confidential Authorization Code Grant for guidance on your options to get an Confidential Authorization Code Grant OAuth token.
Step 2. Obtain your workflow ID
Make a request to the IdentityVerifications:list endpoint of the eSignature REST API using your {API_ACCOUNT_ID} to retrieve the workflow ID. The response will include an array of workflow IDs. Different workflow IDs can be specified per recipient. To use embedded signing with a CFR Part 11 account, you need to use the workflow ID with the name "SMS for access & signatures". If you do not have SMS authentication for CFR Part 11 configured for your account, the IdentityVerifications:list call will not return a workflow ID with that name. Omitting a workflow ID or providing an invalid workflow ID will cause your request to fail.
Note: It is recommended to store the workflowId value obtained in this step and re-use it in the future instead of making this API call again.
Step 3: Create the envelope definition
Next, create the request body. Do this by creating a JSON object, or, if you are using a Docusign SDK, you can prepare a compatible request body by creating an envelope definition using the makeEnvelope method defined in the code for this how-to. Follow the steps below to create a CFR Part 11 envelope for embedded signing.
-
Add a document to the definition by saving it to a variable as a binary-encoded base64 string. If you intend to attach multiple documents, specify the document order using an array. The order of the array sets the order of the documents.
-
Set the signer’s data, including their name, email address, and a client user ID (any alphanumeric value is suitable). Including a client user ID automatically specifies the signer as embedded (using your app). If there are multiple signers, you must create a signer recipient for each one.
Note: If the client user ID is set and either
SignerMustHaveAccountorSignerMustLoginToSignproperty of the account settings is set totrue, the system throws an error. -
Set the
identityVerificationproperty to the workflow ID obtained in the previous step to specify the SMS authentication workflow. Replace{COUNTRY_CODE}, and{PHONE_NUMBER}with your recipient’s data in the JSON request body. -
Create and assign signable fields (also known as tabs) for a specific signer within the document using AutoPlace. This how-to uses anchor tabs to generate tabs automatically in your document by searching for each occurrence of a specific string of characters in the document and adding tabs at those locations. This example uses the string “/sn1/” for autotagging.
To configure the anchor tabs, specify the number of units from the anchor text to offset the tab, as well as the string to search for and replace with a
signHeretab within your document. You can create multiplesignHeretabs for different locations and offsets, if needed.After creating the tabs, assign them to the signer created in the previous step.
-
Set the envelope’s
statusproperty. To save the envelope as a draft, setstatustocreated. To configure the envelope to be sent immediately after it is instantiated, setstatustosentinstead.
Step 4: Create the envelope
With the envelope definition and the attributes defined for the signer, document, and custom fields, you can now use the Envelopes:create endpoint to create an envelope for the transaction.
- First, instantiate a new instance of the API client (if you’re using a Docusign SDK).
- Set the following default request header to add your access token to all API calls.
"Authorization: Bearer ${ACCESS_TOKEN}" - Initialize the Envelopes API.
- Using your Docusign integration key and the prepared envelope definition, generate and retrieve an envelope ID using the Envelopes:create endpoint.
Step 5: Create the recipient view definition
The recipient view is the screen that Docusign generates and displays in your app to enable your signers to sign documents. To create the definition, you must add the signer’s information and the return URL.
- Set the return URL to which the user will be forwarded after signing is complete.
- Add the recipient information to the view, including the signer’s
email,name, andclientUserIDthat were set for the recipient who will sign the envelope.
Step 6. Create the recipient view and initiate embedded signing
Next, create the recipient view. Use the EnvelopeViews:createRecipient method, passing in your API account ID and the envelopeId and viewRequest objects generated in previous steps.
Finally, extract the URL for embedded signing, which is the value of the URL key from the JSON response. You can redirect your app’s internal browser to this URL to begin signing.
Expected response
Use the return URL in the JSON response to start the embedded signing session in your browser. You will need to authenticate via SMS to sign the document and to view it when signing is complete.
Next steps
- Run this code example from our Quickstart or launcher projects: Bash, C#, Java, Node.js, PHP, PowerShell, Python, or Ruby.
- Learn more about CFR Part 11 accounts.
- See how to Go-Live with a completed app and find the base path for API calls in the production environment.