
How to share access to a Docusign envelope inbox
This topic demonstrates how to share envelope inbox access with another user and view an envelope using the SHARED ACCESS view in the Docusign UI. The Shared Access feature enables a user (the principal) to grant another user (the agent) access to the principal’s envelopes.
Important: There must be envelopes in the principal’s inbox to complete this how-to. See How to request a signature by email to learn more about creating an envelope.
See Shared Access for details on the feature and the list of supported envelope actions.
Run this code example from our Quickstart or launcher projects: Bash, C#, Java, Node.js, PHP, PowerShell, Python, or Ruby.
Required data
Running the code in this how-to requires this data:
Step 1. Obtain your OAuth token
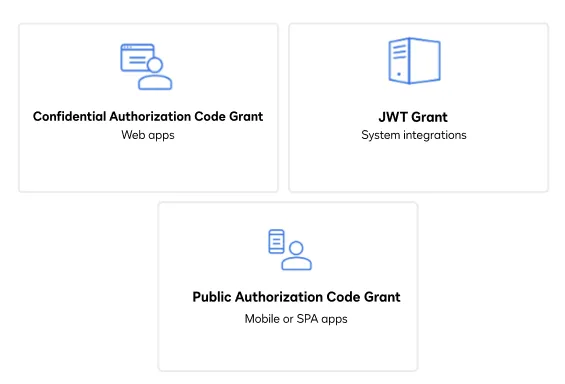
To make the API calls shown in this how-to, you need a valid OAuth access token. Docusign supports access tokens for three different recommended OAuth grant types: Public Authorization Code Grant, Confidential Authorization Code Grant, and JSON Web Token (JWT) Grant. Choose the OAuth grant type appropriate for your scenario.
See Confidential Authorization Code Grant for guidance on your options to get an Confidential Authorization Code Grant OAuth token.
Step 2. Construct your API headers
After you have a valid OAuth access token, you are ready to construct the API headers that you will pass to the API call. Construct your headers like this, but make sure to substitute your valid OAuth access token for {ACCESS_TOKEN}.
Step 3. Construct the request body to create an agent and call the API
To share access to the principal’s envelopes with an agent, there must be at least two users in the principal’s account. This step creates a new agent with whom the principal’s envelope inbox will be shared. If there is already a second user in the principal’s account, you can skip this step and instead record the second user’s user ID to use in the next step.
First, create the request body for the API call to create an agent. Set the userName and email fields to the name and email address associated with the agent. Set the activationAccessCode to a string that the agent will use to activate their account. Make a POST request to the Users:create endpoint and include the request body to create the agent. Then, extract the agent’s userId from the response as {AGENT_USER_ID}. You will use it again in Step 4.
Step 4. Construct the request body to grant authorization and call the API
This step grants shared access to the principal’s Docusign envelope inbox to the agent created in the previous step. If you already have a second user with whom you’d like to share access, you can provide their user ID in the agentUser JSON.
Now that you have created an agent, you need to authorize the agent to manage envelopes in the principal’s inbox. Set the userId field to the one associated with the agent and set the permission to manage. Make a POST request to the Users:authorization endpoint and include the request body to authorize the agent to manage the principal’s envelopes. Use the principal’s user ID as {IMPERSONATION_USER_GUID} and the principal’s API account ID as {ACCOUNT_ID} in the call.
Expected response
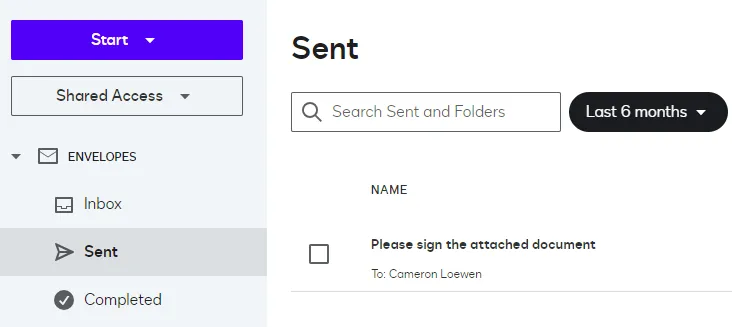
Now that the agent has been authorized, the agent should be able to see the principal’s envelopes in their Shared Access UI. To verify that the principal’s envelopes can be viewed by the agent, log in to the agent’s Docusign developer account, then open the Agreements tab in the eSignature UI. Select SHARED ACCESS in the upper left, then select the principal’s account. The principal’s envelopes should be displayed in Sent.
Step 5. Call the eSignature REST API as the agent
The following API call will be made by the agent. Before making this API call, you need to authenticate as the agent.
After you have authenticated as the agent, confirm that the envelope inbox has been shared by calling the Envelopes:listStatus endpoint. Any API calls made on behalf of the principal need to include the X-DocuSign-Act-On-Behalf header and substitute the principal’s user ID for {IMPERSONATION_USER_GUID}. Be sure to also substitute the API account ID of the agent for {ACCOUNT_ID}.
Expected response
If you run this code example from our Quickstart or launcher projects, you should see a JSON response of the envelopes in the principal’s account.
Next steps
- Run this code example from our Quickstart or launcher projects: Bash, C#, Java, Node.js, PHP, PowerShell, Python, or Ruby.
- Learn more about How to update individual permission settings.
- See how to Go-Live with a completed app and find the base path for API calls in the production environment.