
Mistral Vibe
Follow the steps below to configure your Docusign MCP server, starting with the required prerequisites and credentials.
Prerequisites
Before connecting to the Docusign MCP server, you will need:
- A Docusign developer account. You can create one for free at the Developer Center.
- Integration key id - See Configure your app to add an Integration key.
- Client secret - See Configure your app to create a secret key.
- Mistral Vibe account.
App Configuration
Follow the process below to complete these configuration steps:
-
Go to the Apps and Keys of your Docusign developer or production account.
-
Select Add App and Integration Key.
-
Create a new IK with your desired name (example: “Perplexity”).
-
Copy the Integration Key value.
-
Select Add Secret Key (it will not be visible later).
-
Select + Add URI and add the following two URIs in Redirect URIs section:
Adding a MCP server in Mistral Vibe
To add a MCP server in Mistral Vibe:
-
Navigate to Mistral Vibe.
-
Sign in to your account.
-
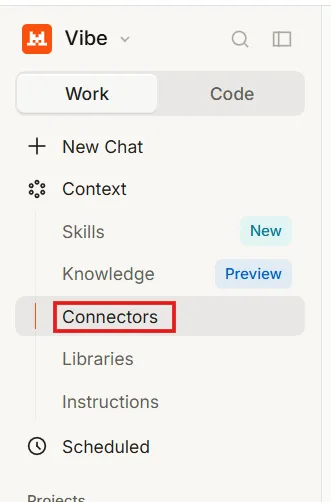
On the left side of the menu, select Context -> Connectors.
-
Select + Add Connector.
-
Select Add a custom connector.
-
Enter a Connector name for the connector. For example: Docusign-MCP
-
Enter Server as https://mcp-d.docusign.com/mcp.
-
(Optional) Enter a Description for your MCP server.
-
Under Authentication section, select OAuth2.1
-
Enter Integration key id as Client ID.
-
Enter client secret as Client Secret.
-
Select Add connector.
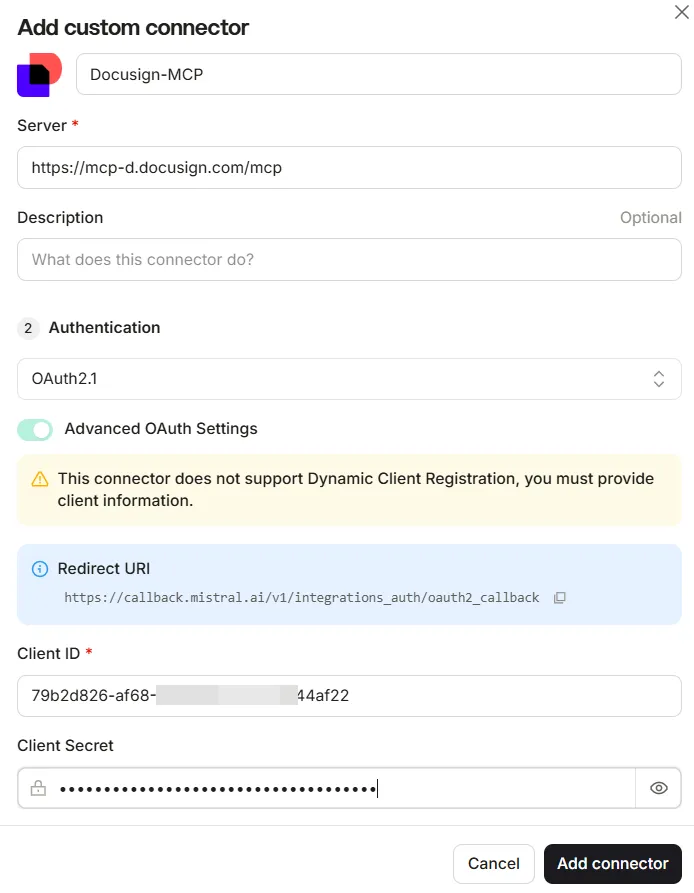
The page opens a new tab in your browser.
-
Sign in to your Docusign account in your browser (if required).
-
Select Allow Access to give your consent to Mistral Vibe to use your Docusign account.
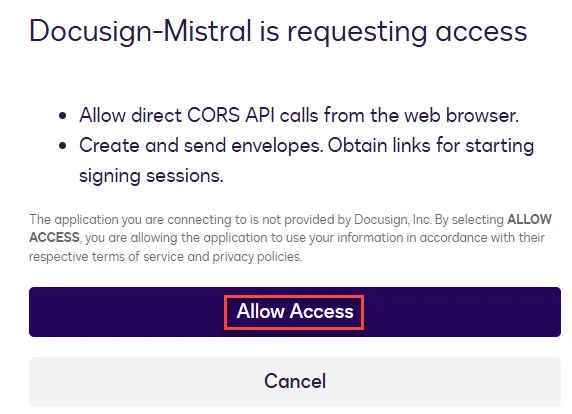
The page redirects to the Mistral Vibe Connectors page confirming the configured Docusign MCP server.
Verify the MCP server is ready for use
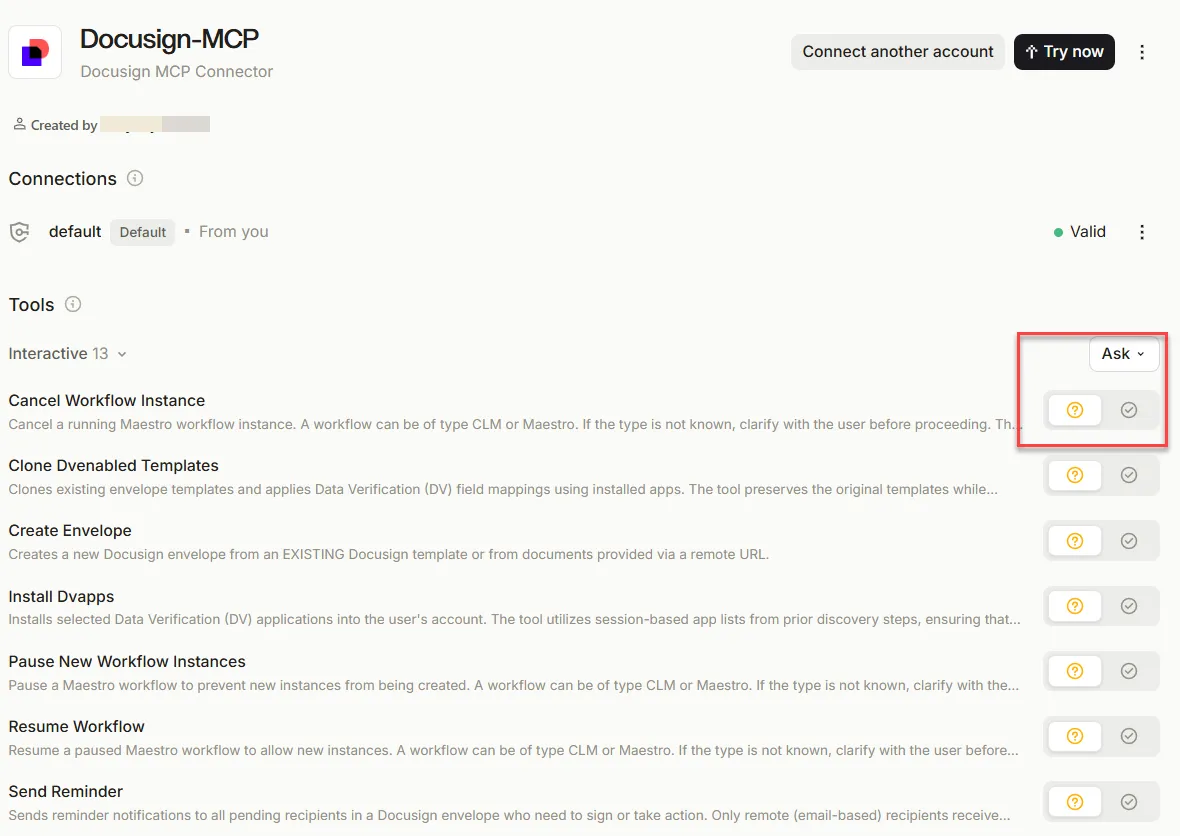
You should see all of the available tools within the Docusign MCP server connector created in the Mistral Vibe Connector page.
-
On the left side of the menu, select Context -> Connectors.
-
Select the custom connector on the right side.
You can now see all the available Docusign MCP tools and you can select them to Ask and Allow.
-
Exit the window.
Run a test prompt
To execute a test prompt, complete the following steps:
-
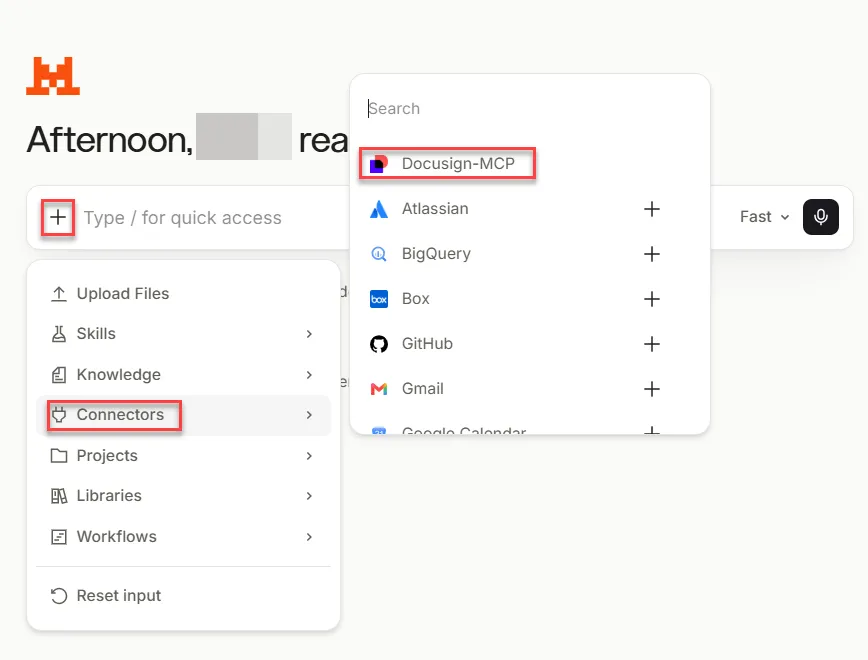
Open a new Mistral Vibe chat box, and select + (Open settings menu).
-
Select Connectors and select the configured MCP connector.
-
Enter a prompt such as: “Can you list the Docusign tools available to me?” or “What’s the status of NDA sent to Fontara Inc? ”
The chat window responds with the available Docusign MCP tools or the status of NDA sent to Fontara Inc depending on the prompt.
Note: The wording of AI responses may differ between AI platforms, but the data and results should be the same
Disconnect or Remove MCP App
To disconnect or remove an existing MCP server in Mistral Vibe:
-
On the left side of the menu, select Context -> Connectors.
-
Select the custom connector on the right side.
-
Select the three dots on the right side, and select Disconnect.

-
(Optional) To disconnect the app, select Disconnect.
-
To delete the app, select the three dots menu on the connector, and select Delete.
-
Select Delete.
The selected MCP configuration is removed at the end of this step.
Next steps
- Try the Docusign MCP server with GitHub (Copilot) to explore its capabilities in Microsoft Visual Studio Code.
- Try the Docusign MCP server with Anthropic (Claude) to explore its capabilities.