
Using Claude Code with Docusign MCP Connector
Claude Code is an agentic command-line interface (CLI) and developer tool that brings the reasoning capabilities of Anthropic’s Claude models directly into your local development environment. By functioning as a coding assistant within your IDE, it bridges the gap among the planning, execution, debugging, and API integrations.
Benefits of using Claude Code with Docusign MCP Connector
Integrating the Docusign Model Context Protocol (MCP) with Claude Code allows you to extend the AI’s capabilities beyond simple text generation. By connecting the Docusign MCP Connector, you unlock several advantages:
- Real-time API Interaction: Instead of manually looking up documentation, Claude can directly query Docusign’s API schema to understand available endpoints and parameters.
- Context-Aware Automation: Claude can write code for listing envelopes, checking document statuses, or retrieving templates directly from your Docusign account without you leaving the terminal.
- Seamless Integration: Claude Code can generate, test, and refine integration code that utilizes the Docusign API or SDK, ensuring that the code is compatible and works with your Docusign account configuration.
Custom Connector Method
Before adding a custom connector to Claude, you must first create an application within your Docusign Apps and Keys page. Please ensure you complete the following steps before configuring the MCP (Model Context Protocol) server:
-
Create an App: Generate a new application and copy the Integration Key (IK).
-
Generate a Secret: Add a Client Secret and copy the value immediately (it will not be visible later).
-
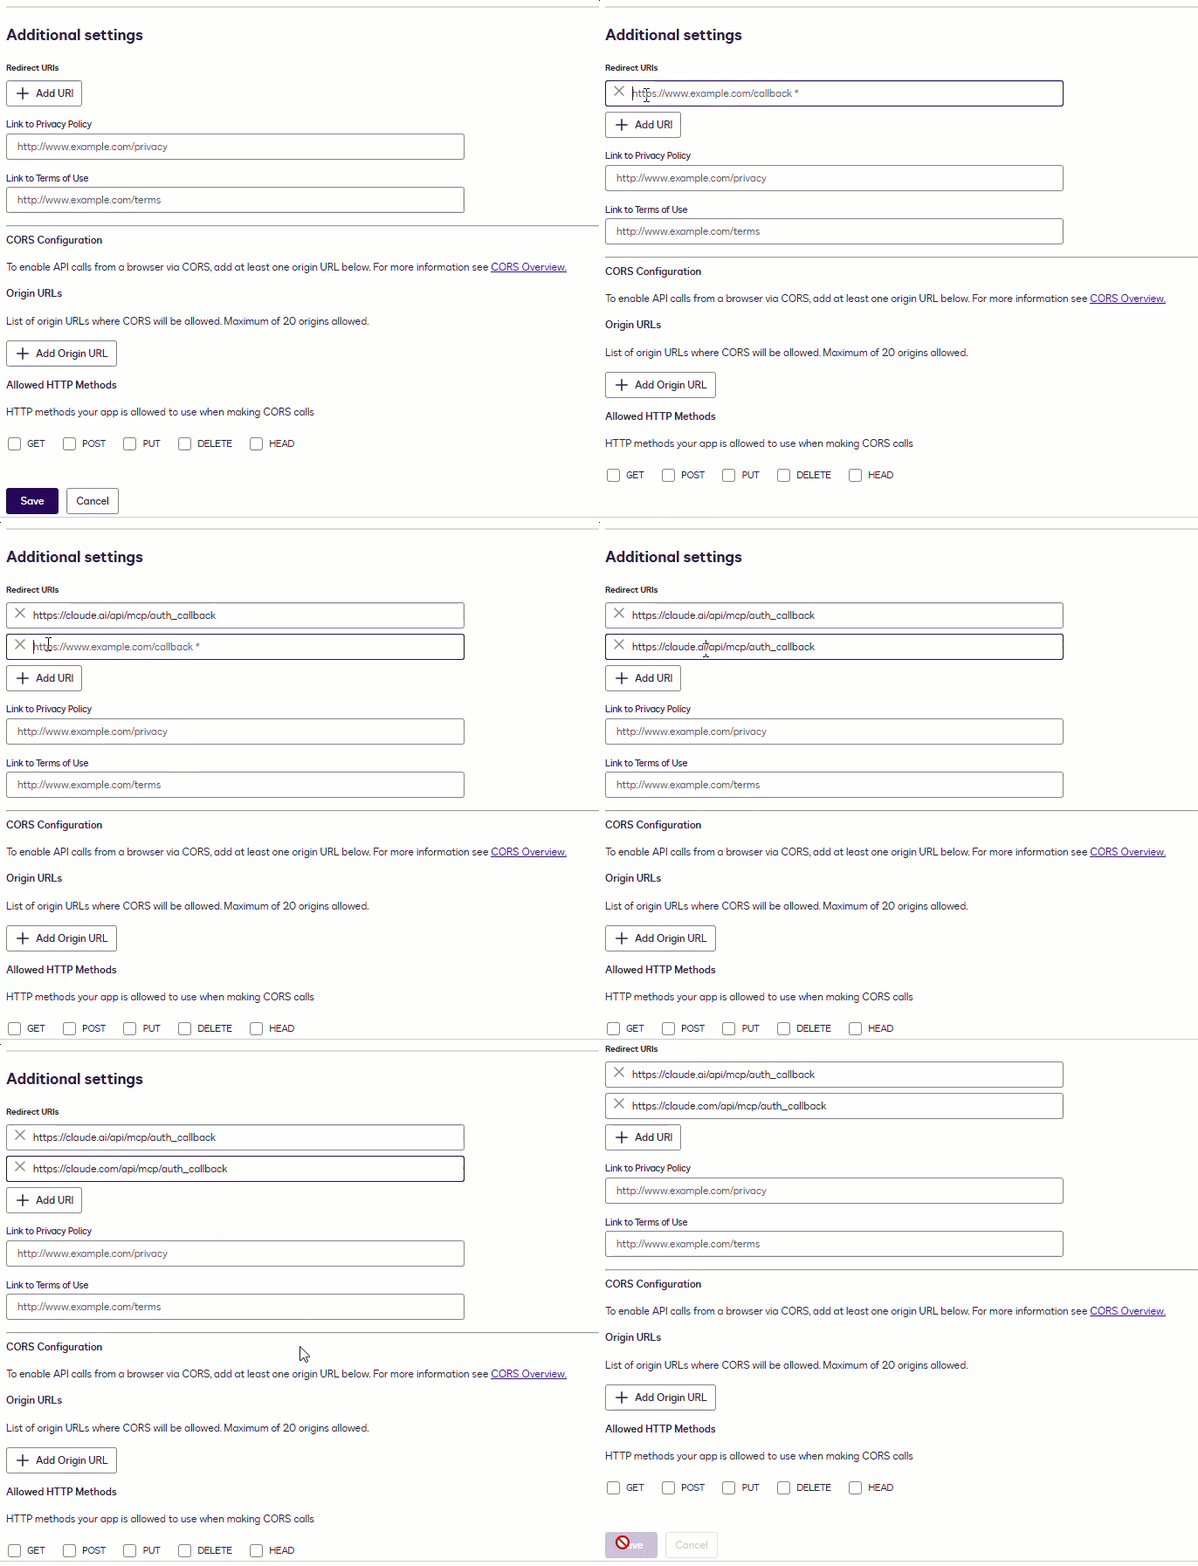
Set Redirect URIs: Configure the following Redirect URI within the app settings to ensure proper authentication.
- https://claude.ai/api/mcp/auth_callback
- https://claude.com/api/mcp/auth_callback
Setup Procedure
Follow the process below to complete these configuration steps:
-
Go to the Apps and Keys of your Docusign developer or production account.
-
Select Add App and Integration Key.
-
Create a new IK with your desired name (example: “Claude Cowork”).
-
Copy the Integration Key value.
-
Select Add Secret Key (it will not be visible later).
-
Select + Add URI and add the following two URIs in Redirect URIs section:
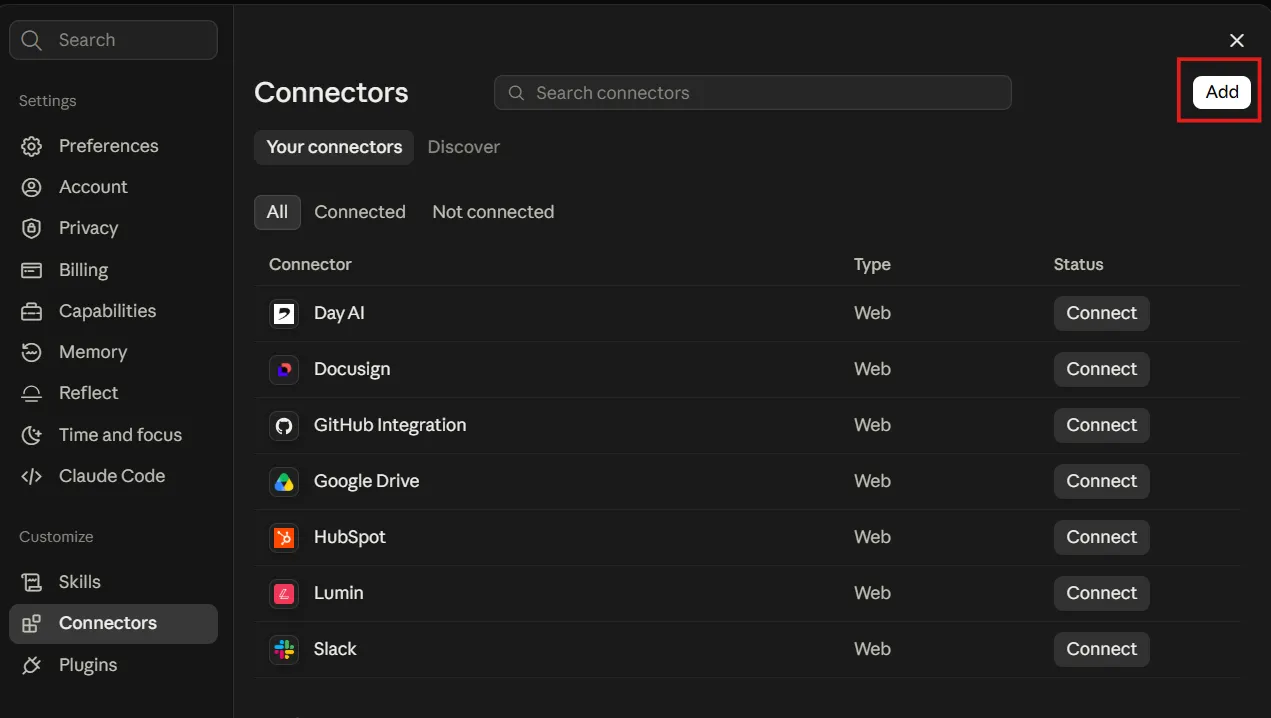
Step 1. Open Claude Desktop
Go to Avatar > Settings > Connectors and select Add.
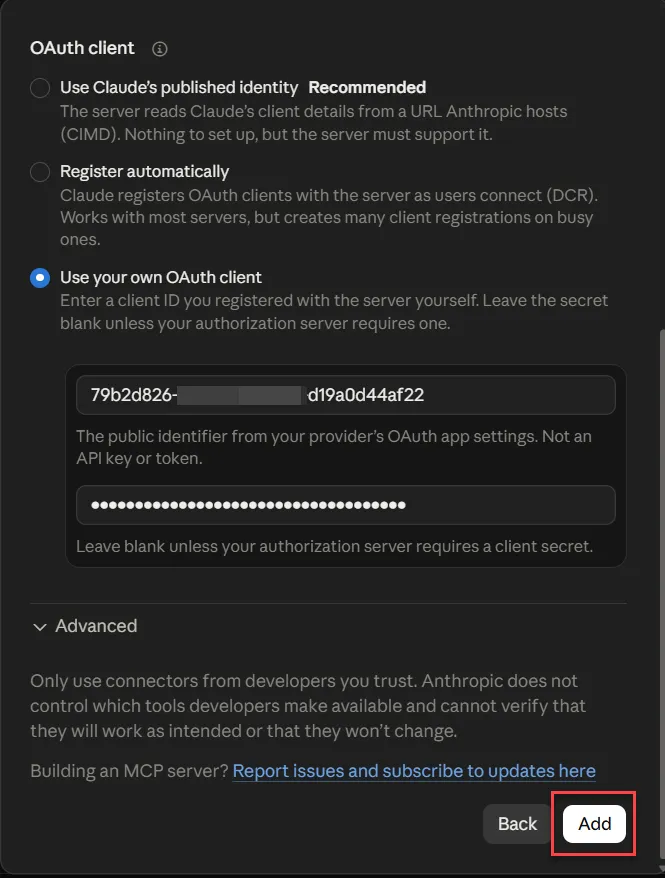
Step 2. Configure Custom Connector
Follow the steps:
- Enter a name for the MCP connector.
- Enter the MCP server URL as
https://mcp-d.docusign.com/mcp - Select Continue.
- Select Continue anyway.
- Under OAuth client section, select Use your own OAuth client.
- Enter the generated Integration Key (IK) as OAuth client ID.
- Enter the generated secret key as OAuth client secret.
- Select Add.
- Select Connect.
Step 3. Sign in and Grant Access
- Sign in to your demo Docusign account.
- If you created the app in production environment, sign in to your Docusign production account.
- Select Allow Access.
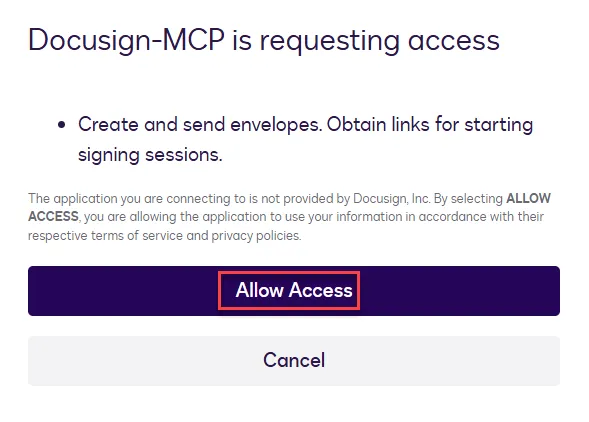
Connecting your Docusign account with Claude requires granting specific permissions to allow the integration to perform tasks on your behalf. These permissions, as shown in the authorization screen, are categorized to ensure Claude can provide comprehensive support across your Docusign account.
When you select Allow access, you authorize the Claude application to interact with various Docusign features:
-
Document & Envelope Management: Claude can create and send envelopes, search through existing documents, and obtain signing links to start sessions.
-
Workflow Integration: The integration gains the ability to create and update Web Forms, and access forms within Docusign Rooms or Docusign for Real Estate.
-
Account & User Context: Claude can read your account details, user details, and group lists to understand your users and the categorized groups.
-
Specialized API Access: This includes permissions to make direct calls to the different API and manage search and archive settings for your records.
The complete list of MCP tools available in demo and production environments are listed in MCP tools section.
Step 4. Run a test prompt
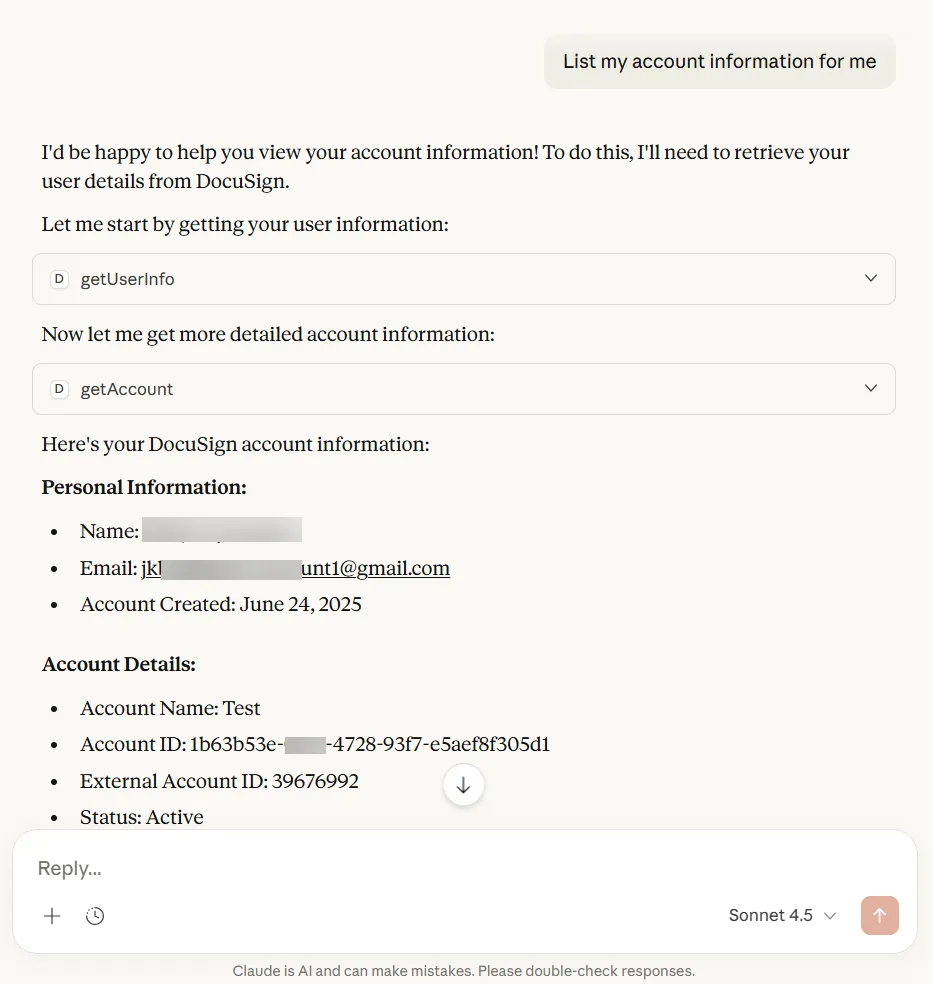
Verify the MCP connection by entering a prompt such as: “List my account information for me”. If successful, Claude will list your Docusign account details with available tools such as getAllAgreements, triggerWorkflow, getTabGroups, and more.
Note: The wording of AI responses may differ between AI platforms, but the data and results should be the same.
Configuring Claude Code in Visual Studio Code
Prerequisites: Complete the configuration of the Docusign MCP server using Custom Connector method.
Complete the following steps to set up the environment and authenticate your session.
- Launch Microsoft Visual Studio Code.
- Navigate to the Extensions view and search for “Claude Code for VS Code.”
- Select Install to add the extension to your IDE.
- Create a new project folder on your local machine and open it in VS Code (File > Open Folder).
- Open the integrated terminal by selecting Terminal > New Terminal.
- Initiate the Claude Code by entering “
claude” in the terminal. Note: If the command is not recognized, run:npx @anthropic-ai/claude-code - When prompted, select “Yes, I trust this folder” to allow Claude Code to access your local folder and files.
- Authenticate your session by typing
/loginand pressing Enter. - Select your subscription type.
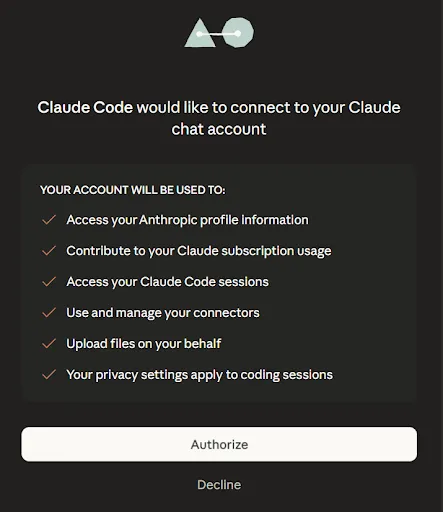
- Follow the browser prompt to select Authorize and link your account.
- To verify the connection, type a test message such as:
"Hello, are you there?" - Ensure Claude responds successfully.
Your environment is now authenticated by Claude and ready for MCP integration.
Adding the Docusign MCP Server in Claude Code
Once Claude Code is running, you can access the Docusign MCP server to bridge the gap between the AI and your Docusign account.
-
Activate the Connector: In the Claude Code terminal, type
Docusignand press Enter. -
Confirm Connection: When prompted to add or use the MCP tool, select Yes to proceed. Claude will then initialize the server and display your Docusign account details (such as Account ID and Base URL) to confirm a successful connection.
-
View Available Tools: To see what actions Claude can now perform on your behalf, type:
"List the Docusign MCP tools".The terminal will display a list of available tools (e.g.,list_envelopes, get_template, create_envelope)available in your Docusign environment.Sample Prompts
-
Create a Node.js web app that uses the Docusign eSign SDK to send an envelope with a standard NDA pdf for signature.
-
List the last five envelopes I sent and tell me their status.
Claude will use the MCP connector to pull the necessary data and write the integration code directly into your workspace.
Next steps
- Try the Docusign MCP server with GitHub (Copilot) to explore its capabilities in Microsoft Visual Studio Code.