
How to bulk send envelopes with merge fields and data writeback
This topic demonstrates how to use the Apex Toolkit to bulk send envelopes with merge fields. Merge fields work differently with bulk sending. The following code will demonstrate how to configure your bulk envelopes with merge fields that write data back to your Salesforce objects.
Prerequisites
- Install the Docusign eSignature for Salesforce managed package.
- Create a subdomain for your Salesforce organization by enabling “My Domain.”
- Select the Docusign Setup tab and complete the login step.
Required data
Running the code in this how-to requires this data:
Step 1. Create your template with merge fields
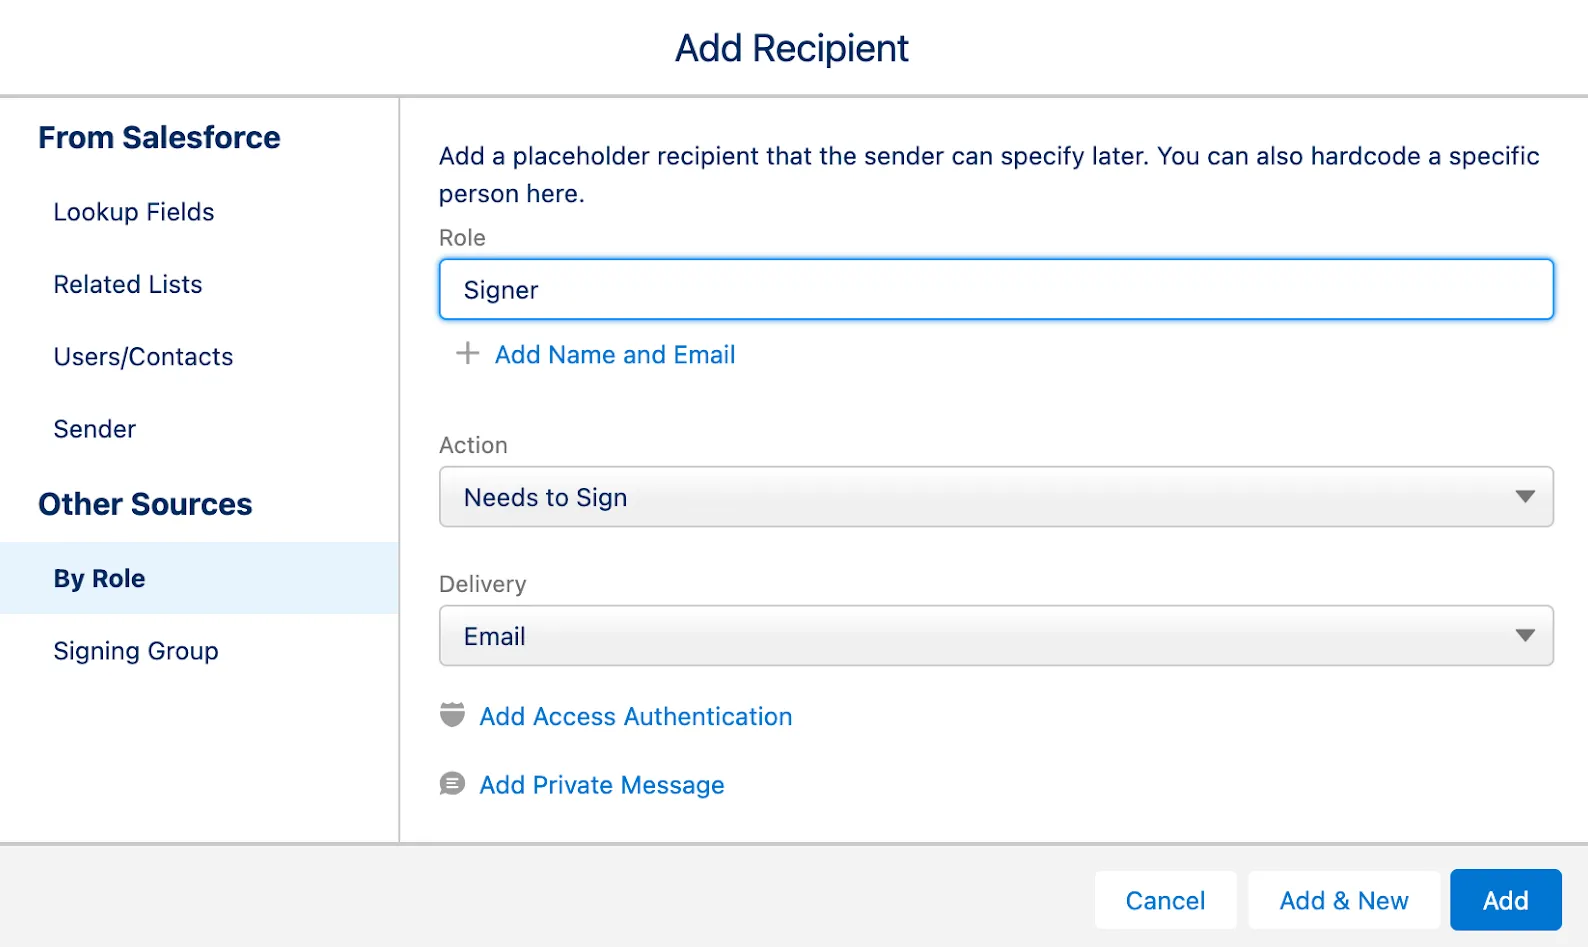
Create a template in the Docusign Apps Launcher. The code in this example requires that your template has a recipient defined by the role “Signer.” If you don’t already have merge fields in your Salesforce account, go to the Merge Fields step while editing your template to create merge fields. The source object for all of the new merge fields should be the Contact object and you will need to create 3 new merge fields, one for each of the following fields on the Contact object: First Name, Last Name, and Title. Later in this example you will build a bulk contact list of recipients whose information will come from Contacts in Salesforce and the merge fields will use these Contacts as their source objects. Be sure to select Allow Writeback to Salesforce when you create your merge fields. Place the fields on the document in the Place fields step.
Step 2. Create your envelope custom fields
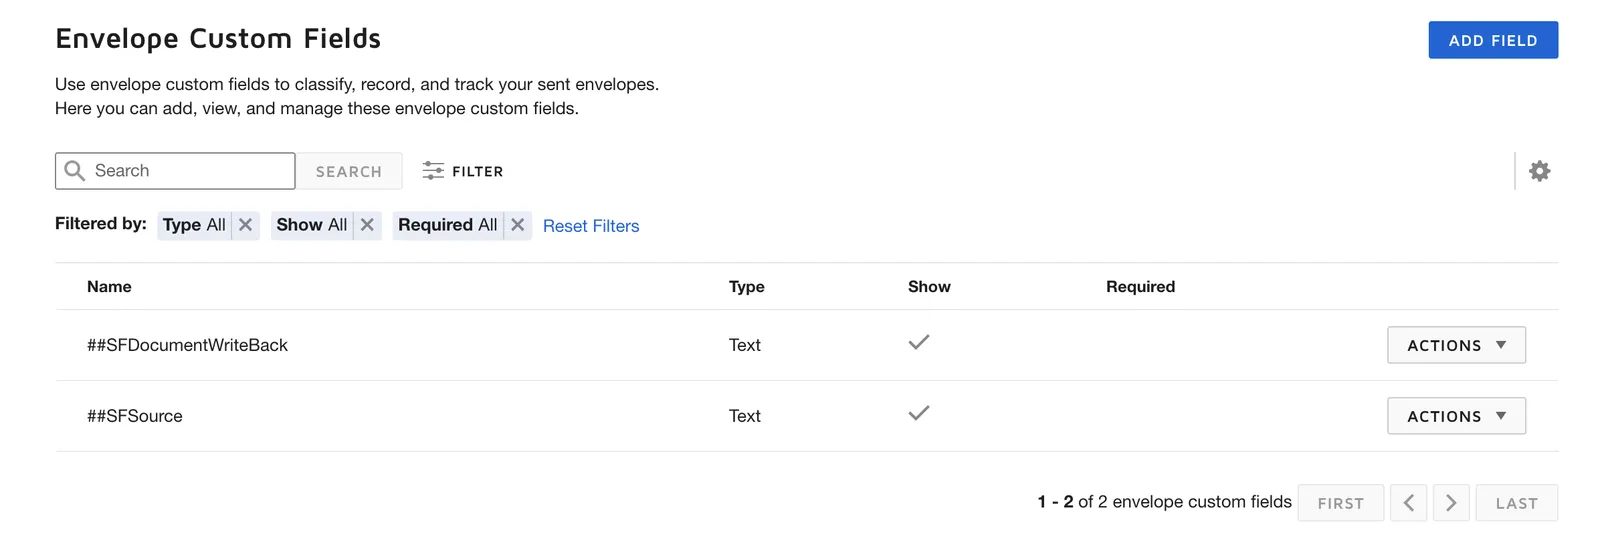
Create two envelope custom fields in your Docusign account. Go to Docusign eSignature Settings and select Envelope Custom Fields in the Signing and Sending section. Add two fields with the field type “Text.” One of the fields should have the name “##SFDocumentWriteBack” and the other should have the name “##SFSource.” You will add these fields to your bulk envelope in your Apex code.
Step 3. Add a custom field to your contact object in Salesforce
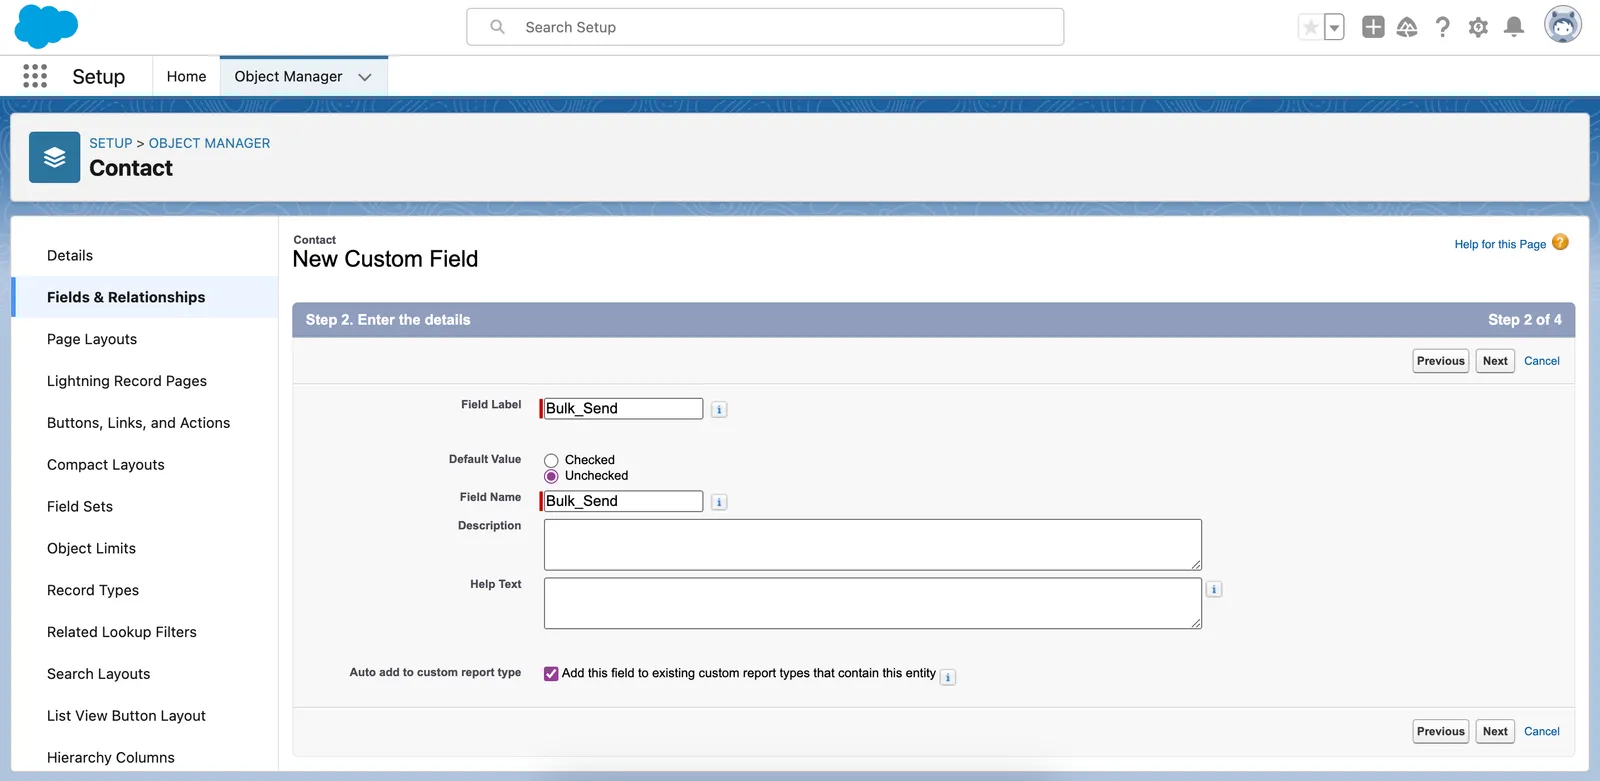
In this example, the bulk contact list is created with a SOQL query that looks for all Contacts that have the Bulk_Send__c field set to true. Bulk_Send__c is a custom field on the Contact object. To add a custom field, open the Object Manager and find the Contact object. Select Fields & Relationships and select New. Choose Checkbox for the data type and name the field Bulk_Send as shown in the accompanying screenshot. Salesforce appends __c to the names of custom fields and objects, so when you access the field through Apex code, you will use Bulk_Send__c.
Step 4. Build your bulk contact list
Create the bulk send list with the contact information for each recipient. This list may be based on any group construct and contains copies of the envelope to be sent. A recipient note, authentication options, and email subject and message may be set for each copy, but each copy must have exactly one recipient.
In this example, the contact list is built from a SOQL query that looks at the value of the Bulk_Send checkbox field from the previous step. Contacts with the checkbox checked will be added to the Bulk List. For the purposes of this example, the list is limited to five recipients.
The accompanying code demonstrates how to create a new envelope definition for each contact in the bulk list. Create two new dfsle.CustomField objects to match the envelope custom fields created in step 2. Set the value of the custom field named ##SFSource to the ID of the Contact concatenated with Contact. Set the value of the custom field named ##SFDocumentWriteback to ID of the Contact concatenated with 1. These values are required to allow data writeback in the merge fields on the envelope. Use the dfsle.Envelope.withCustomFields method to add the custom fields to the bulk copy. Be sure to add the ‘Signer’ role to the recipients using the withRole method to match the role in your template.NamePDF0
Note: Each created bulk list persists both in Salesforce and Docusign and may be reused to send multiple envelopes. The list definition can be updated when the underlying group membership changes with dfsle.BulkSendService.updateLists, or it may be removed with dfsle.BulkSendService.deleteLists when no longer relevant.
Step 5. Bulk send the envelopes
Once a list has been created, create an envelope with the document(s) you wish to send. You can use a Docusign template as the document or use a document that leverages Auto-place (anchor tagging) to add a recipient’s information automatically to generic tags within a document.
Be sure to replace the value for myTemplateId with the ID of the template created in step 1. To find the template ID, go to the Docusign Apps Launcher and choose the Docusign Envelope Templates tab. Select the template you want to use and copy the Docusign template ID GUID under the Details tab.
Next, use the dfsle.BulkSendService.sendEnvelope method to bulk send the envelope to each member in the list you created previously, as demonstrated in the accompanying code. These steps need to be done within an @future method to prevent the code from failing due to Apex’s DML and callout limitations.
Step 6. Execute your methods
To execute your code, go to the Developer Console in Salesforce, open the Debug menu, then select Open Execute Anonymous Window. Type the accompanying code in the window and select Execute.
View the source code for this how-to on GitHub:
Expected response
If your API call is successful, envelopes will be sent to the emails of the Salesforce contacts in your bulk list. When the recipient opens the envelope, they will see a tab containing the name of the opportunity that was used to create the merge field. If the recipient edits the text in the tab, the opportunity name in your Salesforce org will be updated accordingly.
Next steps
- See all available Apex Toolkit How-to guides.
- Learn more about Bulk sending envelopes.
- See How to bulk send envelopes.
- Learn How to send an envelope with merge fields.
- See How to perform unit testing to ensure that you have adequate code coverage.