
Salesforce Client Authentication
Developing with the CLM API is only available for CLM customers with a production account. To purchase a plan to gain access to the CLM API, contact Docusign Sales.
Salesforce clients must authenticate by using Web Token (JWT) Grant. However, before you authenticate, you first need to configure your application’s connection to Docusign CLM.
Prerequisites
Before you can authenticate your Salesforce client, you must:
- Have a Salesforce developer account.
- Have a Docusign developer account.
- Have created and configured an app in your Docusign Developer Account by following the steps in Building a Docusign integration.
- Have a Docusign CLM account.
- Have installed a package that creates custom metadata and written Apex code that uses this package. To get started quickly, you can download this example package. For more information about Apex, see the Apex Toolkit Overview.
- Configure your Salesforce client to connect to Docusign.
Required data
To authenticate your Salesforce client, you will need this information:
Configure your Salesforce client to connect to Docusign
To configure your Salesforce client to connect with Docusign, you need to perform the following steps in the Salesforce web application.
Set up custom metadata in Salesforce
Deploy the custom metadata and Apex package to Salesforce
-
If you have not already downloaded the custom metadata and Apex package, download it now.
-
Deploy the files in the package to Salesforce.org. You can use Workbench for the installation.
-
Zip all of the files so that the folders and the .XML file in the src folder are at the root of the zip file.
-
Log in to Workbench and select Migration > Deploy.
-
Select the ZIP file that you downloaded. Check the Single Package checkbox and select Next.
-
Select Deploy.
Add your Docusign information to Salesforce
After you have successfully deployed the source files to your Salesforce organization, you need to add your Docusign information, such as your Docusign API User ID and API Account ID, to Salesforce as custom metadata. These values are used to generate the access token and connect to Docusign.
Log in to the Salesforce web application use these steps to add your Docusign information:
- Select Setup > Custom Metadata Types.
- Under DocusignRESTSettings, select Manage Records.
- Enter the values for your Docusign instance in the following settings:
- DSAccount: Enter the Docusign API Account ID.
- DSUserName: Enter the Docusign User ID.
- RequestIntegratorKey: Enter the Integration Key.
- RequestPrivateKey: Enter the Private Key you created when you created and configured your app in your Docusign Developer Account.
Set up Remote Site URLs in Salesforce
Next, in the Remote Site Settings area of the Salesforce web application, add the following Docusign URLs as Remote Site URLs:
https://account-d.docusign.comfor demo accounts.https://account.docusign.comfor production accounts.- The appropriate REST API URL for your environment. You can find this in CLM Admin in the Integrations section of the System Domains page.
Obtain consent to impersonate the user for API calls
Next, you need to ask the Docusign user to grant consent for your app to perform actions on their behalf. For service integrations, you can set up a service user and grant consent on this user’s behalf.
Note: You will need to request special CLM-required scopes.
To complete this step, open this URI in a browser:
Make sure that:
- For the
client_id, you substitute the correct Integration Key forYOUR_INTEGRATION_KEY. - The value for the
redirect_uriparameter matches the redirect URI configured for the Integration Key in your Docusign Developer Account.
When you open the URL in your browser, a consent screen displays. Select Accept.
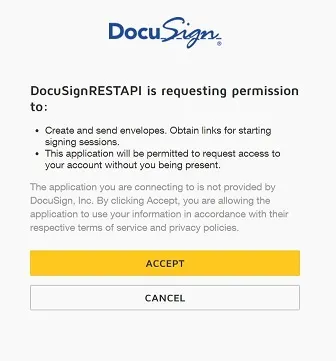
After you select Accept, you will be redirected to the redirect URI you specified.
Next steps
To get started with using CLM objects, see Object API.