
Skip to navigation

How to bulk upload agreements

View as Markdown

This topic demonstrates how to bulk upload agreements using Agreement Manager API.

Required data

Running the code in this how-to requires this data:

Data elementDescription
{API_ACCOUNT_ID}A GUID value that identifies your account. This value is automatically generated by Docusign for any account you create. Copy the value from the API Account ID field on the Apps and Keys page.
{BASE_PATH}A string value that forms the root of the URL required to make API calls. The base path value in the example code is set to target the developer environment at
https://<domain>/v1
Where <domain> is api-d.docusign.com for the developer environment and api.docusign.com for production.

Step 1. Obtain your OAuth token

To make the API call shown in this how-to, you need a valid OAuth access token. Docusign supports access tokens for three different OAuth grant types: Authorization Code Grant, Implicit Grant, and JSON Web Token (JWT) Grant. Choose the OAuth grant type appropriate for your scenario.

Agreement Manager OAuth access tokens are the same ones used for our eSignature REST API, although you must request one or more Agreement Manager scopes to call the Agreement Manager API. The endpoint calls made in this how-to require that you request the Agreement Manager-specific adm_store_unified_repo_read scope when obtaining your access token.

See Agreement Manager Authentication for details and the full list of Agreement Manager scopes.
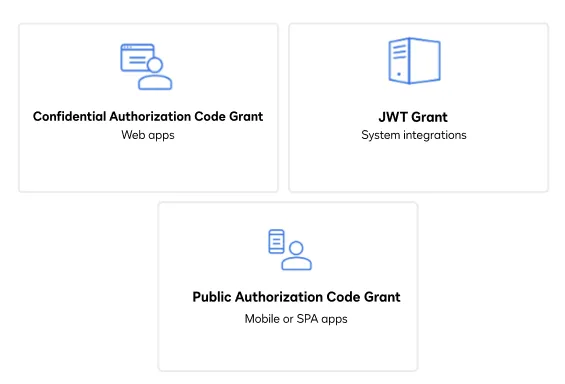
Three icons that represent the three methods a user can use to obtain an OAuth token: JSON Web Token (JWT), Public Authorization Code Grant (ACG), and Confidential Authorization Code grant

Step 2. Create bulk upload job and extract upload URLs

After you have a valid OAuth access token, you are ready to create a new bulk upload job. Make sure to substitute your valid OAuth access token for {ACCESS_TOKEN}, and to provide your base path and account ID for {base_path} and {account_id}. This example uses 5 included documents; after the bulk upload job is created, one upload URL will be returned for each. Record these upload URLs and the bulk upload job ID, which will be needed for the next step.

printf \
'{
"job_name": "Example bulk upload job",
"expected_number_of_docs": 5,
"language": "en-US"
}' >> $request_data
curl --request POST ${base_path}/accounts/${account_id}/upload/jobs \
--header "Authorization: Bearer ${ACCESS_TOKEN}" \
--header "Accept: application/json" \
--header "Content-Type: application/json" \
--data-binary @${request_data} \
--output $response
# Extract job ID and upload URLs for each document
job_id=$(cat "$response" | grep -o '"id":"[^"]*' | head -1 | cut -d'"' -f4)
upload_urls=$(cat $response | grep -o '"upload_document":"[^"]*' | cut -d'"' -f4)

Step 3. Upload documents

Once the bulk upload job is created, you can begin adding documents by making PUT requests with the file binaries to the upload URLs returned in the previous step’s response.

# Array of demo documents to upload
declare -a demo_files=(
"demo_documents/World_Wide_Corp_Battle_Plan_Trafalgar.docx"
"demo_documents/World_Wide_Corp_lorem.pdf"
"demo_documents/doc_1.html"
"demo_documents/Welcome.txt"
"demo_documents/Id.jpg"
)
# Convert to array (cross-platform: works on macOS and Linux)
upload_urls_array=()
while IFS= read -r url; do
upload_urls_array+=("$url")
done <<<"$upload_urls"
# Upload each file
for i in "${!demo_files[@]}"; do
file_path="${demo_files[$i]}"
upload_url="${upload_urls_array[$i]}"
# Extract filename from path
filename=$(basename "$file_path")
if [[ ! -f "$file_path" ]]; then
echo "Skipping $filename - file not found: $file_path"
continue
fi
if [[ -z "$upload_url" ]]; then
echo "Skipping $filename - no upload URL found"
continue
fi
case "$filename" in
*.docx)
content_type="application/vnd.openxmlformats-officedocument.wordprocessingml.document"
;;
*.pdf)
content_type="application/pdf"
;;
*.html)
content_type="text/html"
;;
*.txt)
content_type="text/plain"
;;
*.jpg|*.jpeg)
content_type="image/jpeg"
;;
*)
content_type="application/octet-stream"
;;
esac
echo "Uploading $filename..."
# Make PUT request with binary file content and required headers.
curl --request PUT "$upload_url" \
--header "x-ms-blob-type: BlockBlob" \
--header "x-ms-meta-filename: ${filename}" \
--header "Content-Type: ${content_type}" \
--data-binary @"$file_path"
done

Step 4. Mark the bulk upload job complete

After uploading each document to the bulk upload job, call the POST BulkJob: uploadCompleteBulkJob endpoint to trigger ingestion of the documents and AI extraction.

View the source code for this how-to on GitHub: Bash, C#, Java, PowerShell.

curl --request POST "${base_path}/accounts/${account_id}/upload/jobs/${job_id}/actions/complete" \
--header "Authorization: Bearer ${ACCESS_TOKEN}" \
--header "Accept: application/json" \
--header "Content-Type: application/json" \
--output "$response"

Expected response

If you run this code example from our Quickstart or launcher projects, you should see a JSON response similar to the code shown.

Sample response
{
"id": "8d04f00b-xxxx-xxxx-xxxx-bd50c6345692",
"name": "Example bulk upload job",
"status": "UPLOAD_COMPLETE",
"status_enum": [
"OPEN",
"UPLOAD_COMPLETE",
"IN_PROGRESS",
"COMPLETE",
"FAILED",
"CANCELED"
],
"created_at": "2026-05-19T22:38:27.596695Z",
"modified_at": "2026-05-19T22:38:27.596695Z",
"expires_at": "2026-05-21T22:38:27.596695Z",
"ttl_period": "P2D",
"upload_settings": {
"ai_extraction": true
},
"metadata": {
"response_timestamp": "2026-05-19T22:38:51.558607395Z",
"response_duration": 51
}
}

Next steps