
Skip to navigation

How to request a signature with third-party notarization

View as Markdown
eSignature REST API 2.1 only

This topic demonstrates how to use the eSignature REST API to send a signature request with a third-party notary service using the Notary On-Demand feature.

Run this code example from our Quickstart or launcher projects: Bash, C#, Java, Node.js, PHP, PowerShell, Python, or Ruby.

Required data

Running the code in this how-to requires this data:

Data elementDescription
{API_ACCOUNT_ID}A GUID value that identifies your account. This value is automatically generated by Docusign for any account you create. Copy the value from the API Account ID field on the Apps and Keys page.
{BASE_PATH}A string value that forms the root of the URL required to make API calls. The base path value in the example code is set to target the developer environment at
https://<domain>/restapi
Where <domain> is demo.docusign.net for the developer environment and is the result of the GetUserInfo call in production.
{CLIENT_USER_ID}A string value that serves as an identifier of an individual signer throughout the signing process. The combination of this value, the signer’s name, and the signer’s email is used to uniquely identify them.
Document to be signedYou must provide at least one document to be signed. Document used in this how-to:
{RECIPIENT_ID}A unique string value that you assign to identify each recipient. This value assigns tabs on a per-recipient basis.
{SIGNER_EMAIL}A string value for the email address where the signer will receive a notification of the signing request.
{SIGNER_NAME}A string value for the full name of the signer.

Step 1. Obtain your OAuth token

To make the API call shown in this how-to, you need a valid OAuth access token. Docusign supports access tokens for three different recommended OAuth grant types: Public Authorization Code Grant, Confidential Authorization Code Grant, and JSON Web Token (JWT) Grant. Choose the OAuth grant type appropriate for your scenario.

See Confidential Authorization Code Grant for guidance on your options to get an Confidential Authorization Code Grant OAuth token.
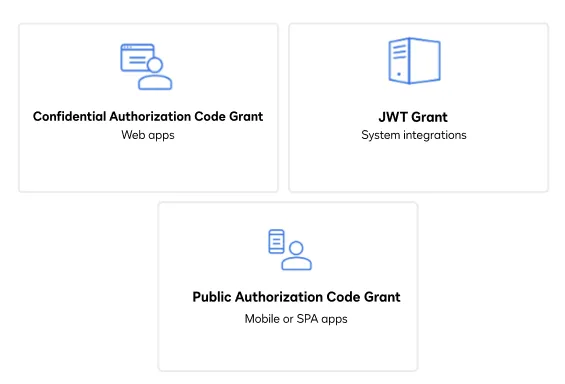
Three icons that represent the three methods a user can use to obtain an OAuth token: JSON Web Token (JWT), Public Authorization Code Grant (ACG), and Confidential Authorization Code grant

Step 2. Construct your API headers

After you have a valid OAuth access token, you are ready to construct the API headers that you will pass to the API call. Construct your headers like this, but make sure to substitute your valid OAuth access token for {ACCESS_TOKEN}.

declare -a Headers=('--header' "Authorization: Bearer ${ACCESS_TOKEN}" \
'--header' "Accept: application/json" \
'--header' "Content-Type: application/json")

Step 3. Construct the envelope definition

Next, create the request body. The envelope definition will include at least two recipients: one notary and up to four signers. For each recipient, be sure to include the required properties and objects listed in the tables below.

Notary recipient definition

The notary recipient definition must include, at minimum, these properties and objects.

Property or objectSet the value to
nameA placeholder value for the name of the notary. Can be set to any value, including Notary or an empty string.
After a notary has been assigned by the third-party provider, GET requests that return recipient information will include the name of the assigned notary in this property.
recipientIdA unique numeric or GUID value.
routingOrderA value that indicates the order in which the envelope is to be delivered to this recipient. This value must be the same as the routingOrder for all signer recipients whose document is to be notarized by this notary.
notaryTyperemote
notarySourceTypethirdparty
notaryThirdPartyPartneronenotary
recipientSignatureProviders.sealDocumentsWithTabsOnlyfalse
recipientSignatureProviders.signatureProviderNameds_authority_idv
tabsAny tabs that the notary must complete in the envelope. A notary recipient’s tabs must include, at minimum, both of the following:
  • A signHereTab or an initialHereTab
  • A notarySealTab

Signer recipient definition

The signer recipient definition must include, at minimum, these properties and objects.

Property or objectSet the value to
nameThe signer’s name.
emailThe email address to which the online notary session invitation will be sent.
clientUserIdA value unique to this user.
Although a clientUserId typically marks a recipient as signing in an embedded signing scenario, for Notary On-Demand, the signer receives an emailed link to the signing session rather than the signing session being embedded into your web application.
recipientIdA unique numeric or GUID value.
routingOrderA value that indicates the order in which the envelope is to be delivered to this recipient. This value must be the same as the routingOrder for the notary recipient who will notarize this signer’s document.
All signers with the same routingOrder are members of the same notary group and are required to be signed into the online notary session concurrently in order for the session to be completed.
notaryIdThe recipientId of the notary recipient who will notarize this signer’s envelope.
recipientSignatureProviders.sealDocumentsWithTabsOnlyfalse
recipientSignatureProviders.signatureProviderNameuniversalsignaturepen_imageonly
tabsAny tabs that the signer must complete in the envelope. A signer recipient must have, at minimum, a signHereTab.
printf \
'{
"emailSubject": "Please sign this document set",
"documents": [
{
"documentBase64": "' >> $request_data
cat $doc_base64 >> $request_data
printf '",
"name": "Order acknowledgement",
"fileExtension": "html",
"documentId": "1",
},
],
"recipients": {
"signers": [
{
"clientUserId": "1000",
"email": "'"${SIGNER_EMAIL}"'",
"name": "'"${SIGNER_NAME}"'",
"recipientId": "2",
"routingOrder": "1",
"notaryId": "1",
"tabs": {
"signHereTabs": [
{
"documentId": "1",
"xPosition": "200",
"yPosition": "235",
"pageNumber": "1",
},
{
"stampType": "stamp",
"documentId": "1",
"xPosition": "200",
"yPosition": "150",
"pageNumber": "1",
},
],
},
}
],
"notaries": [
{
"name": "Notary",
"recipientId": "1",
"routingOrder": "1",
"recipientSignatureProviders": [
{
"sealDocumentsWithTabsOnly": "false",
"signatureProviderName": "ds_authority_idv"
}
],
"tabs": {
"notarySealTabs": [
{
"xPosition": "300",
"yPosition": "235",
"documentId": "1",
"pageNumber": "1",
},
],
"signHereTabs": [
{
"xPosition": "300",
"yPosition": "150",
"documentId": "1",
"pageNumber": "1",
},
]
},
"notaryType": "remote",
"notarySourceType": "thirdparty",
"notaryThirdPartyPartner": "onenotary"
}
]
},
"status": "sent"
}' >> $request_data

Step 4. Call the eSignature REST API

Now that you have constructed your API headers and request body, make a POST request to the Envelopes:create endpoint and include the request body to send the envelope. Here’s how you make the call, but make sure to substitute your API account ID for {ACCOUNT_ID}.

View the source code for this how-to on GitHub: Bash, C#, Java, Node.js, PHP, PowerShell, Python or Ruby.

curl --data-binary @${request_data} \
--request POST ${base_path}/v2.1/accounts/${ACCOUNT_ID}/envelopes \
"${Headers[@]}" \
--output ${response}

Expected response

If you run this code example from our Quickstart or launcher projects, you should see a JSON response similar to the code shown.

On the developer environment, if Suppress emails to embedded signers is enabled in your account’s Signing Settings, notary session invitation emails are not sent to signers. On production, by default, enabling this setting does not prevent invitation emails from being sent. If you would like to enable this behavior for your account on production, contact Docusign Support. See Envelope Delivery for more information about the setting.

Sample response
{
"envelopeId":"7afe0361-xxxx-xxxx-xxxx-7c17623b0555",
"uri":"/envelopes/7afe0361-xxxx-xxxx-xxxx-7c17623b0555",
"statusDateTime":"2025-01-21T22:33:16.9870000Z",
"status":"sent"
}

Next steps