
How to bulk export user data
This topic demonstrates how to bulk export user accounts within an organization into a CSV (comma separated value) file.
Run this code example from our Quickstart or launcher projects: Bash, C#, Java, Node.js, PHP, PowerShell, Python, or Ruby.
Required data
Running the code in this how-to requires this data:
Step 1. Obtain your OAuth token
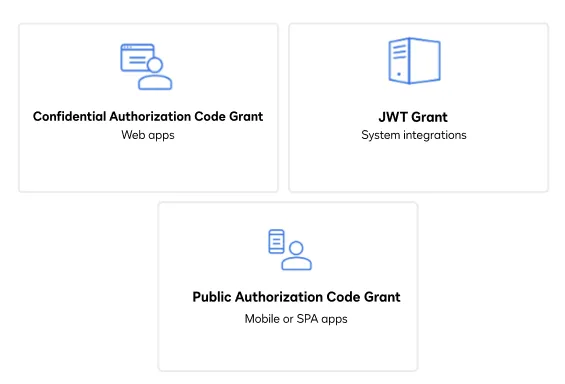
To make the API calls shown in this how-to, you need a valid OAuth access token. Docusign supports access tokens for three different recommended OAuth grant types: Public Authorization Code Grant, Confidential Authorization Code Grant, and JSON Web Token (JWT) Grant. Choose the OAuth grant type appropriate for your scenario.
Docusign Admin OAuth access tokens are the same ones used for our eSignature REST API, although you must request one or more Docusign Admin scopes to call the Docusign Admin API. The endpoint calls made in this how-to require that you request the Docusign Admin-specific user_write scope when obtaining your access token.
See Docusign Admin Authentication for details and the full list of Docusign Admin scopes.
Step 2. Construct your API headers
After you have a valid OAuth access token, you are ready to construct the API headers that you will pass to the API call. Construct your headers like this, but make sure to substitute your valid OAuth access token for {ACCESS_TOKEN}.
Step 3. Create the bulk export request
Next, begin the process of creating the bulk export list by calling the createUserListExport endpoint. You can retrieve the resulting CSV data in a future step.
Creating and provisioning the bulk export list can take some time, especially for large organizations spread out over several regions. You can check the status of your bulk export request by calling the getUserListExport endpoint, as demonstrated in the next step.
You can filter the users that will be added to the generated bulk export user list using the type parameter of the request body, which specifies the category of users within your organization that will be added to the generated list of user data. Possible values are:
organization_external_memberships_export: Returns a list of users with email addresses that are part of your organization’s domain(s), but with memberships in accounts that are not part of your organization.organization_memberships_export: Returns a list of all users with memberships in your organization’s accounts.organization_domain_users_export: Returns a list of all users within your organization’s domain(s).
Expected response
After a successful request, you will receive a response similar to this.
The important parts of the response are highlighted below:
If you receive a 401 - Unauthorized response, your access token is not valid for the endpoint. If you receive this error:
- Make sure that your access token has the
user_readscope. - Make sure that the calling user has admin rights.
Step 4. Check the request status
It can take some time for a bulk user export request to be fully created, depending on the number of users that it contains and the regions it encompasses. You can call the getUserListExport endpoint to check the status of your pending request and, if complete, obtain a URL that you can call to download the CSV file containing the export data.
Important: Be sure to replace the requestId value in the request with the ID of the bulk user export request that you created in the previous step.
Expected response
This call will return a response similar to this.
The important parts of the response are highlighted below:
Step 5. Download the exported user data
After the export is complete and you’ve obtained the URL to retrieve the bulk export data, you can download a CSV file of that data.
The results.url value returned by the status request made in the previous step will contain the full path for the URL where you can download the CSV data, but you can also create the request manually by calling the getUserListExport endpoint, as demonstrated in this example.
Expected response
Important: Make sure to replace the resultId placeholder with the results.id value you obtained in the previous step (or copy and paste the results.url value to completely replace the URL).
This API call will return a CSV file containing the list of user data, similar to this.
After downloading the CSV file, you can make edits to the list and either reimport it to update your user data or import it to a new account or organization. See How to add users via bulk import for details.
Next steps
- Run this code example from our Quickstart or launcher projects: Bash, C#, Java, Node.js, PHP, PowerShell, Python, or Ruby.
- See How to create a new active eSignature user
- Learn How to add users via bulk import
- See Docusign Admin concepts for more information on Docusign Admin capabilities and features.
- See how to Go-Live with a completed app and find the base path for API calls in the production environment.