
How to retrieve ID Evidence media
This topic demonstrates how to retrieve the image of an ID stored as part of the ID Verification (IDV) process. To retrieve such an image, you need its URL, which is part of the JSON response when you retrieve ID Evidence events.
Prerequisites
- If you do not see a sidebar link named Identity Verification under eSignature Settings in your Docusign account, you do not have ID Verification (IDV) enabled. See ID verification for information on enabling IDV in your account.
- You must enable ID Evidence storage.
- In your Docusign account, you must have a completed IDV envelope: you must have sent an IDV envelope, the recipient must have completed the IDV process, and they must have signed the envelope.
- In your locally downloaded Quickstart or launcher
/``configfolder, you must save your IDV envelope ID GUID in a file namedIDV_ENVELOPE_ID.
Run this code example from our Quickstart or launcher projects: Bash, PowerShell.
Required data
Running the code in this how-to requires this data:
Step 1. Obtain your OAuth token
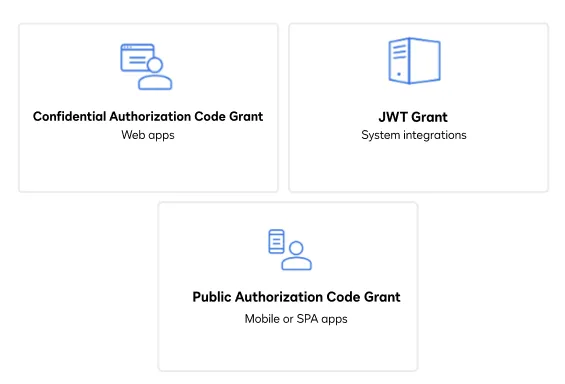
To make the API calls shown in this how-to, you need a valid OAuth access token. Docusign supports access tokens for three different recommended OAuth grant types: Public Authorization Code Grant, Confidential Authorization Code Grant, and JSON Web Token (JWT) Grant. Choose the OAuth grant type appropriate for your scenario.
See Confidential Authorization Code Grant for guidance on your options to get an Confidential Authorization Code Grant OAuth token.
Step 2. Retrieve your recipient ID GUID
To obtain your resource token in the next step, you must provide your recipient ID GUID in the request body. Call the EnvelopeRecipients:list endpoint with your {API_ACCOUNT_ID} and {IDV_ENVELOPE_ID} to retrieve your recipient ID GUID.
Step 3. Obtain your resource token
To call the ID Evidence API, you need a valid resource token. To obtain your resource token, call the EnvelopeRecipients:createRecipientProofFileResourceToken endpoint with your {API_ACCOUNT_ID}, {IDV_ENVELOPE_ID}, and {RECIPIENT_ID_GUID}.
Step 4. Construct your API headers
After you have a valid resource token, you are ready to construct the API headers that you will pass to the API call. Construct your headers like this, but make sure to substitute your valid resource token for {RESOURCE_TOKEN}.
Step 5. Call the ID Evidence API to retrieve event data
Now that you have constructed your API headers, call the Events:list endpoint with your {PROOF_BASE_PATH} and [RECIPIENT_ID_GUID} to retrieve ID Evidence event data for a recipient.
Step 6. Call the ID Evidence API to retrieve the ID image
Call your {COPY_OF_ID_FRONT_URL} to return the image of the front of your photo ID.
View the source code for this how-to on GitHub: Bash, PowerShell.
Expected response
If you run this code example from our Quickstart or launcher projects, you should see a text file saved to your local directory that contains the image of the front of your photo ID encoded in Base64 format.
You will need to use a Base64 decoder to convert the string into a binary image that can be displayed to the user
Note: The image of the front of your photo ID will have a honeycomb pattern superimposed on it and cannot be used to make additional IDV requests.
Next steps
- Run this code example from our Quickstart or launcher projects: Bash, PowerShell.
- Learn more about ID Evidence.
- See How to retrieve ID Evidence events.
- Send an envelope requiring ID Verification (IDV) for a recipient.
- See ID Evidence Q&A.
- See how to Go-Live with a completed app and find the base path for API calls in the production environment.