
Skip to navigation

How to embed an elastic signing agreement

View as Markdown

This topic demonstrates how to embed an agreement using an elastic template with a unique agreement link and dynamic content using the ClickWraps:createHasAgreed method.

Important: You must create, activate, and add dynamic content to a elastic template to complete this how-to.

Run this code example from our Quickstart or launcher projects: Bash, C#, Java, Node.js, PHP, PowerShell, Python, or Ruby.

Required data

Running the code in this how-to requires this data:

Data elementDescription
{API_ACCOUNT_ID}A GUID value that identifies your account. This value is automatically generated by Docusign for any account you create. Copy the value from the API Account ID field on the Apps and Keys page.
{BASE_PATH}A string value that forms the root of the URL required to make API calls. The base path value in the example code is set to target the developer environment at
https://<domain>/clickapi
Where <domain> is demo.docusign.net for the developer environment and is the result of the GetUserInfo call in production.
{CLICKWRAP_ID}A GUID value that identifies an individual elastic template. You can obtain this value by following the steps in How to get a list of elastic templates.
Elastic template dynamic contentElastic template dynamic content enables you to add customized field values to each instance of a elastic template agreement. This is the set of fields that appears on a given elastic template document within the INSERT DATA editor.
{CLIENT_USER_ID}A unique identifier for a user that should originate from your own system. Docusign uses this value to identify each user. Note that:
  • This value can be anything your backend system will use to track individual users. Examples include employee IDs, email addresses, and surrogate key values.
  • The Click API uses the client user ID, API account ID, and clickwrap ID to track which users have already accepted an elastic signing agreement.
  • An elastic template agreement will not appear again after it has been accepted with a given client user ID. The client user ID needs to be updated to a new, unique value each time the elastic template is embedded.

Step 1. Obtain your OAuth token

To make the API call shown in this how-to, you need a valid OAuth access token. Docusign supports access tokens for three different recommended OAuth grant types: Public Authorization Code Grant, Confidential Authorization Code Grant, and JSON Web Token (JWT) Grant. Choose the OAuth grant type appropriate for your scenario.

See Authentication for guidance on your options to get an OAuth token.
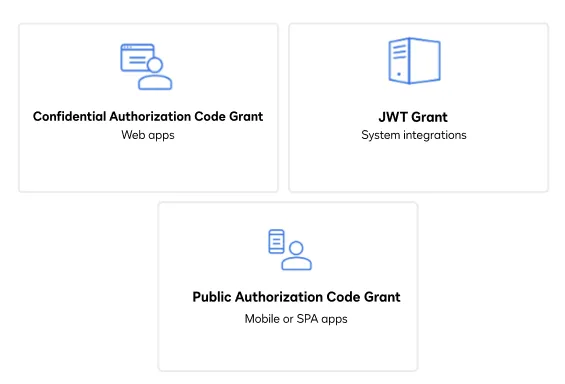
Three icons that represent the three methods a user can use to obtain an OAuth token: JSON Web Token (JWT), Public Authorization Code Grant (ACG), and Confidential Authorization Code grant

Step 2. Construct your API headers

After you have a valid OAuth access token, you are ready to construct the API headers that you will pass to the API call. Construct your headers like this, but make sure to substitute your valid OAuth access token for {ACCESS_TOKEN}.

declare -a Headers=('--header' "Authorization: Bearer ${ACCESS_TOKEN}"
'--header' "Content-Type: application/json"
'--header' "Accept: application/json")

Step 3. Construct the request body

Next, create the request body. The metadata provided in the gist matches the available dynamic fields in the INSERT DATA editor.

request_data=$(mktemp /tmp/request-cw-001.XXXXXX)
printf \
'
{
"clientUserId": "'"$client_user_id"'",
"documentData": {
"fullName": "'"$full_name"'",
"email": "'"$email_address"'",
"company": "'"$company_name"'",
"title": "'"$title"'",
"date": "'"$(date -I)"'"
}
}' >$request_data

Step 4. Call the Click API

Now that you have constructed your API headers and request body, make a POST request to the Click API and include the request body to populate the dynamic fields within your elastic signing agreement. Here’s how you make the call, but make sure to substitute your API account ID for {account_id} and elastic template ID for {clickwrap_id}.

Note: For compatibility with previous versions of the Click API, elastic templates use clickwrap endpoints.

View the source code for this how-to on GitHub: Bash, C#, Java, Node.js, PHP, PowerShell, Python, or Ruby.

response=$(mktemp /tmp/response-cw.XXXXXX)
curl --request POST https://demo.docusign.net/clickapi/v1/accounts/${account_id}/clickwraps/${clickwrap_id}/agreements \
"${Headers[@]}" \
--data-binary @${request_data} \
--output ${response}

Expected response

Copy the agreementUrl from the JSON response and paste it in the corresponding line in the HTML in the next step.

JSON
{
"accountId": "d4bb3256-xxxx-xxxx-xxxx-87abac8ebd46",
"clickwrapId": "b85992df-xxxx-xxxx-xxxx-e1c524e8a6bd",
"clientUserId": "1013ps1",
"agreementId": "4532d6d0-xxxx-xxxx-xxxx-521d3abba8c3",
"documents": [
{
"documentName": "Terms of Service",
"order": 1,
"fileExtension": "pdf"
}
],
"consumerDisclosureEnabled": true,
"agreementUrl": "https://demo.docusign.net/clickapi/v1/redeem?agreementToken=AcTZT8…P5gvB0",
"createdOn": "2022-10-07T16:19:17.7350578Z",
"status": "created",
"versionId": "869800a8-xxxx-xxxx-xxxx-997a7f6a5a8b",
"versionNumber": 1,
"settings": {
"displayName": "Terms of Service",
"hasDeclineButton": false,
"actionButtonAlignment": "left",
"mustRead": true,
"mustView": false,
"requireAccept": true,
"downloadable": true,
"sendToEmail": false,
"consentButtonText": "I Agree",
"allowClientOnly": true,
"format": "modal",
"documentDisplay": "document",
"statementAlignment": "bottom"
},
"documentData": {
"email": "larry.lee@mail.com",
"title": "General Counsel",
"fullName": "Larry Lee",
"company": "Tally",
"date": "2022-10-13T05:17:14-07:00"
"
}
}

Step 5. Write your HTML for embedding the elastic template

Write the code you need to embed your elastic template on your web page. This includes three HTML tags:

  • A <div> that identifies where on your web page the elastic template should render

  • Two <script> tags:

    • One that calls the Docusign elastic template JavaScript library

    • Another that calls the Docusign Clickwrap.render method from the JavaScript library

      • Paste the agreementUrl that is generated in the prior step
HTML
<div id="ds-terms-of-service"></div>
<script src="https://demo.docusign.net/clickapi/sdk/latest/docusign-click.js"></script>
<script>docuSignClick.Clickwrap.render({
agreementUrl: "https://demo.docusign.net/clickapi/v1/redeem?agreementToken=AcTZT8…P5gvB0",
onAgreed: function() {
// Triggered if the user has just agreed
}
}, "#ds-terms-of-service");
</script>

Expected response

You can paste the HTML gist with your unique agreementUrl into an HTML editor to preview your elastic template with dynamic content.
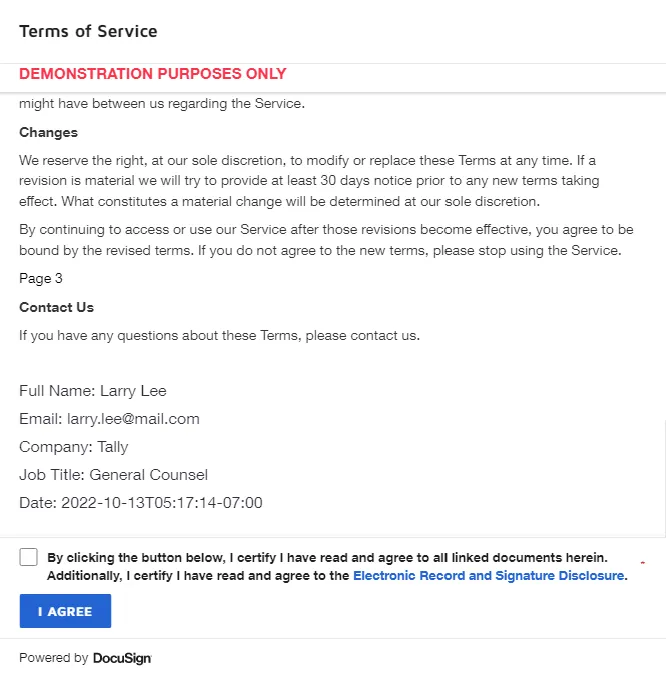
Previewing your elastic template

Next steps