
Customize elastic template fields
You can create customizable fields (also called tabs) within an elastic template using the dynamic content feature. Dynamic content enables you to add customized field values to each instance of a elastic signing agreement. For example, by defining the full name and email dynamic content for your elastic template, you can supply these values when you load an instance of it to show your user’s name and email within the agreement document.
Dynamic content field values are set when a URL for a elastic signing agreement is created or when it is embedded. They are not directly editable by users.
The following field types are supported:
Each dynamic content field type shares its value with all other fields of the same type in your document. For example, if you define two full name fields, they will both display the same value.
Dynamic content field data is stored in a documentData JSON element in your elastic template. The JSON structure of an elastic template with one or more dynamic content fields will look similar to the example below:
This topic contains the following sections:
- add dynamic content
- View elastic templates that contain dynamic content
- Set dynamic content as you generate the agreement
- Set dynamic content as you render the agreement
- Create custom dynamic field types
Add dynamic content to your elastic template
You can only add dynamic content to your elastic templates through the UI, rather than programmatically through the API.
To add dynamic content fields to your elastic template:
-
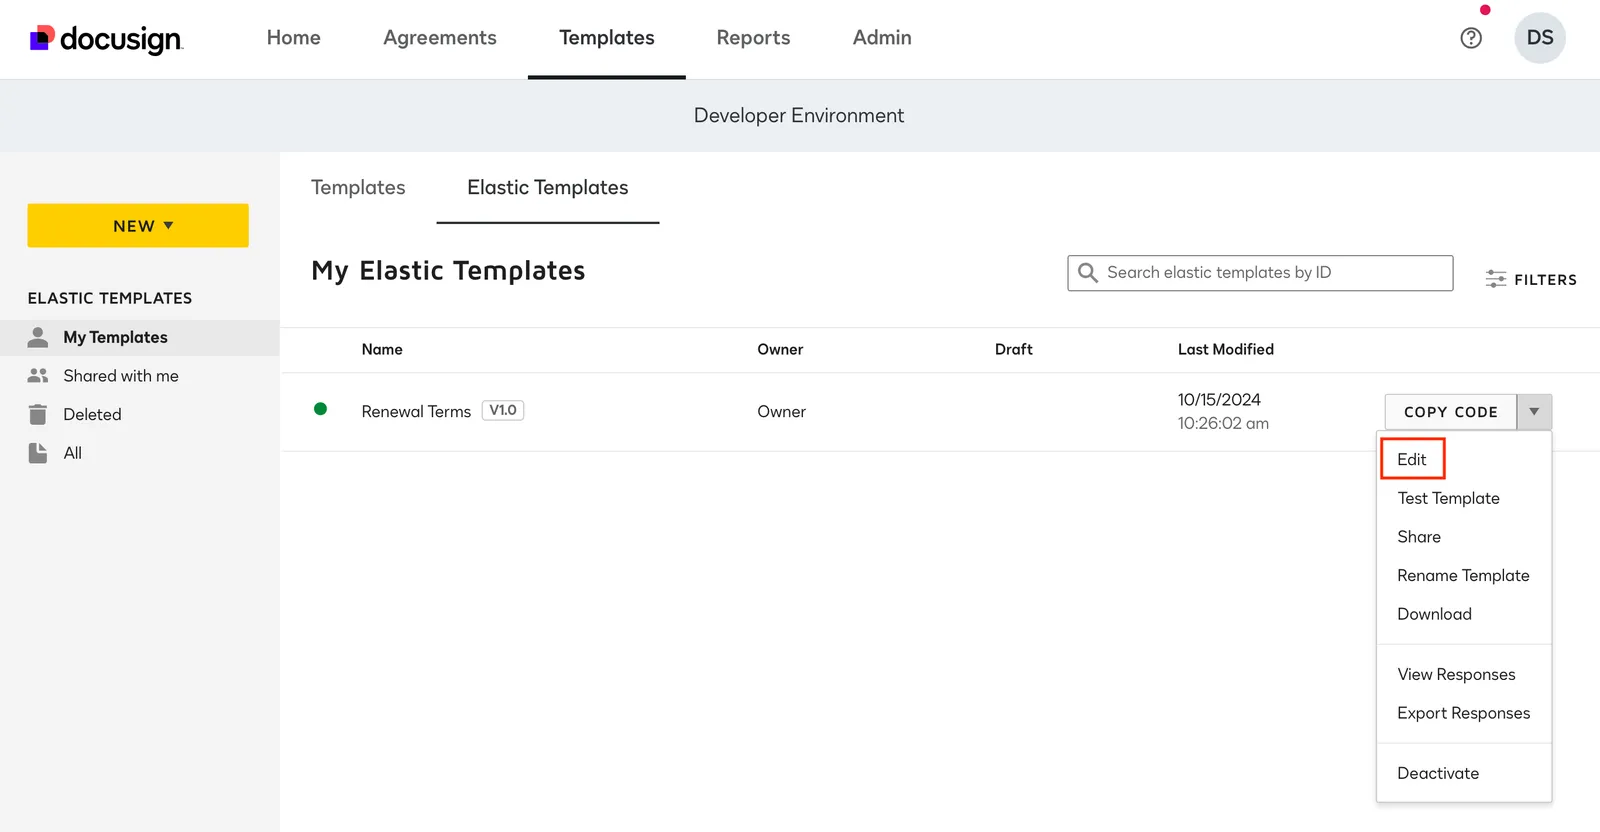
Open the Templates panel in the eSignature web app.
-
Select the Elastic Templates tab.
-
Open the menu to the right of your chosen elastic template’s COPY CODE button, then choose Edit.
-
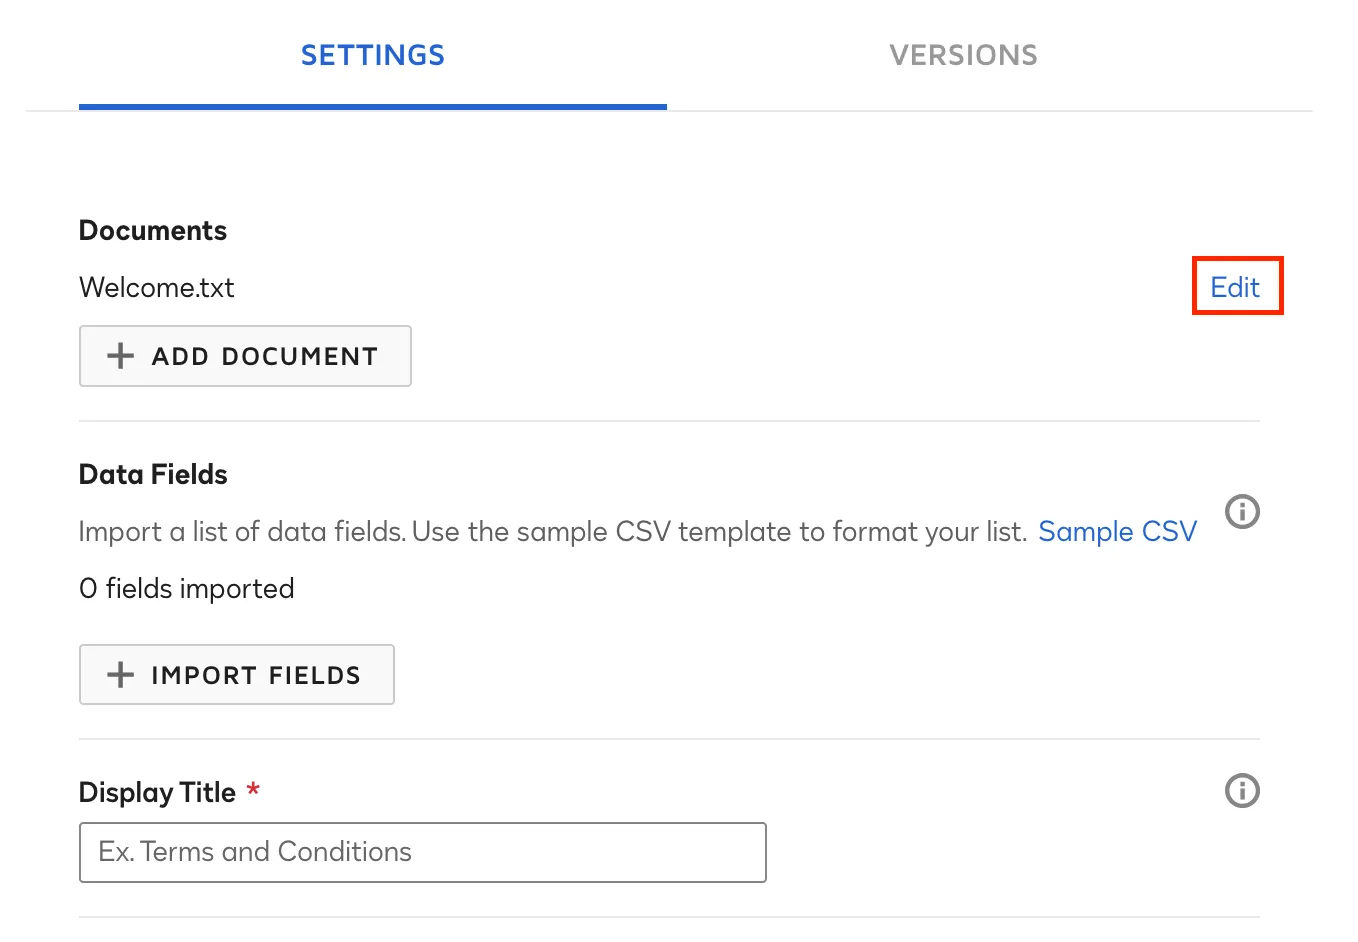
Select the document to which you will add the dynamic content, select Edit, and then Edit.
-
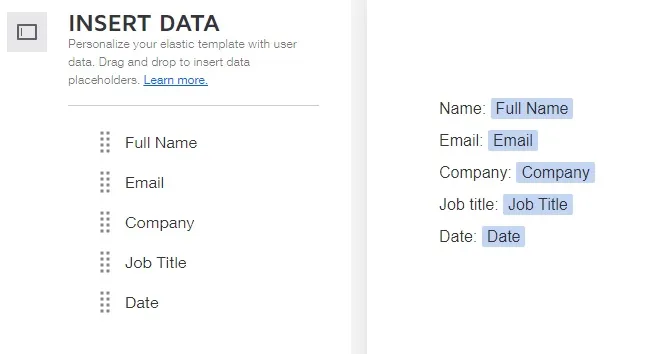
In the edit document window, the available fields are displayed in a panel at the left of the screen. Select or drag-and-drop them to add them to your document.
-
Select SAVE in the lower right corner of the screen.
-
Select SAVE on the Edit Documents window.
-
Select SAVE & CLOSE in the lower right corner of the screen.
-
Select an option on the Require Re-acceptance window and select SAVE. If you select Yes, returning users who have previously agreed to this elastic template must agree to it again.
-
Select an option on the Activate New Version window. If you select ACTIVATE NOW, the changes will immediately appear in all websites and apps where the elastic template is embedded.
View elastic templates that contain dynamic content
You can also embed elastic templates and display customized values for the dynamic content fields they contain.
There are two ways to generate elastic templates that contain dynamic content:
- Set dynamic content as you generate the agreement: In this method, you generate the agreement by passing in the dynamic content values as parameters for the ClickWraps:createHasAgreed API call. This sets the values as the agreement is created, making this the most secure method of setting and viewing dynamic content.
- Set dynamic content as you render the agreement: You can also choose to set your dynamic content values as you render the agreement.
Note: For compatibility with previous versions of the Click API, elastic templates use clickwrap endpoints.
Set dynamic content as you generate the agreement
To set customized values for your elastic template agreement’s dynamic content fields as you generate it, follow the steps below:
-
Select the COPY CODE button for the elastic template to display. It must be activated and contain dynamic content fields to set.
-
In the elastic template details from step 1 of the Copy Code dialog box, copy the
documentDataJSON element and paste it into a place where you can edit text, such as Notepad.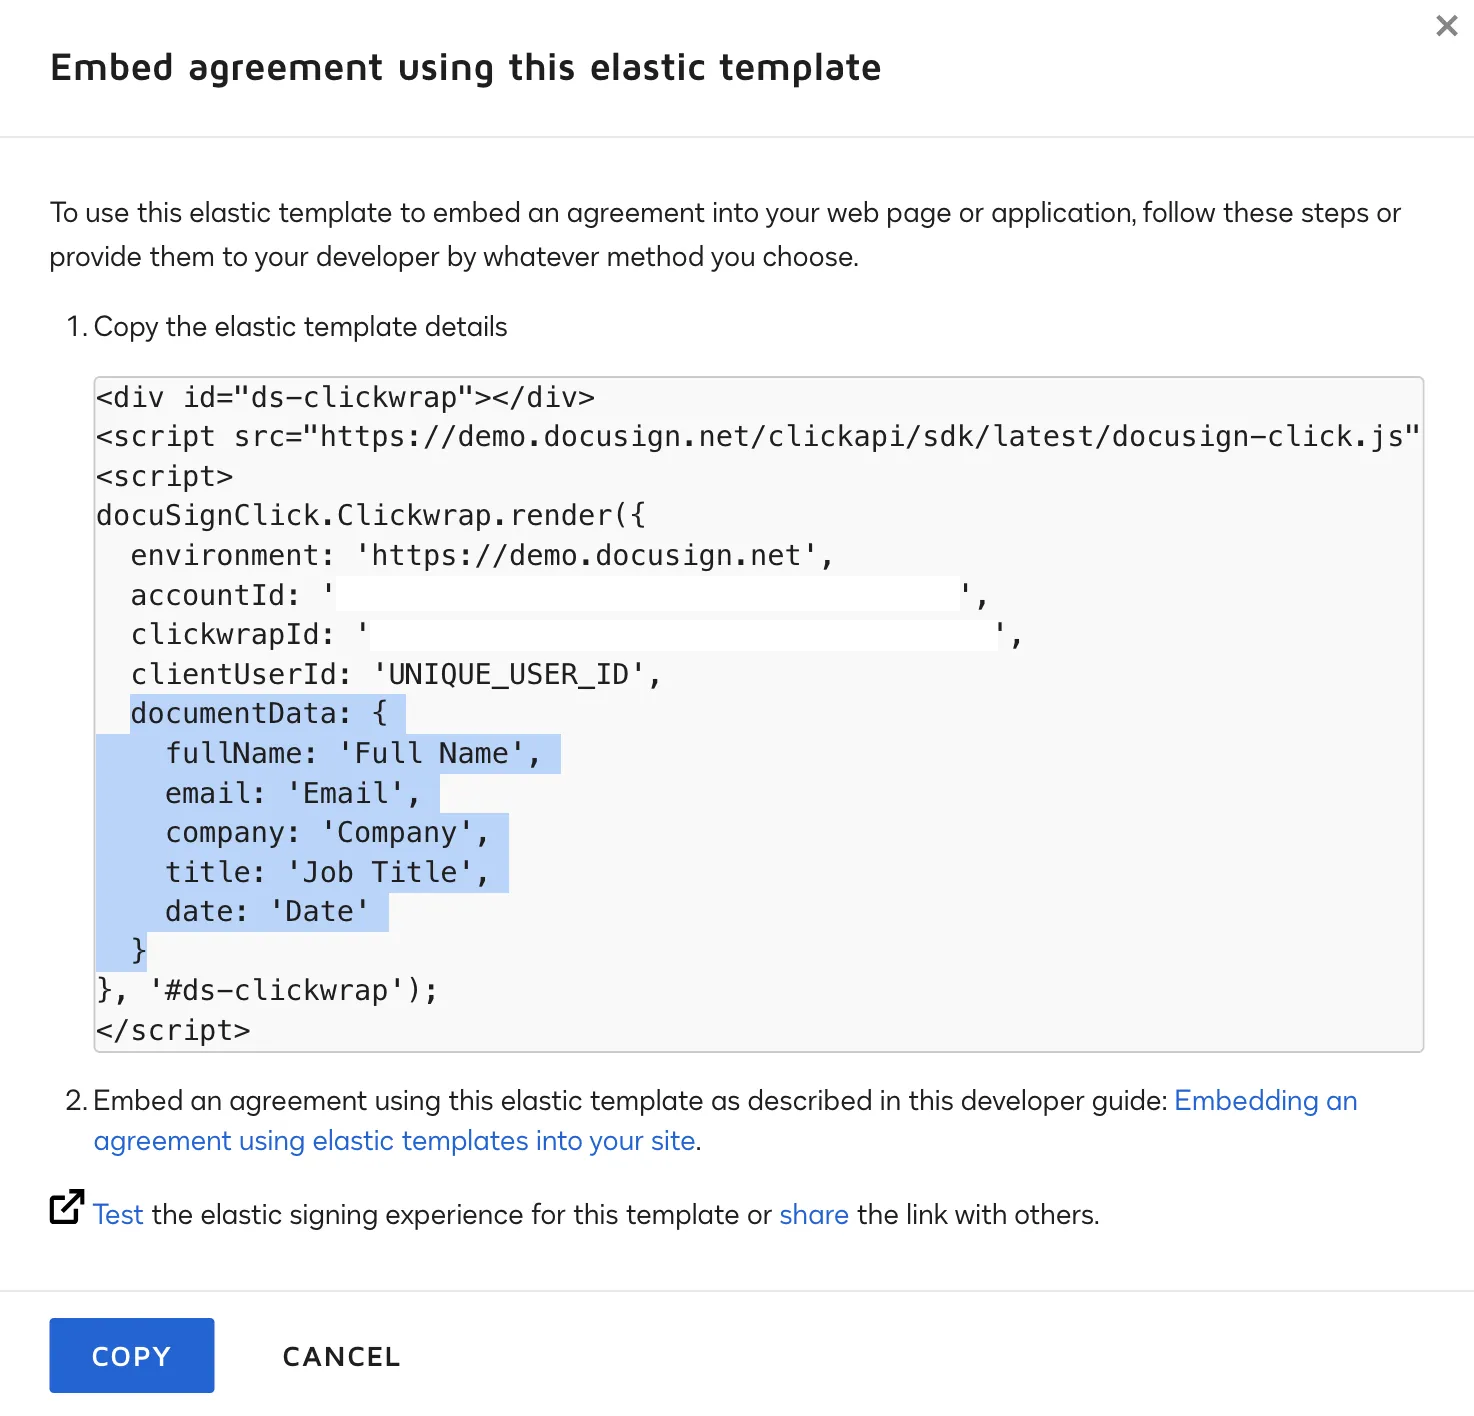
-
The
documentDatavalues that you just copied are placeholders for each dynamic content field defined in your document. Replace these placeholders values with the ones you want to use when you view the elastic template. -
Add quotation marks (
"characters) around the elements withindocumentData. The following screenshot demonstrates a formatteddocumentDataelement with custom dynamic field values added to it: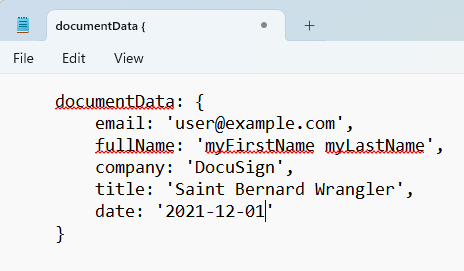
-
Generate the viewing URL by making a ClickWraps:createHasAgreed method call, providing your account ID and clickwrap ID in the path. For the call body, choose a unique
clientUserIdfor the viewer and add thedocumentDataJSON element that you created in the previous step, as shown in the example below.Note: The ClickWraps:createHasAgreed method requires that you obtain both the
click.manageandclick.sendscopes during Authentication. If you do not have these scopes, you will receive response code 401 - unauthorized. -
The ClickWraps:createHasAgreed method call will return a set of data about the created agreement session. The
agreementUrlfield in the response contains the URL of the agreement session that your recipients can use to open and view it. You can do this in two ways:-
You can send the URL directly to your recipient to have them view the agreement session.
-
You can use The
agreementUrlto embed your elastic signing agreement in your web page or app HTML. This enables you to apply your styles to how it is displayed. For example:See How to embed an elastic signing agreement for a more detailed set of step-by-step instructions on how to embed the elastic signing agreement in your app.
-
Set dynamic content as you render the agreement
To set customized values for dynamic content fields when embedding your elastic template, use the following steps:
- Select the COPY CODE button for the elastic template to display. It must be activated and contain dynamic content fields to set.
- Copy the elastic template details from step 1 of the Copy Code dialog box.
- Update the
documentDataJSON element with values for your dynamic content fields. An example set of elastic template details containing thedocumentDataJSON is shown below: - Embed the elastic template as described in this developer guide: How to embed an elastic signing agreement.
- View the responses through your Docusign account on the Manage page or use the Docusign Click API to manage responses. See the API documentation for details.
Create custom dynamic field types
Every elastic template has a standard set of supported dynamic fields: full name, email, company, job title, and date. In addition to these standard dynamic fields, you can add your own custom dynamic field types when you create an elastic template with the ClickWraps:createClickwrap endpoint or through the Docusign web app.
To define new dynamic field types with the API:
-
Add a dataFields entry to your elastic template definition JSON.
-
Within this dataFields entry, add an object that contains a label, type (such as string, number, or date), and name for every new dynamic field type to add.
The below example elastic template definition demonstrates the syntax for defining custom dynamic field types for each valid format (string, number, and date) within a JSON elastic template definition.
-
Only numeric characters can be input to a number field.
-
Date fields can only accept input in mm/dd/yyyy or ISO Date format.
-
-
When you’ve added all of your custom dynamic fields, call the ClickWraps:createClickwrap API endpoint, providing the elastic template JSON that you defined in the previous step. This creates a new elastic template that will include your new types as options when you add dynamic fields.
Use the steps documented in add dynamic content to add dynamic content to an elastic template document. Your new custom dynamic field types will appear as options when choosing which dynamic fields to add.
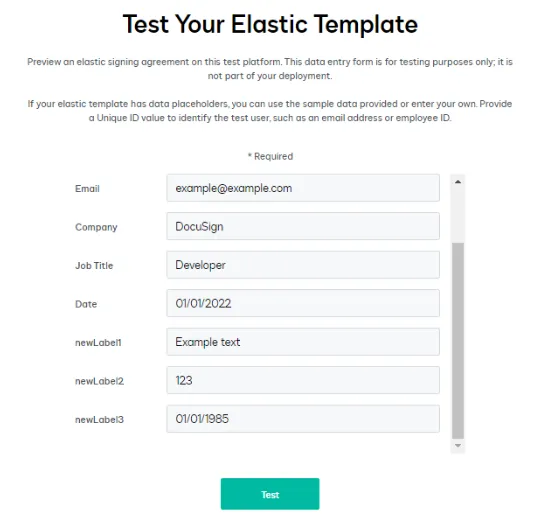
Note: You can also create custom dynamic field types through the Docusign web app UI. See Bulk Import Data Fields to Insert User Data or Add Metadata to Your Documents for details.